
Previously, we told about how to map Forge Viewer camera state into Revit. In the blog, I provided an approach to achieve the goal and looks great. Now you might ask how about the Navisworks. Therefore, here are tips for you! Let's get started right away!
For achieving the same goal in Navisoworks, we need to obtain the Forge Viewer camera state, too. But it's much simpler than the Revit approach. In this case, we need these parameters the eye, target, up and globalOffset only. So the steps for Viewer is simplified to:
- Obtain target, position and up vector from the Viewer camera of the current view:
- Call Viewer3D#getState({ viewport: true }) to obtain necessary camera state of current view, for example:
-
{
  "viewport": {
    "name": "",
    "eye": [
      -14.870469093323,
      36.571562767029,
      -1.2129259109497
    ],
    "target": [
      -14.770469665527,
      36.571967124939,
      -1.2129259109497
    ],
    "up": [
      0,
      0,
      1
    ],
    "worldUpVector": [
      0,
      0,
      1
    ],
    "pivotPoint": [
      -14.770469665527,
      36.571967124939,
      -1.2129259109497
    ],
    "distanceToOrbit": 0.10000024532334,
    "aspectRatio": 3.1789297658863,
    "projection": "perspective",
    "isOrthographic": false,
    "fieldOfView": 90.68087674208
  }
}
- Obtain the global offset of the currently loaded model
- Call viewer.model.getData().globalOffset for the value, for example:
-
{
  "x": -0.253891,
  "y": -45.556179,
  "z": 6.134186
}
- This time we don't subtract the globalOffset from target and position of the Viewer camera in this example, but you can do the same thing as the Revit approach here if you would like to. (Note. This will affect the last step of the Navisworks part)
Ok, now we got every necessary parameter we needed. Let's continue the Navisworks part:
- In this part, we will take advantage of Navisworks's current viewpoint.
- Here is the code snippet that is written in Naisworks .NET SDK:
-
Document doc = Autodesk.Navisworks.Api.Application.ActiveDocument;
Viewpoint vp = doc.CurrentViewpoint.CreateCopy();

Point3D offset = new Point3D( -0.253891, -45.556179, 6.134186 );
offset = offset.ToVector3D().Negate().ToPoint3D();

Point3D pos = new Point3D( -15.12436009332275, -8.984616232971192, 4.921260089050291 );
pos = pos.Subtract(offset).ToPoint3D();

Point3D target = new Point3D( -15.02436066552734, -8.984211875061035, 4.921260089050291 );
target = target.Subtract( offset ).ToPoint3D();

Point3D up = new Point3D( 0, 0, 1 );

// Set the camera parameters to current viewpoint
vp.Position = pos;
vp.PointAt( target );
vp.AlignUp( up.ToVector3D() );
doc.CurrentViewpoint.CopyFrom( vp );
-
- If you subtracted the globalOffset from target and position of the Viewer camera in the step3 of the Viewer part, the offset of the above code example should be changed to ( 0, 0, 0 ):
-
Point3D offset = new Point3D( 0, 0, 0 );
offset = offset.ToVector3D().Negate().ToPoint3D();

// ...
pos = pos.Subtract(offset).ToPoint3D();

// ...
target = target.Subtract( offset ).ToPoint3D();

// ...
-
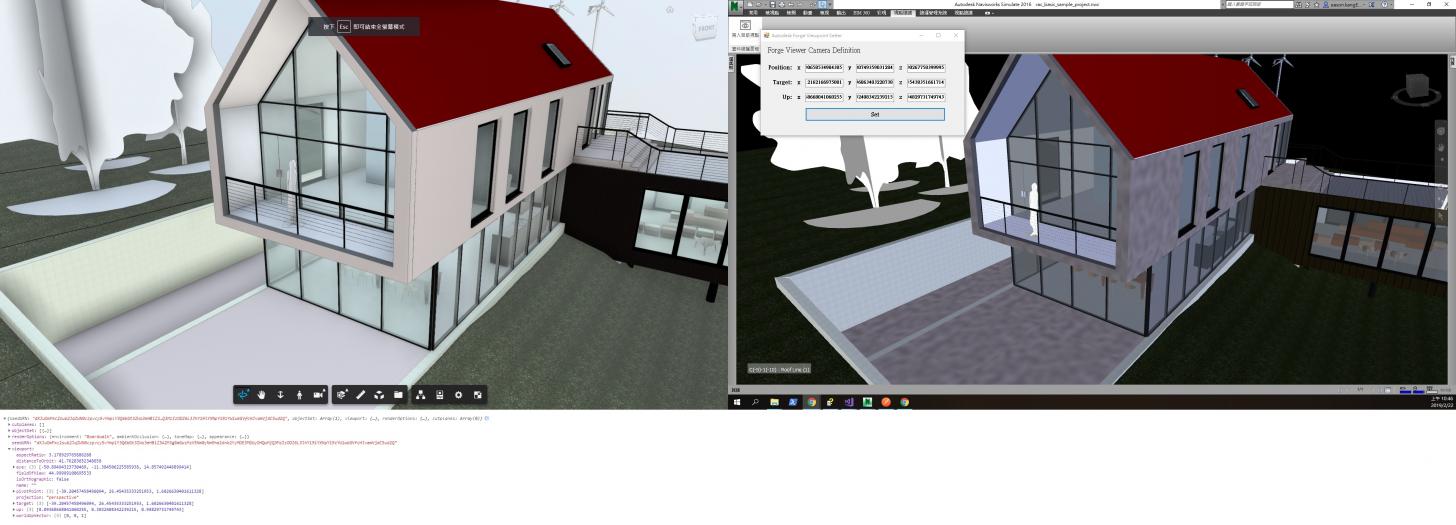
Here is an example project of the Navisworks plugin(https://github.com/yiskang/forge-navisworks-viewpoint-switchback-plugin) and the demo video:
Enjoy and hope it helps, cheers!