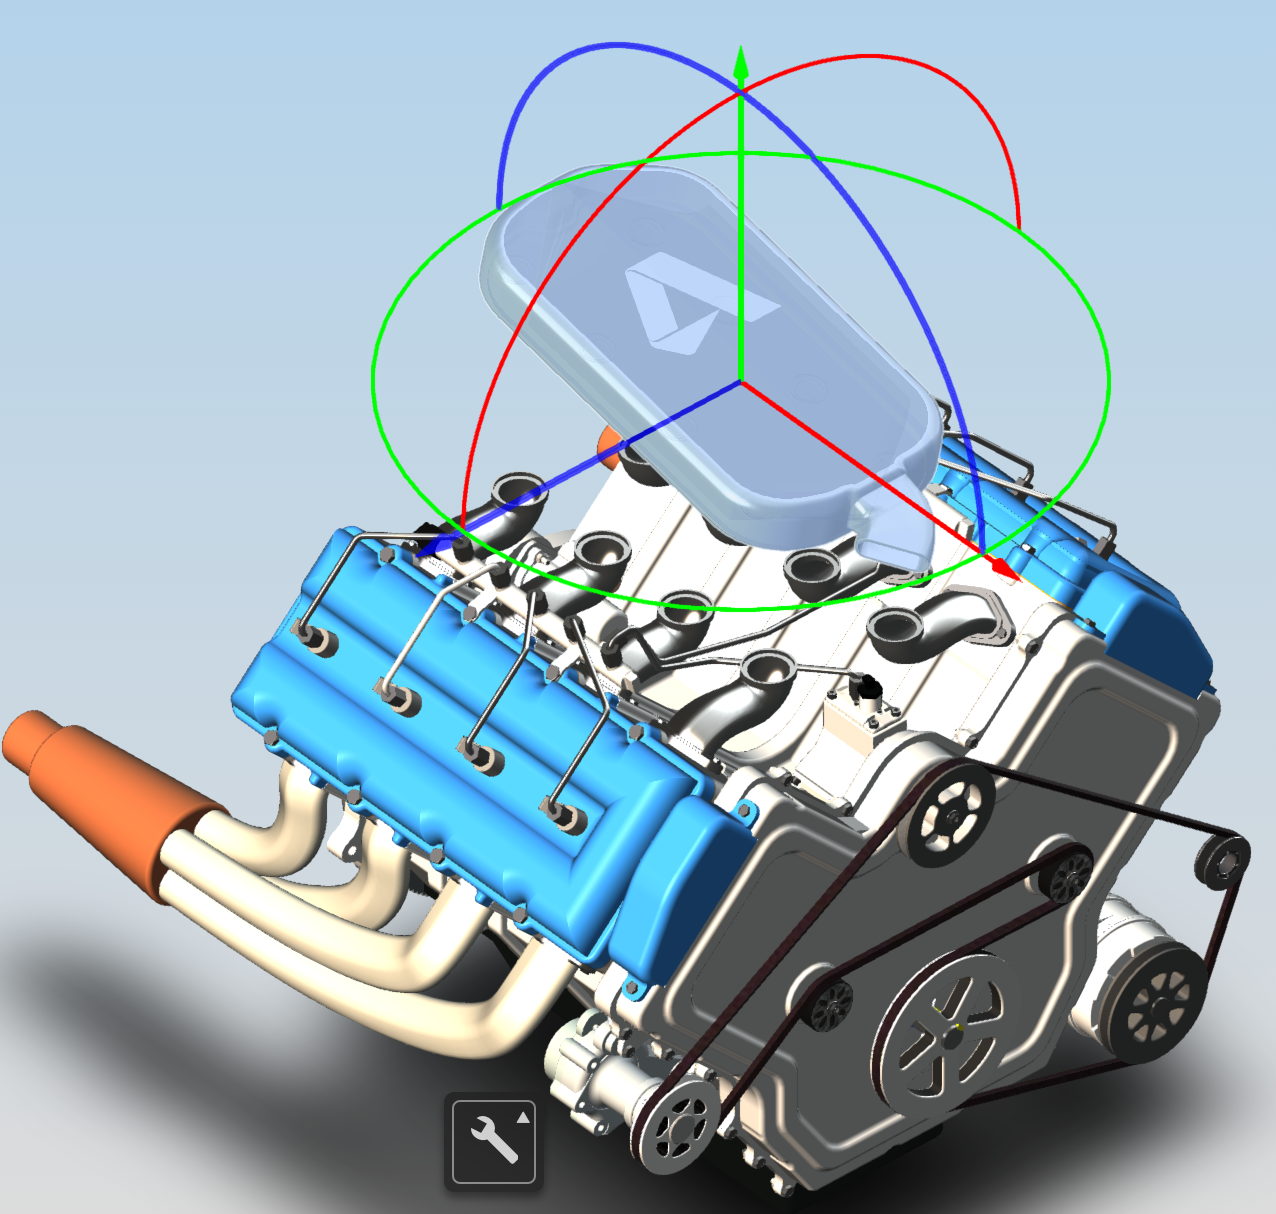
The viewer API provides access to individual components in a model and the programmer has the possibility to transform them at will by applaying matrices, translations are rather straightforward, however rotations can get a bit tricky. There is also no built-in tools directly provided by the API to transform components from the UI.
I worked in the past on a first version of the translate tool and finally got the opportunity to deal with the rotation. If the translate tool is using a transform control provided by three.js API, I wasn't really satisfied by the rotate feature, so I decided to write my own and learn a couple of things at the same time.
Here are the two main highlights of that sample:
1/ The pointerToRaycaster method that converts a 2d screenpoint from the mouse pointer into a three.js Raycaster object that lets you perform object picking selection on screen, this is used to handle user interaction with our rotate gizmo control
 1 ///////////////////////////////////////////////////////////////////////////
 2 // Creates Raycaster object from mouse or touch pointer
 3 //
 4 ///////////////////////////////////////////////////////////////////////////
 5 pointerToRaycaster (pointer) {
 6
 7   var pointerVector = new THREE.Vector3()
 8   var pointerDir = new THREE.Vector3()
 9   var ray = new THREE.Raycaster()
10
11   var rect = this.domElement.getBoundingClientRect()
12
13   var x = ((pointer.clientX - rect.left) / rect.width) * 2 - 1
14   var y = -((pointer.clientY - rect.top) / rect.height) * 2 + 1
15
16   if (this.camera.isPerspective) {
17
18     pointerVector.set(x, y, 0.5)
19
20     pointerVector.unproject(this.camera)
21
22     ray.set(this.camera.position,
23       pointerVector.sub(
24         this.camera.position).normalize())
25
26   } else {
27
28     pointerVector.set(x, y, -1)
29
30     pointerVector.unproject(this.camera)
31
32     pointerDir.set(0, 0, -1)
33
34     ray.set(pointerVector,
35       pointerDir.transformDirection(
36         this.camera.matrixWorld))
37   }
38
39   return ray
40 }
This can later be used as follow:
 1 onPointerDown (event) {
 2
 3   var pointer = event.pointers ? event.pointers[ 0 ] : event
 4
 5   if (pointer.button === 0) {
 6
 7     var ray = this.pointerToRaycaster(pointer)
 8
 9     var intersectResults = ray.intersectObjects(
10       this.gizmos, true)
11
12     if (intersectResults.length) {
13
14       this.gizmos.forEach((gizmo) => {
15
16         gizmo.visible = false
17       })
18
19       this.selectedGizmo = intersectResults[0].object
2/ The rotateFragments method that perform rotation of the selected meshes (fragments) according to the specific input parameters
 1 ///////////////////////////////////////////////////////////////////////////
 2 // Rotate selected fragIds of specific model around based on specified
 3 // axis, angle and center
 4 //
 5 ///////////////////////////////////////////////////////////////////////////
 6 rotateFragments (model, fragIdsArray, axis, angle, center) {
 7
 8   var quaternion = new THREE.Quaternion()
 9
10   quaternion.setFromAxisAngle(axis, angle)
11
12   fragIdsArray.forEach((fragId, idx) => {
13
14     var fragProxy = this.viewer.impl.getFragmentProxy(
15       model, fragId)
16
17     fragProxy.getAnimTransform()
18
19     var position = new THREE.Vector3(
20       fragProxy.position.x - center.x,
21       fragProxy.position.y - center.y,
22       fragProxy.position.z - center.z)
23
24     position.applyQuaternion(quaternion)
25
26     position.add(center)
27
28     fragProxy.position = position
29
30     fragProxy.quaternion.multiplyQuaternions(
31       quaternion, fragProxy.quaternion)
32
33     if (idx === 0) {
34
35       var euler = new THREE.Euler()
36
37       euler.setFromQuaternion(
38         fragProxy.quaternion, 0)
39
40       this.emit('transform.rotate', {
41         rotation: euler,
42         model
43       })
44     }
45
46     fragProxy.updateAnimTransform()
47   })
48 }
The rest of the code is pretty much self-explanatory so you can refer to the sample below. The full source code of the extension is part of my extensions library at Viewing.Extension.Transform. Like most of my latest samples, the extension requires a build step with webpack, sorry for people who prefer to deal with straigh ES5 JavaScript code to include in their html but we are in 2016 now :)
Here is a live demo where you can play with those transform tools.


