As it was announced recently, Automation API for Fusion has started a public beta and we have some very nice tools and resources to get you started quickly.
1) TypeScript add-in and VS Code Extension
It might come as a surprise, but currently Automation API for Fusion only supports TypeScript code, which is not fully supported on the desktop, where you can only create Python or C++ scripts and add-ins.
Fortunately, there is an add-in that will help you create, edit and run TypeScript code locally on the desktop. More info on this here.
Once you added it to the correct folder on your machine, just make sure it is running inside Fusion and is set to "Run on startup"

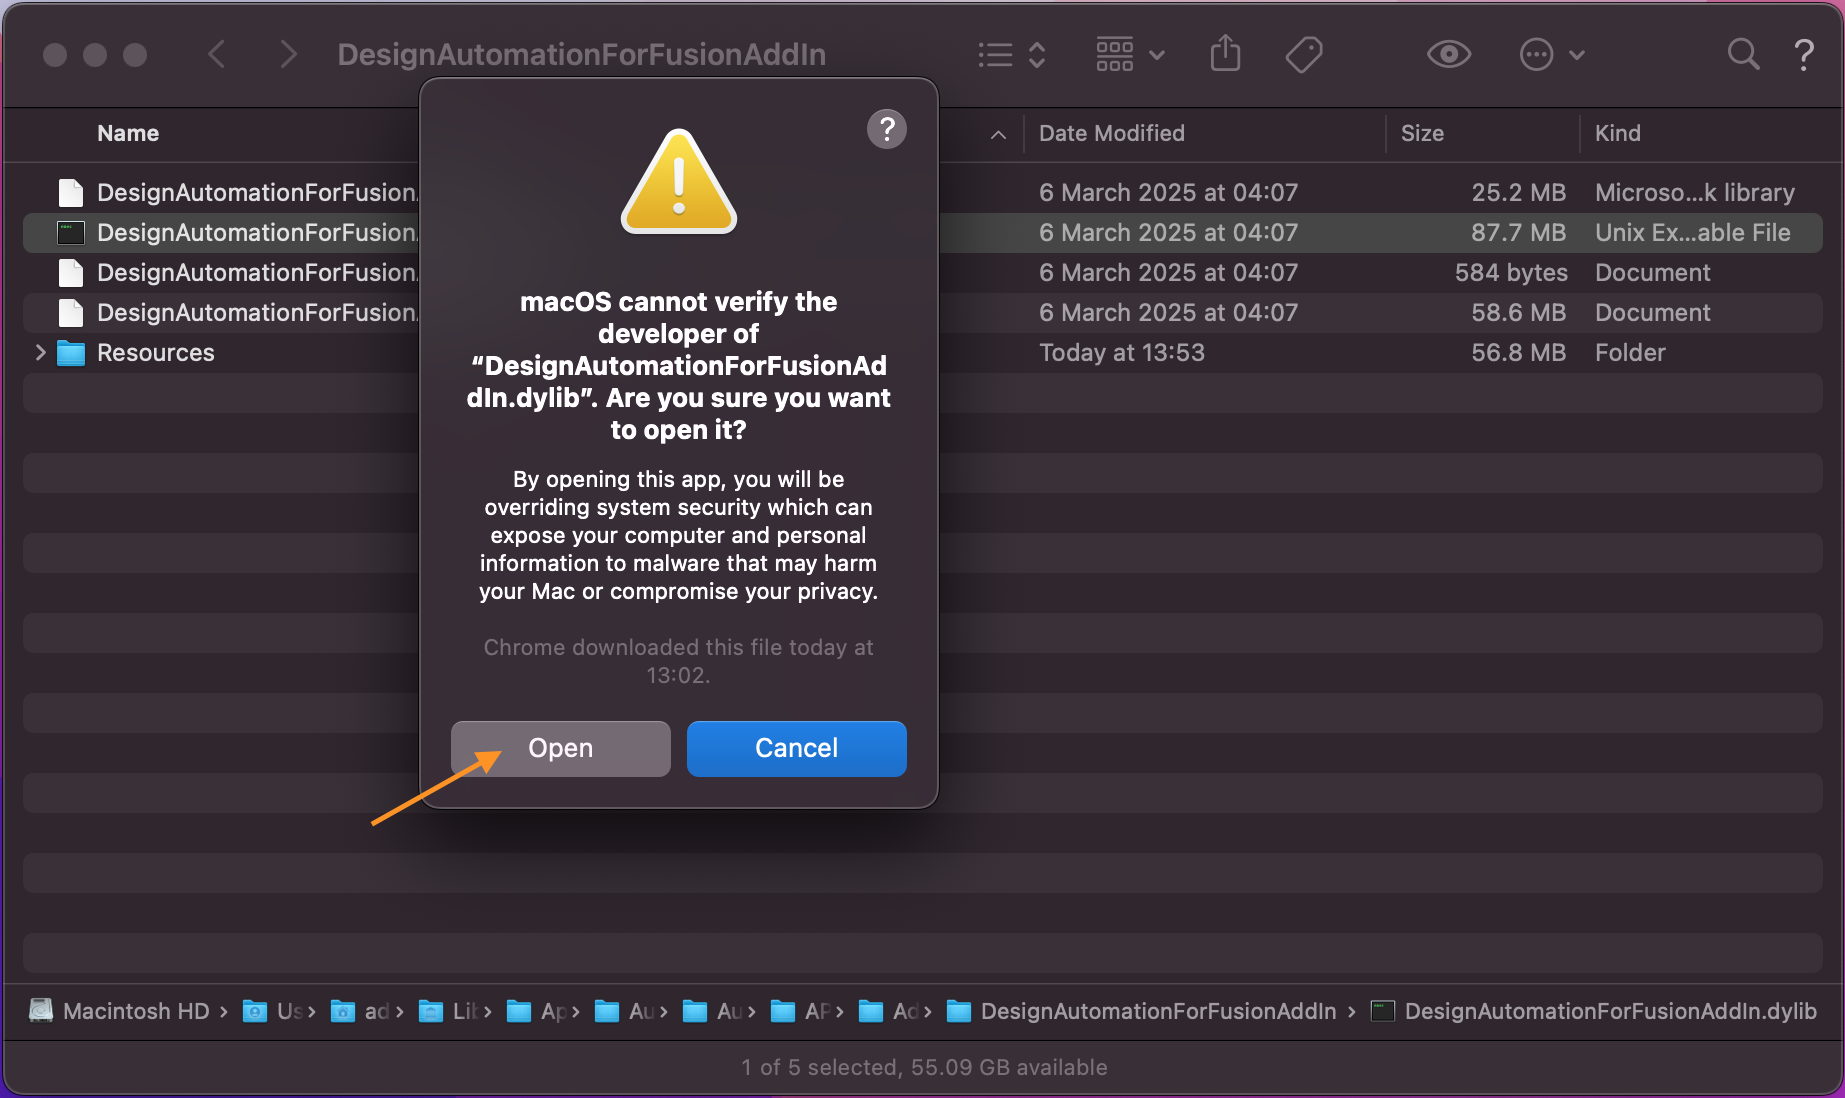
For security reasons on macOS you might run into this issue when trying to run the add-in:
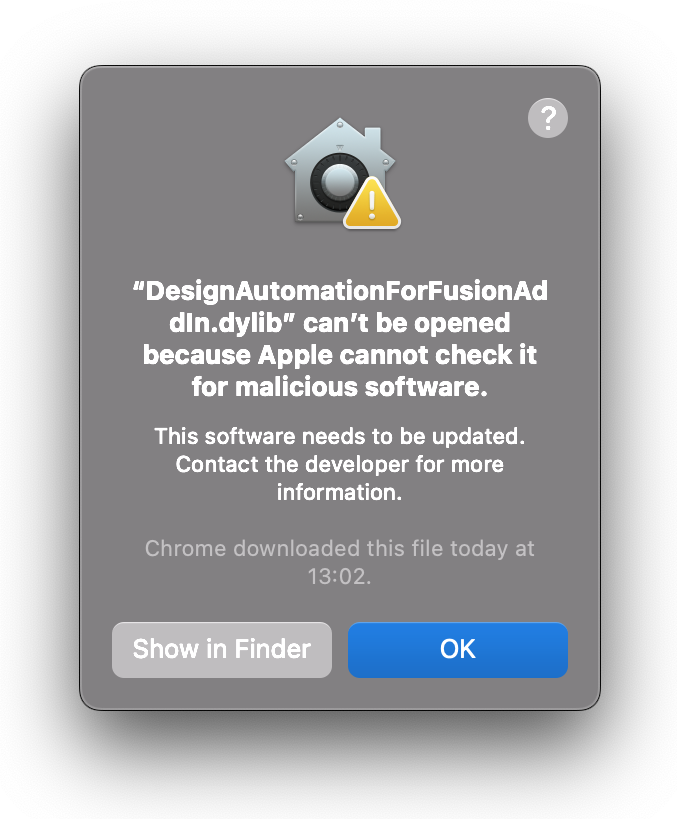
If so, then right-click on DesignAutomationForFusionAddIn.dylib select "Open" and then select "Open" again in the additional dialog that pops up:
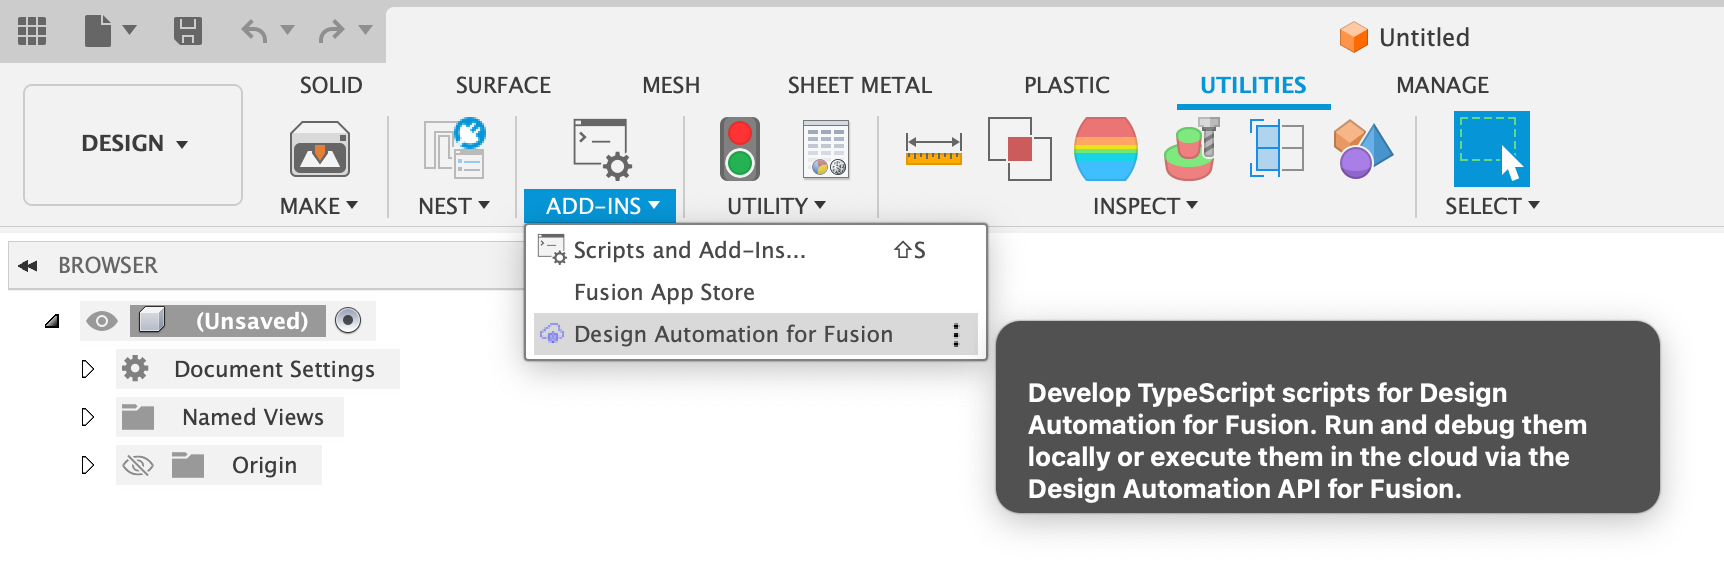
Once all is good, you'll find the add-in's command button under Utilities -> Add-Ins drop-down:
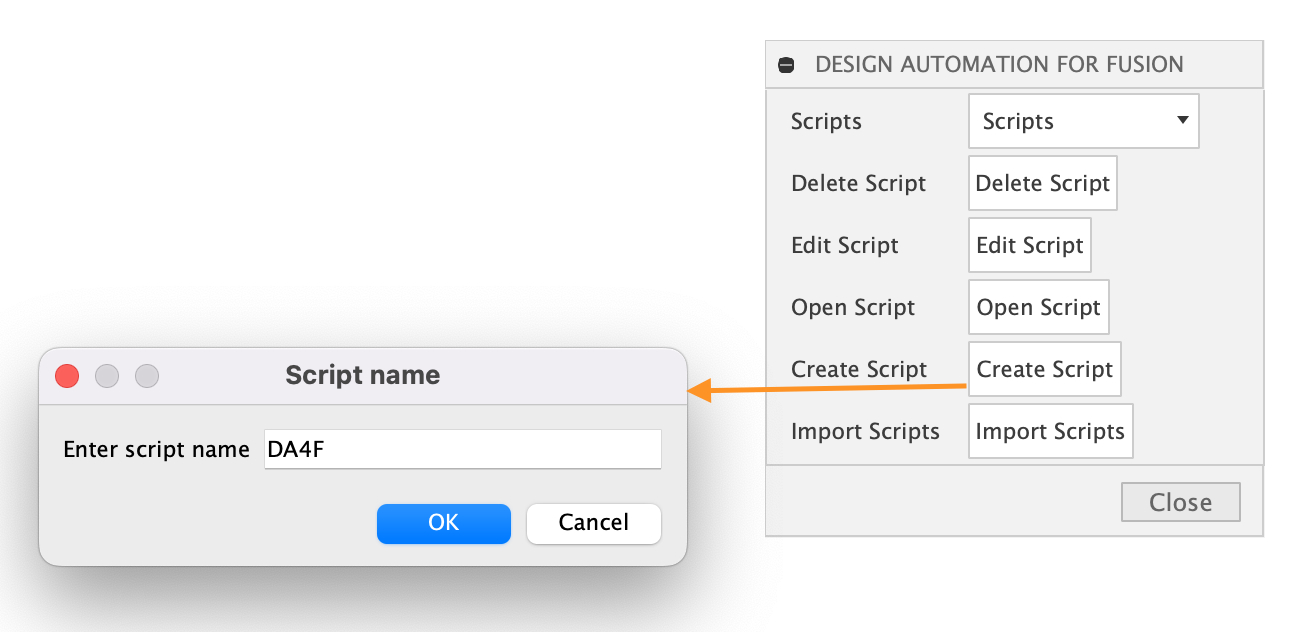
Now you can create a new TypeScript based script with it:
Then you can click "Edit Script" that should open your script in VS Code where a notification dialog will appear about installing a VS Code extension. Just go ahead and install that.
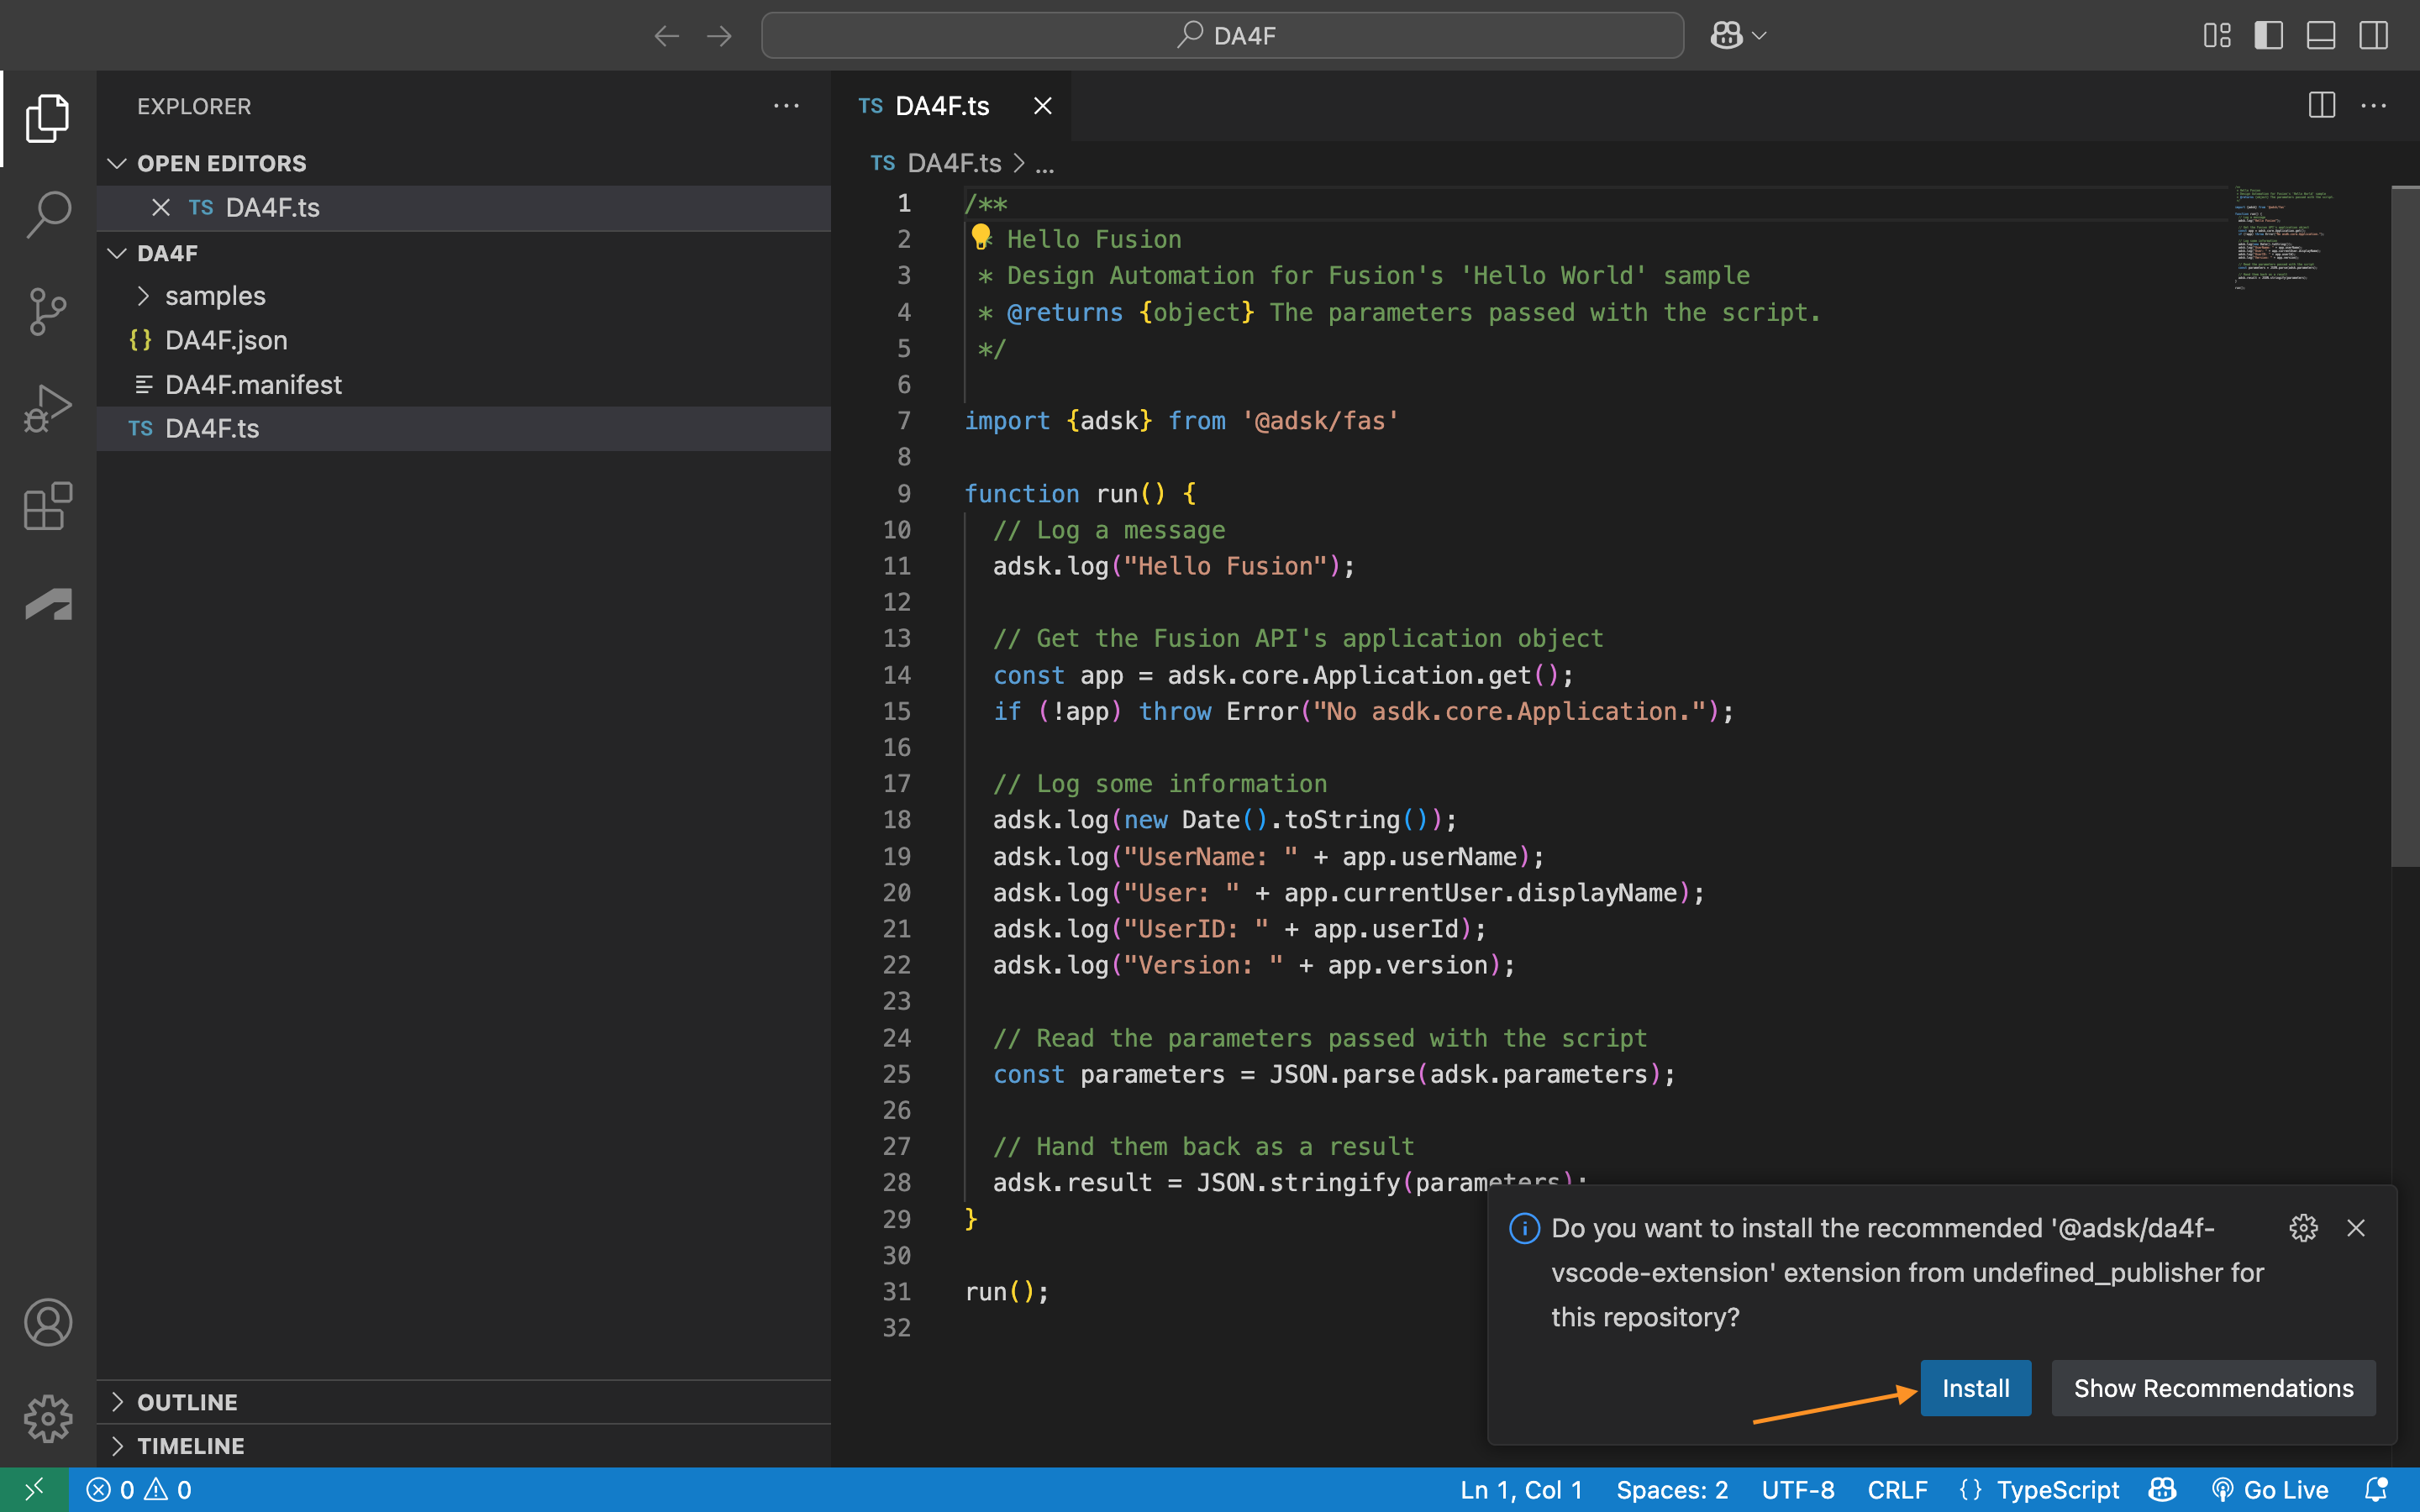
This extension allows you to test your script both on the desktop and on the Automation servers without having to use any Automation APIs.
When the cursor is inside the text editor for the TypeScript file then two play icons should appear in the top-right corner.
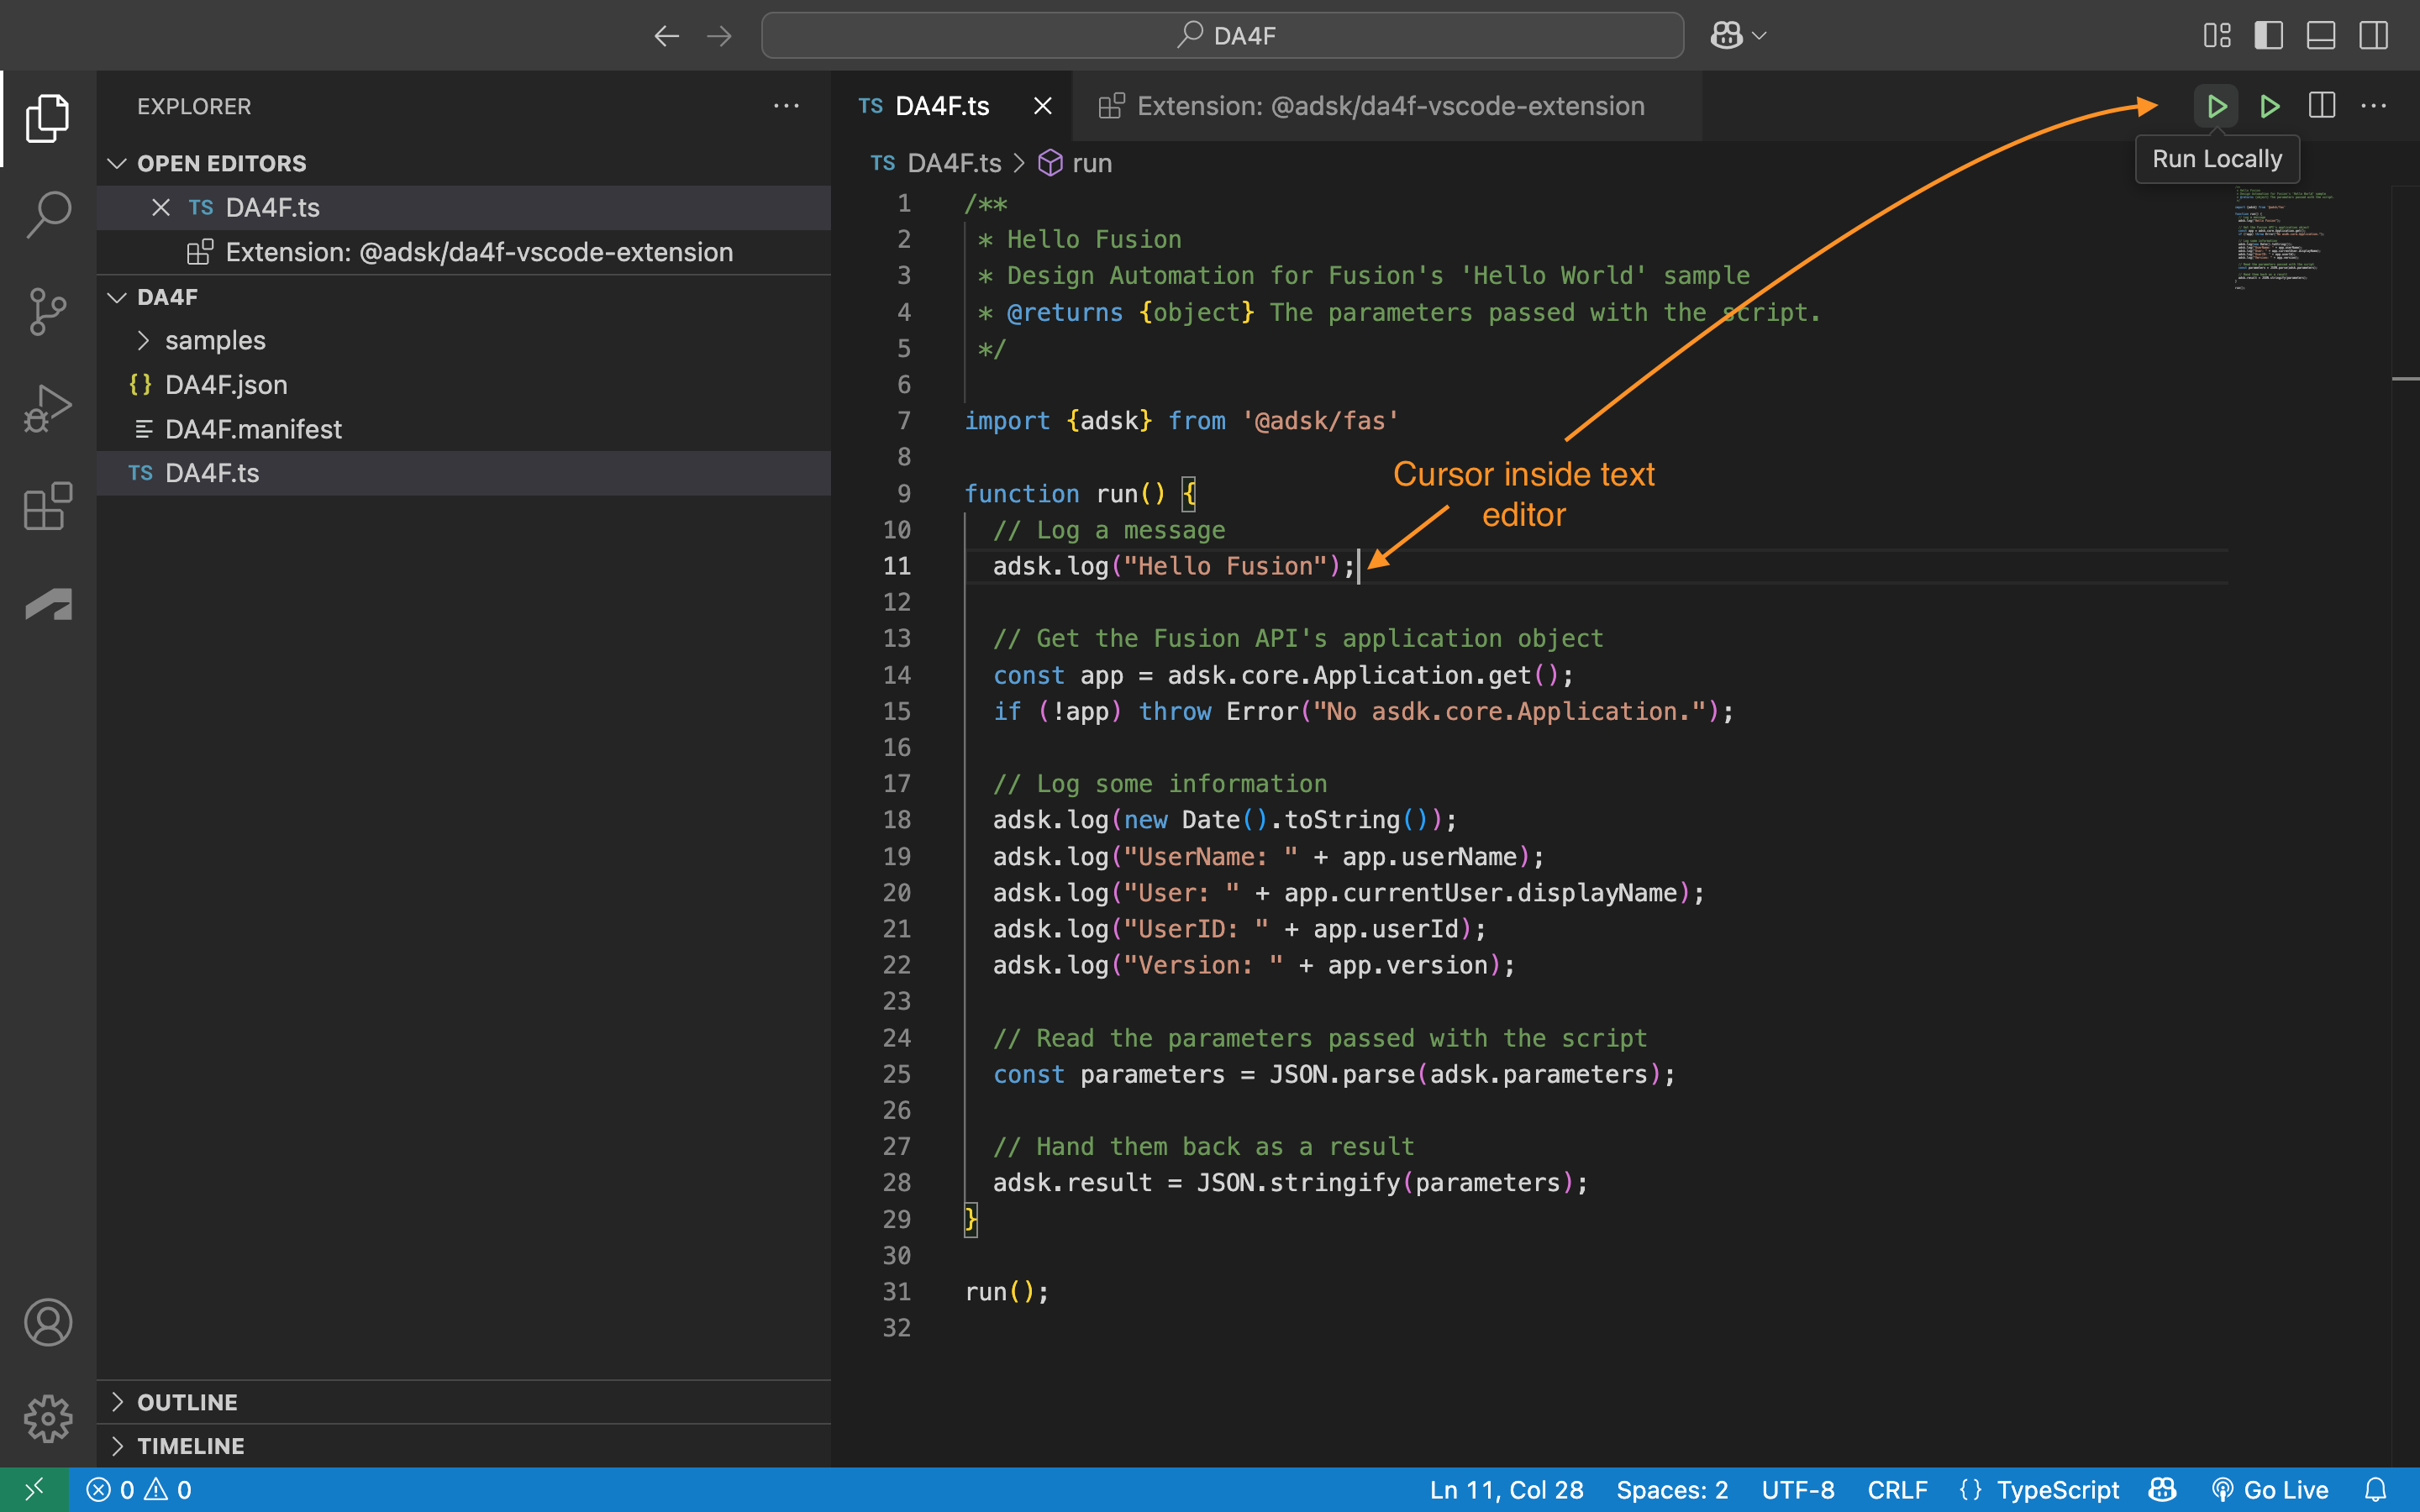
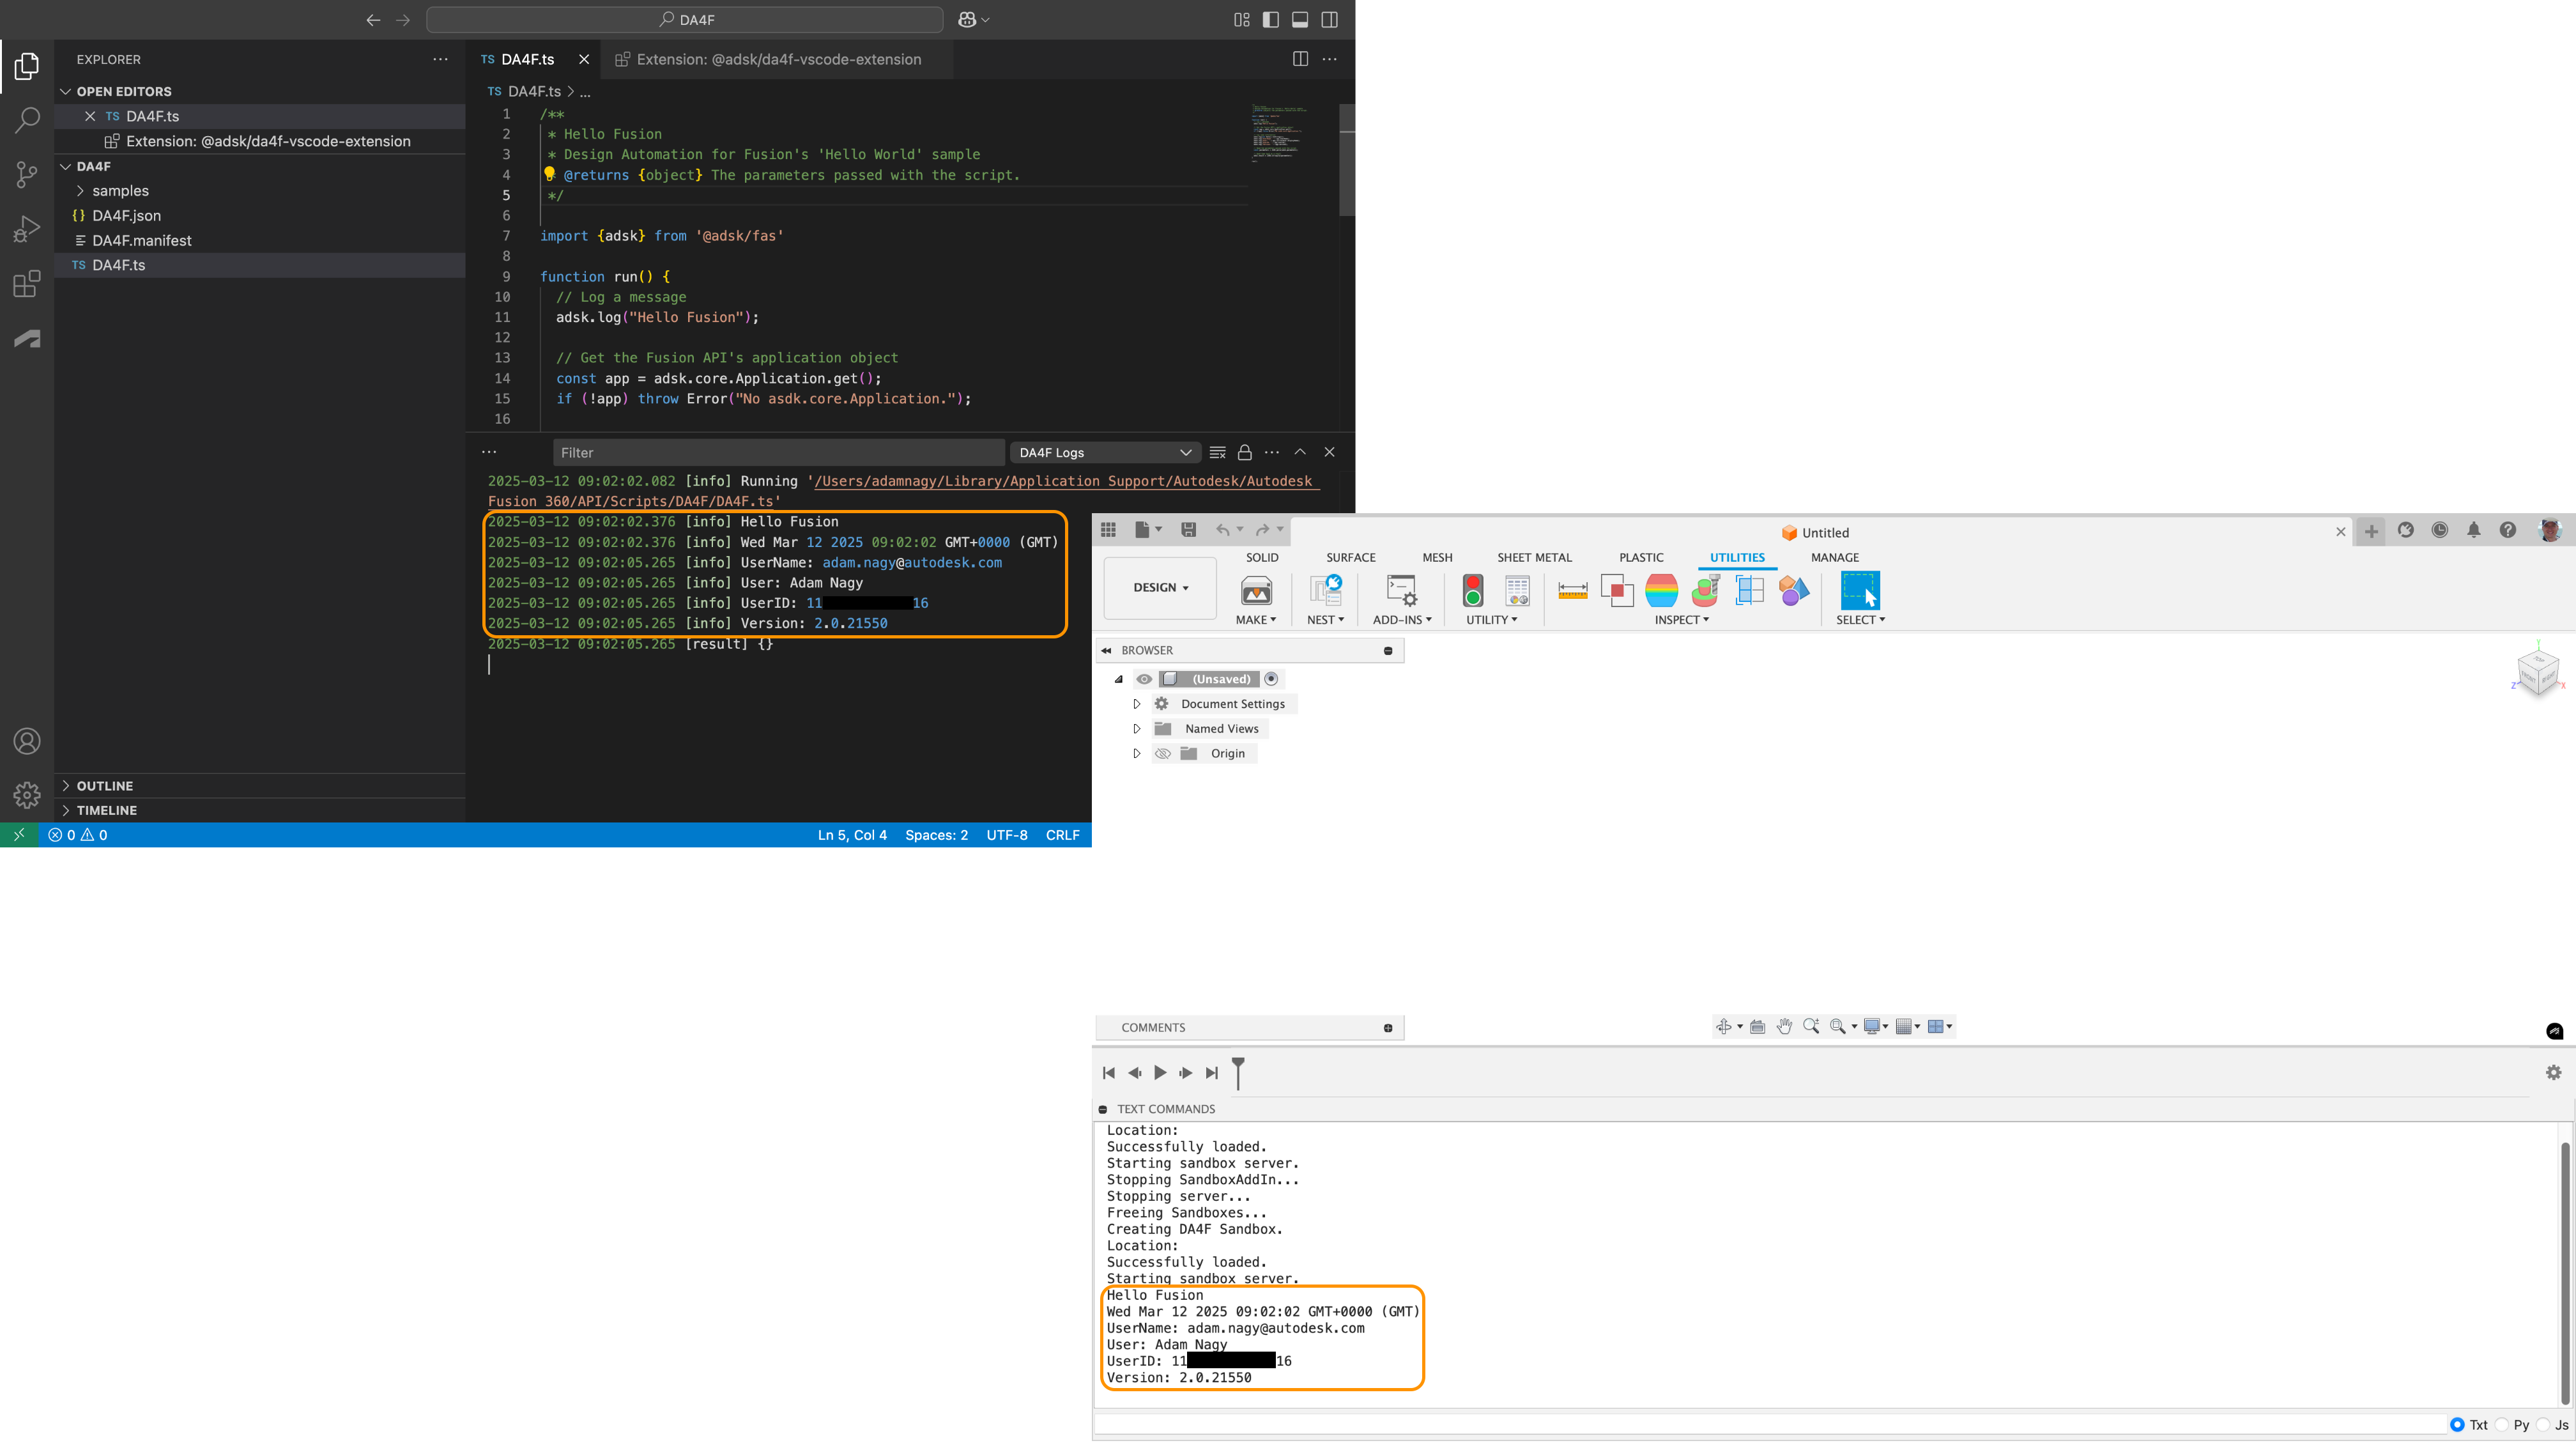
If you select "Run Locally" then you can start running it on the desktop. The result:
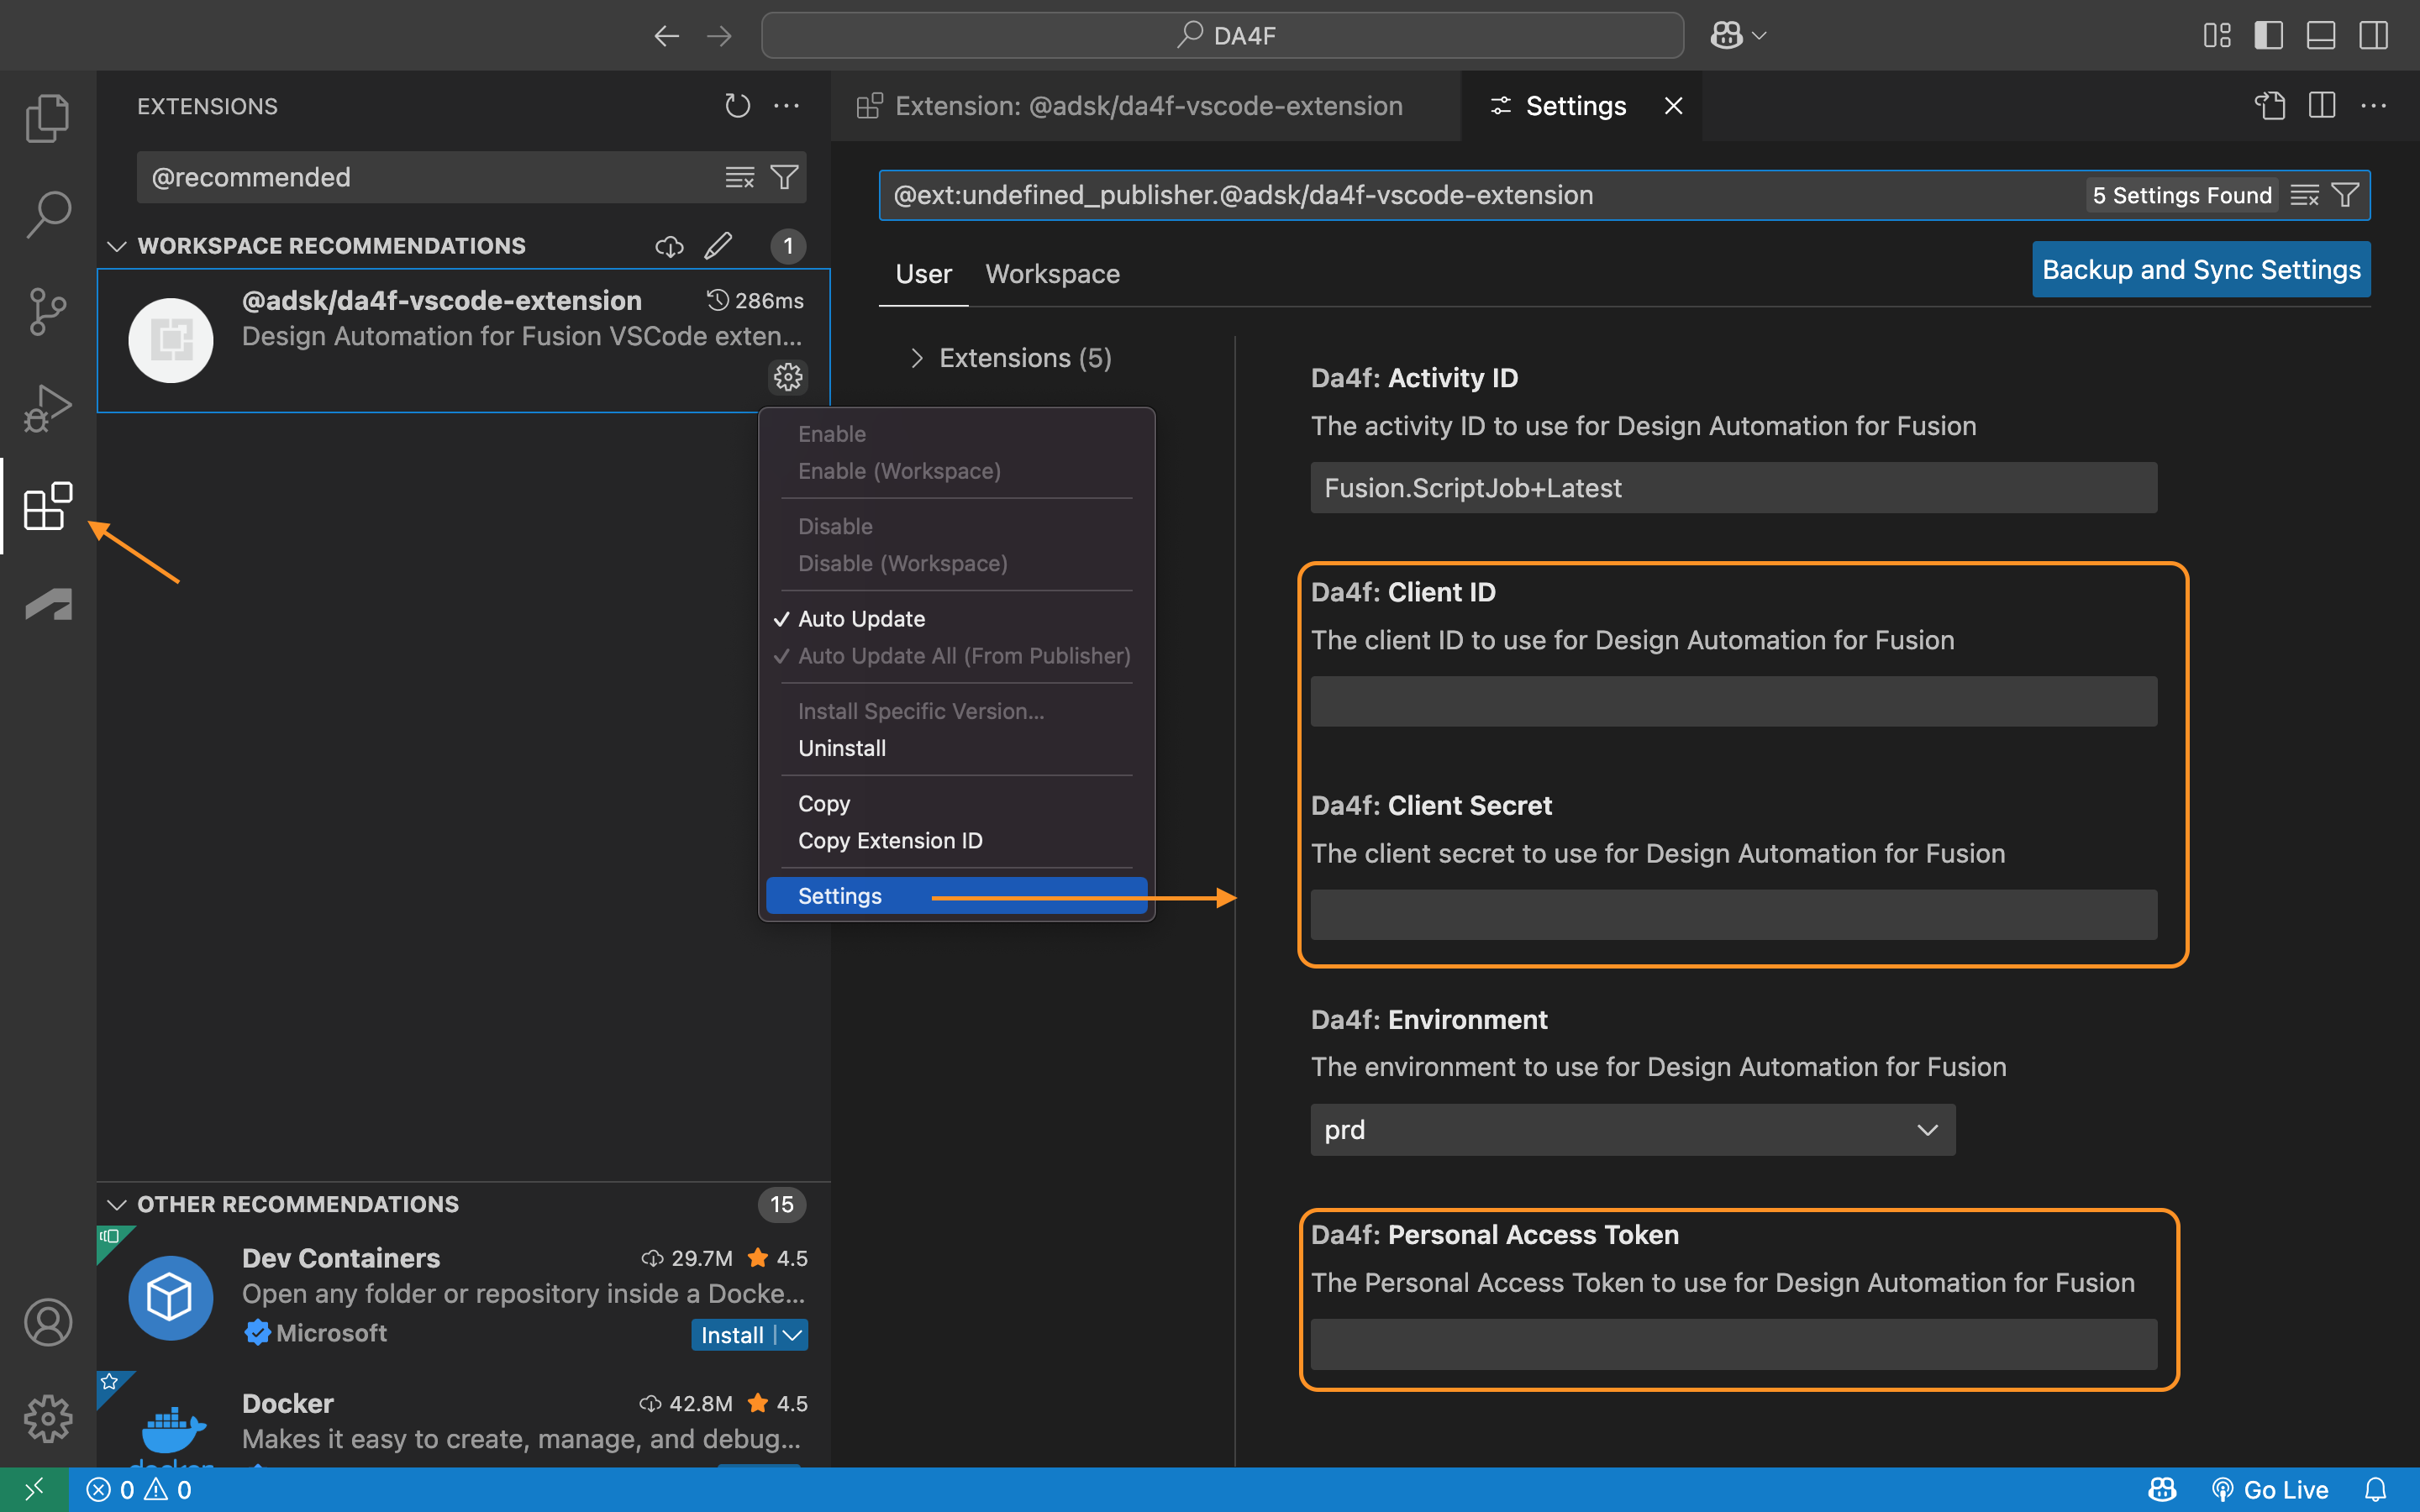
If you want to test your code on the Automation server, then you'll need to create an APS application and a Personal Access Token, and provide those credentials for the VS Code extension:
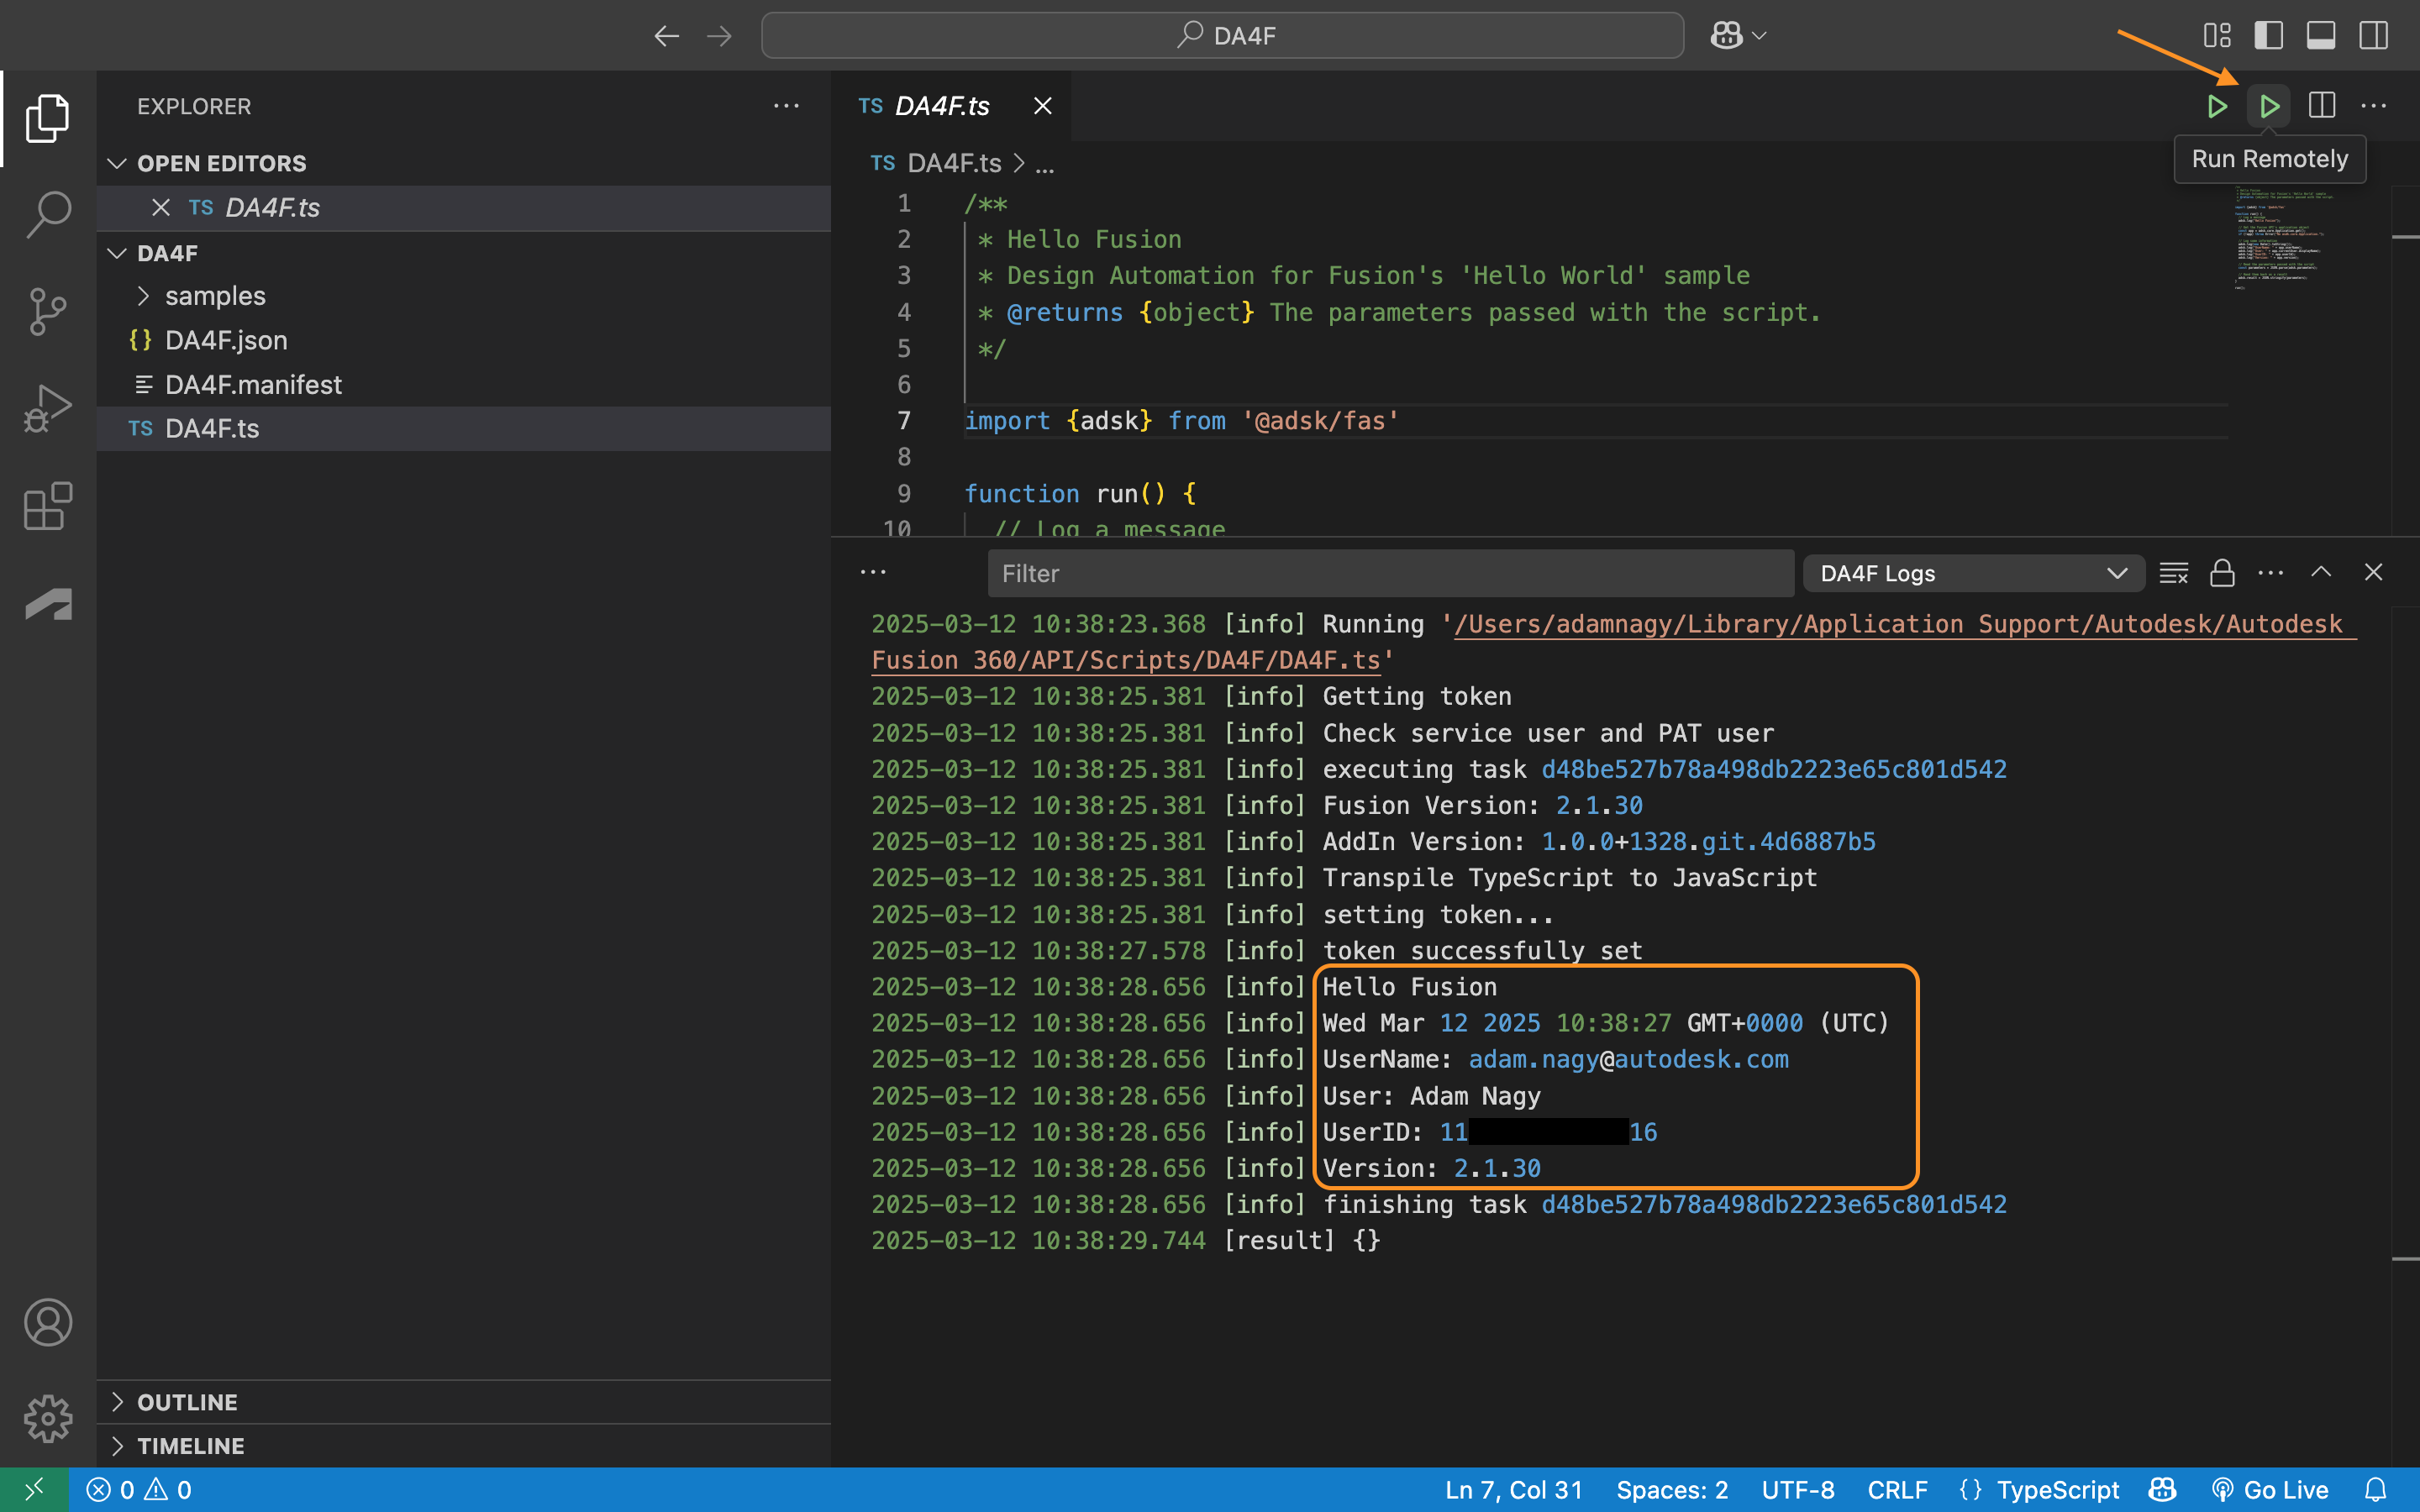
Now you can select "Run Remotely" which will provide you with the same output that you also got locally plus some additional messages from the Automation server.
2) Postman collection
If you're ready to interact with the Automation API, then you can have a look at the online walkthrough, or the postman collection that takes you through the same steps, but is much more user friendly than using cURL.
You just have to provide the same credentials for it as you did previously for the VS Code extension: client id, client secret, and personal access token, plus a value for nickname.
By default your app's nickname is the same as the client id and you do not have to change that. If you don't, then in the case of both the online walkthrough and postman environment variables just set nickname to the same value as your client id.
3) CLI tool
I blogged about this CLI tool recently, and of course it can also be used with Automation API for Fusion. Just added a config file to it that uses the same values as the postman collection mentioned above. You just have to set the "clientId", "clientSecret", "nickname", and "PersonalAccessToken" in it and rename the file to "config.json" so that all the VS Code launch configurations will work with it.
Once you downloaded the Node.js project just run "npm i" in the terminal.
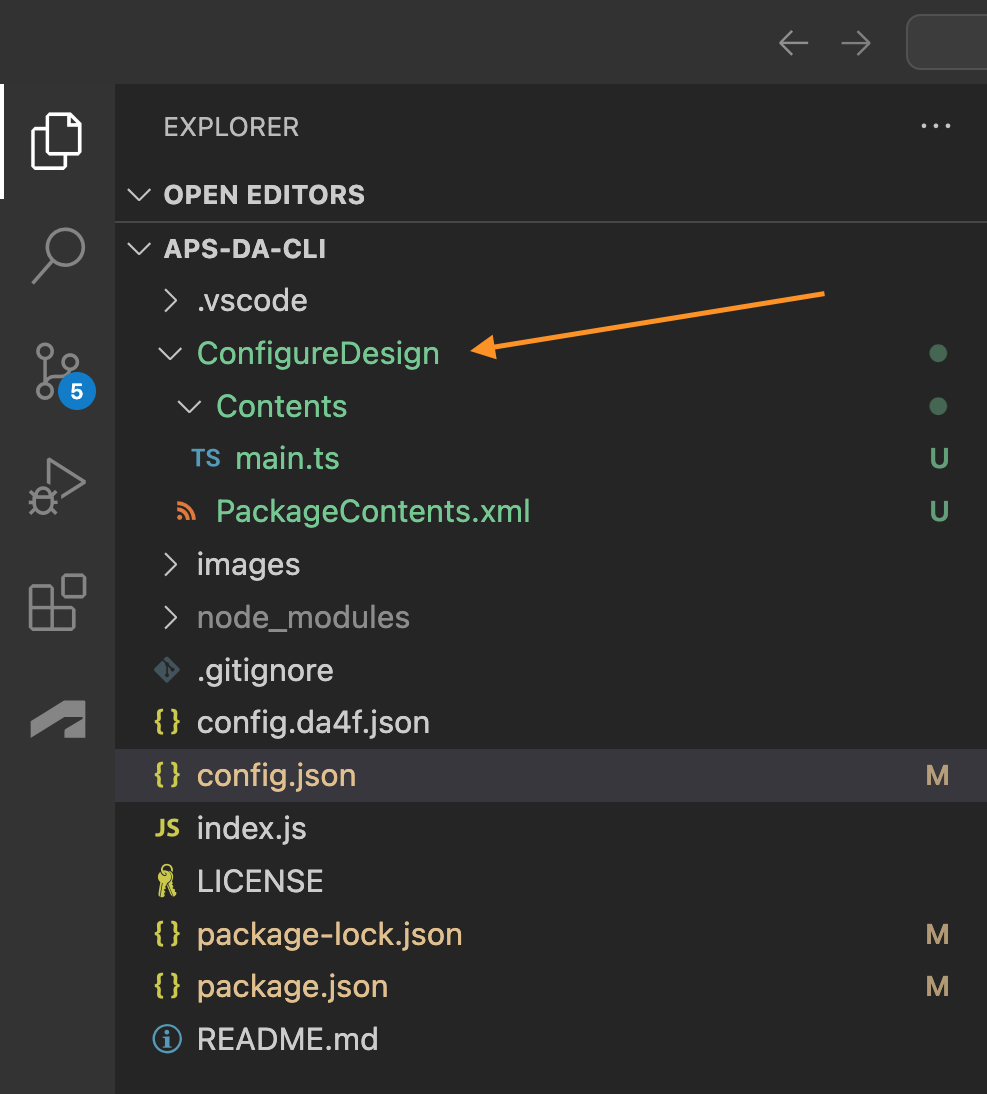
Also, extract the ConfigureDesign.zip file into the root folder of the project:
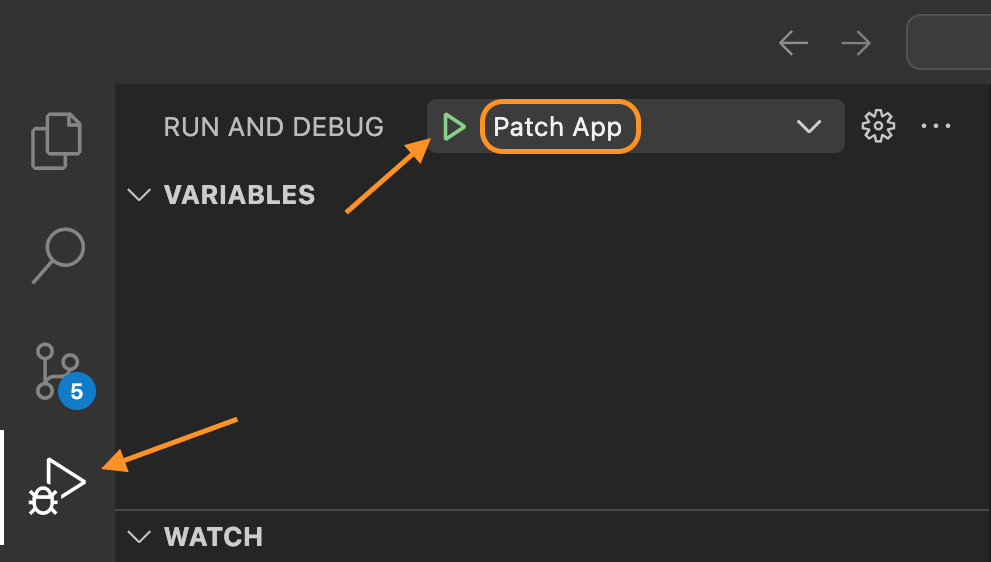
If you set the "nickname" in "config.json" to something more user friendly, instead of just using the client id's value for that, then make sure the first operation you run is the "Patch App":
Then you can run "App Bundle", "Activity" and finally "Work Item".
From then on whenever you update the code in main.ts, you can just run "App Bundle / Work Item" that both updates the app bundle content on the Automation server and starts a work item using that app bundle.
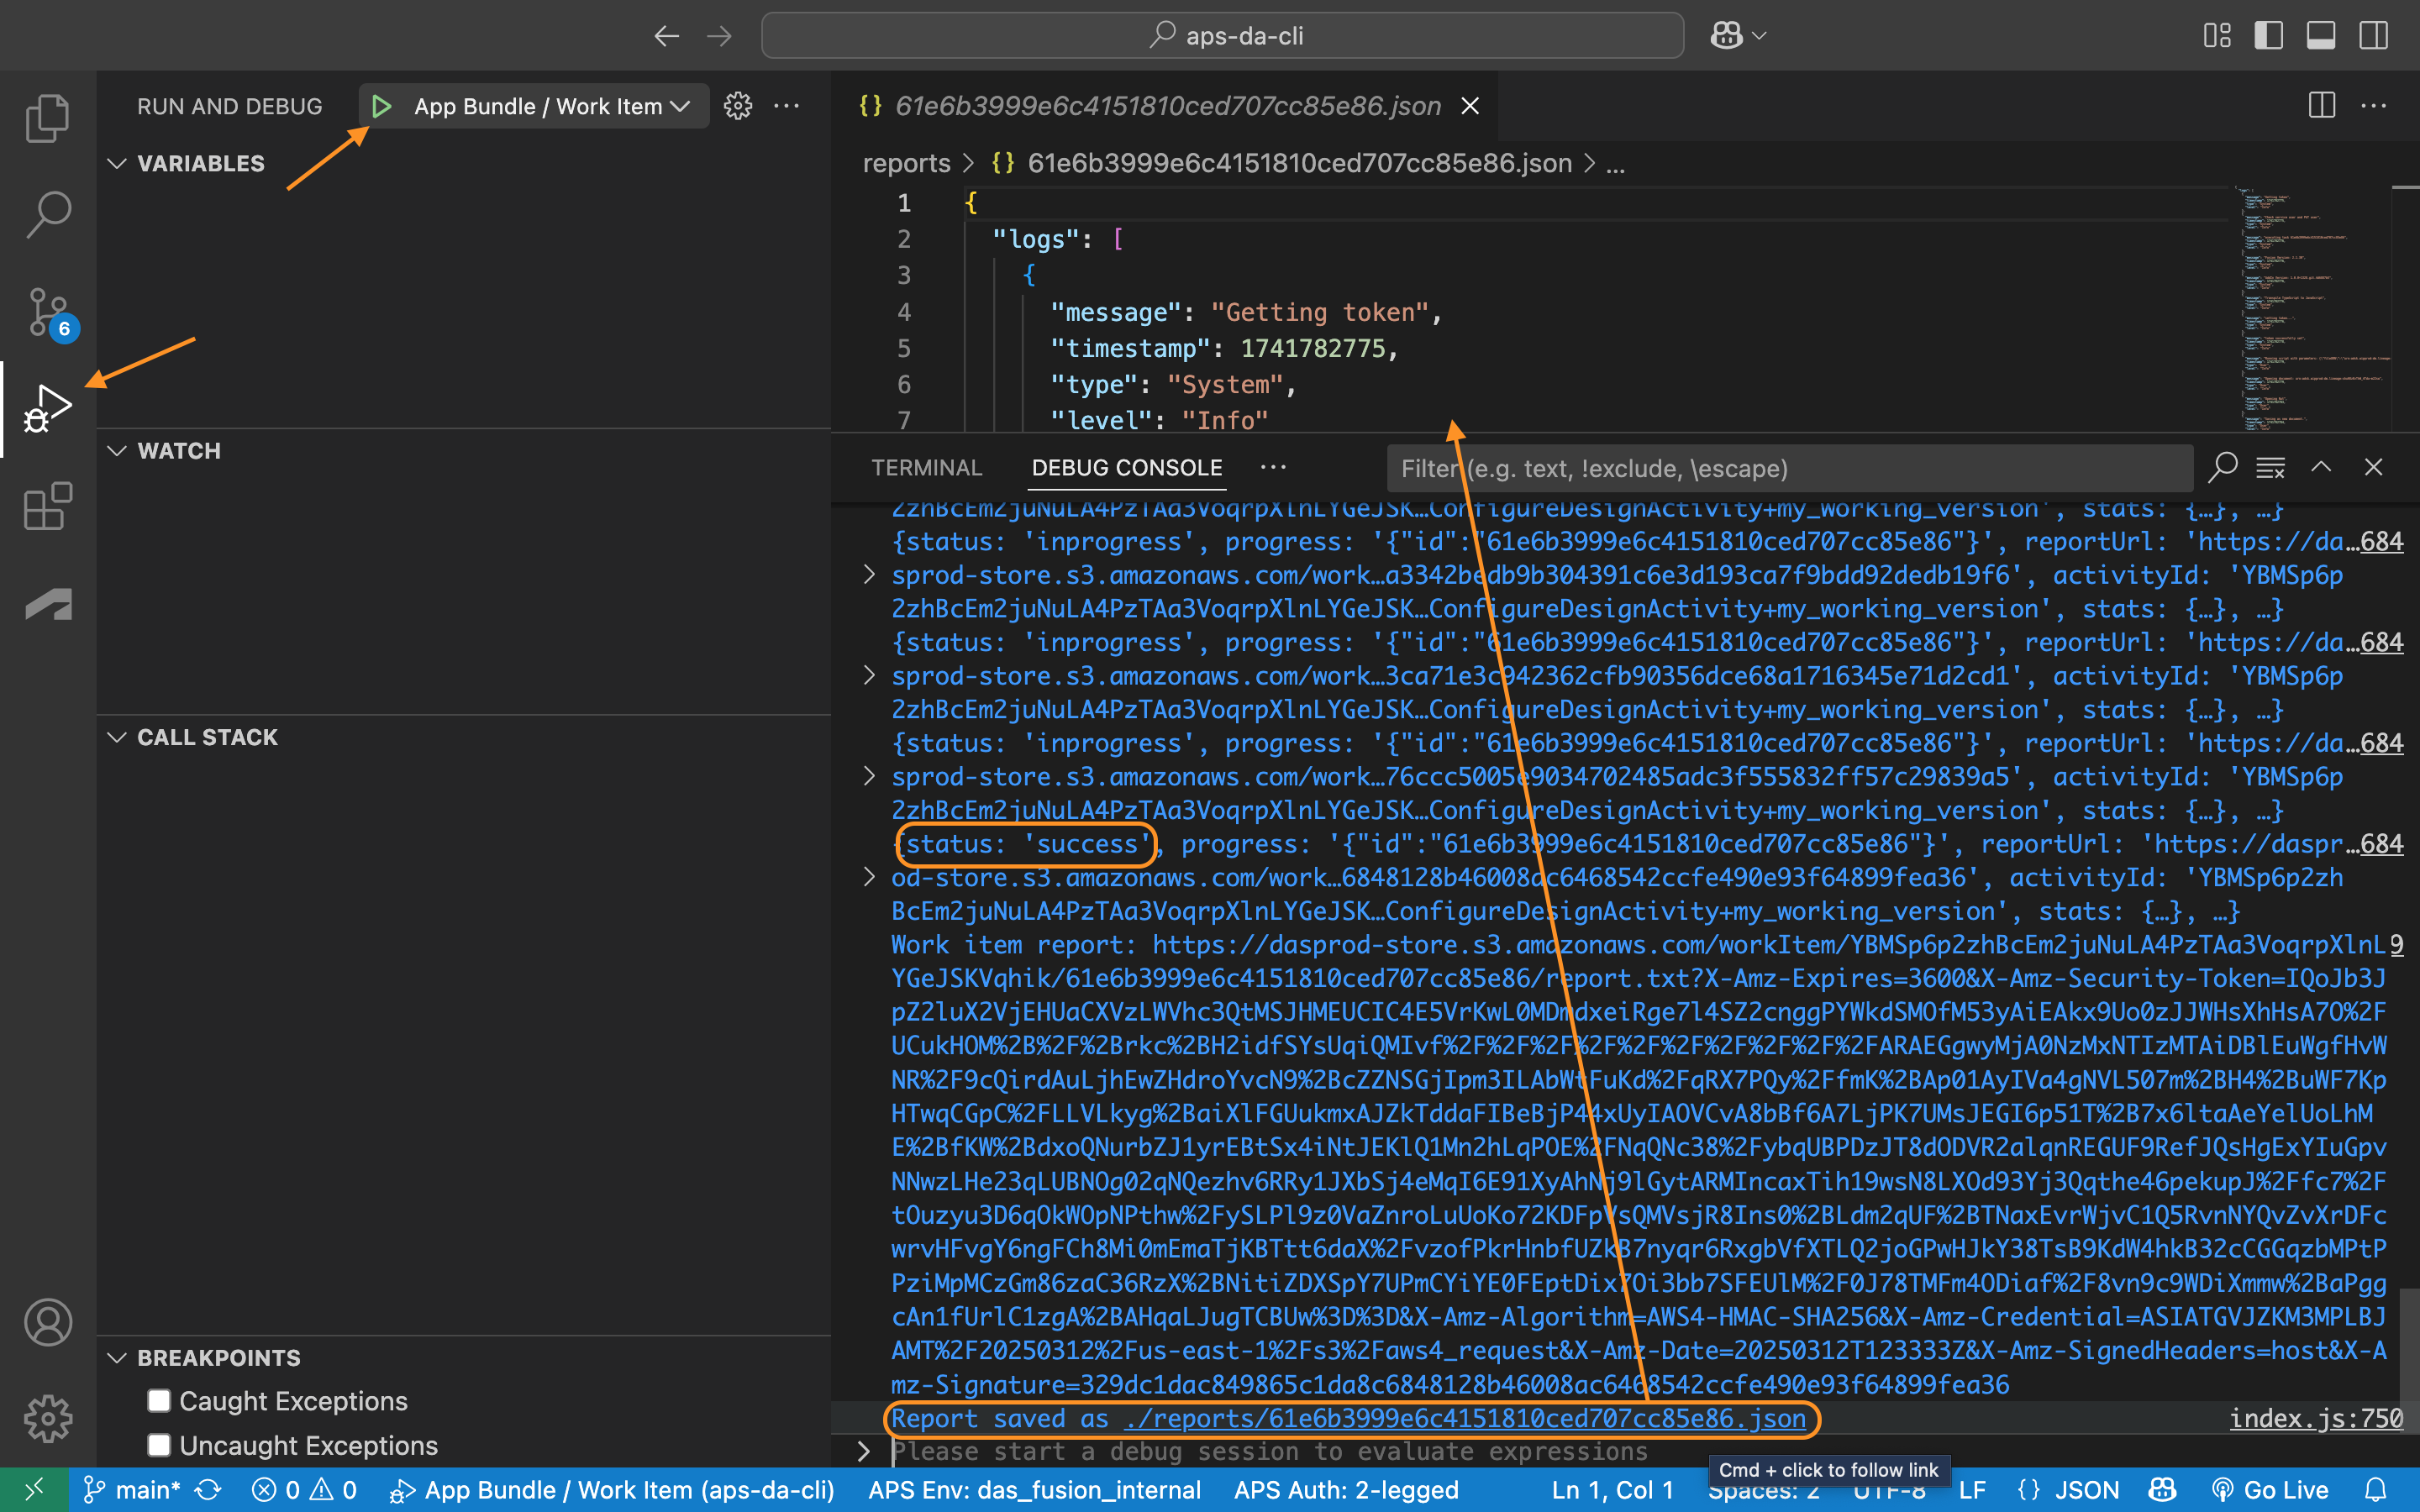
The generated work item report will automatically be saved in the "reports" subfolder of the project, so you can inspect it later as well. These reports will include all the messages created by the Automation server plus all those logged by your application using the asdk.log() function.
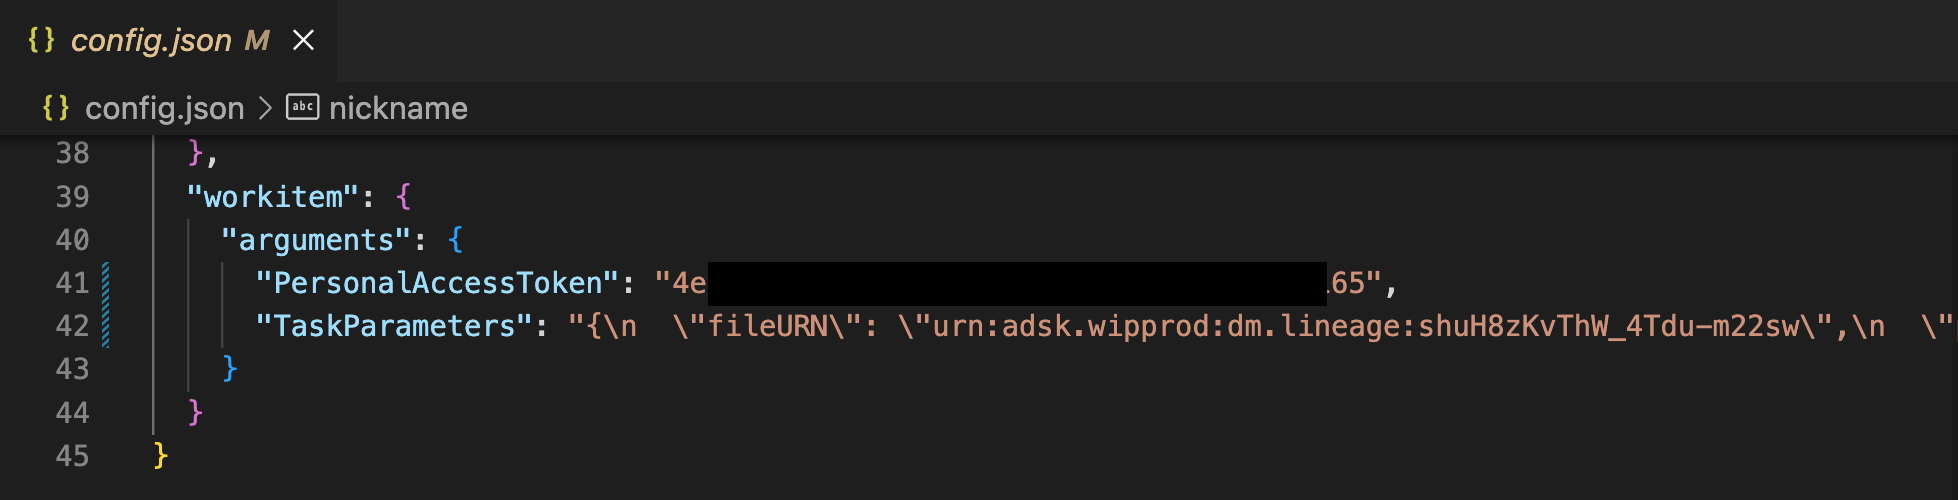
If you want to change the parameters passed to the work item, then just change the value of "TaskParameters" in the config.json file: