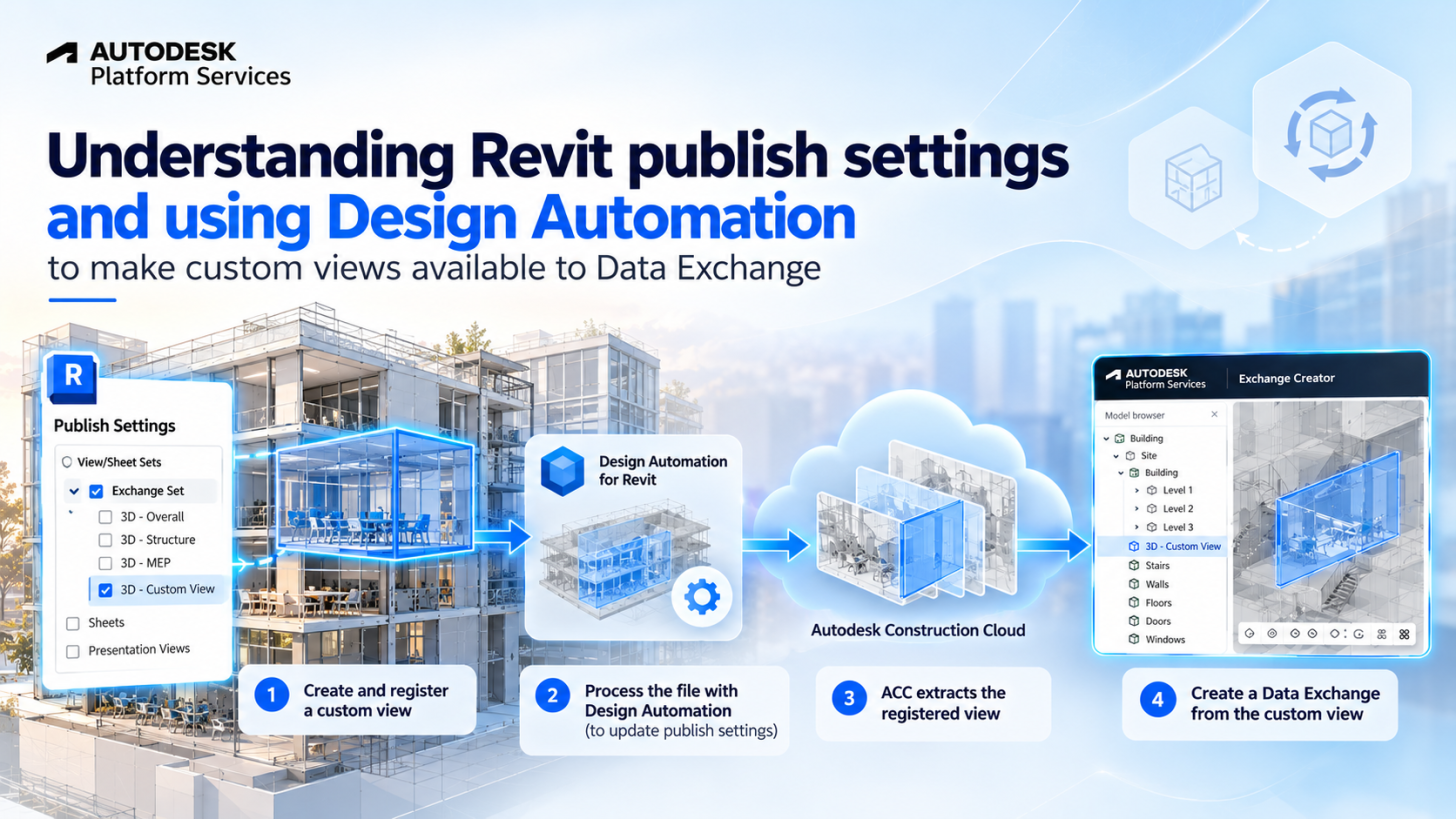
When working with Revit models in Autodesk Forma (former ACC), you may discover that some views available in Revit are missing. This can affect several workflows, from displaying specific views in Autodesk Viewer to building custom applications with APS or creating Data Exchanges from selected model elements.
The reason is not always obvious: a view can exist in the Revit file without being included in the views extracted by ACC. Understanding how Revit publish settings control this process is essential when you need to make custom views available to downstream applications.
In this article, we'll explore how ACC determines which Revit views to extract, how to register additional views using the Revit API, and how the Exchange Creator .NET sample brings these steps together.
The file carries the list
If a Revit file has no publish settings, Autodesk Forma falls back to its default views. When a Revit file has publish settings, Forma extracts only the views listed there, whatever other 3D views the file contains. The decision lives in the file, not in the cloud, which means whoever authors the model also decides which views become "viewables". Many services, like Data Exchange builds on those "viewables", so it can only create an exchange from a view that was extracted. A view outside the list is not just hidden, for the cloud, it doesn't exist.
Two practical consequences follow:
- If your workflow starts from a published view, as it does with Exchange Maker sample, you only need to ask the file which views it publishes.
- If your workflow needs a view that doesn't exist yet, for example one that shows a user's selection of elements, you have to add it to that list before the file goes to the cloud.
Where the list lives
Revit stores the publish settings in extensible storage, on the Project Information element. In extensible storage, a schema defines the fields, and an entity is an instance of that schema attached to an element, holding the actual values. The publish settings use a schema named ExportViewSheetSetListSchema:
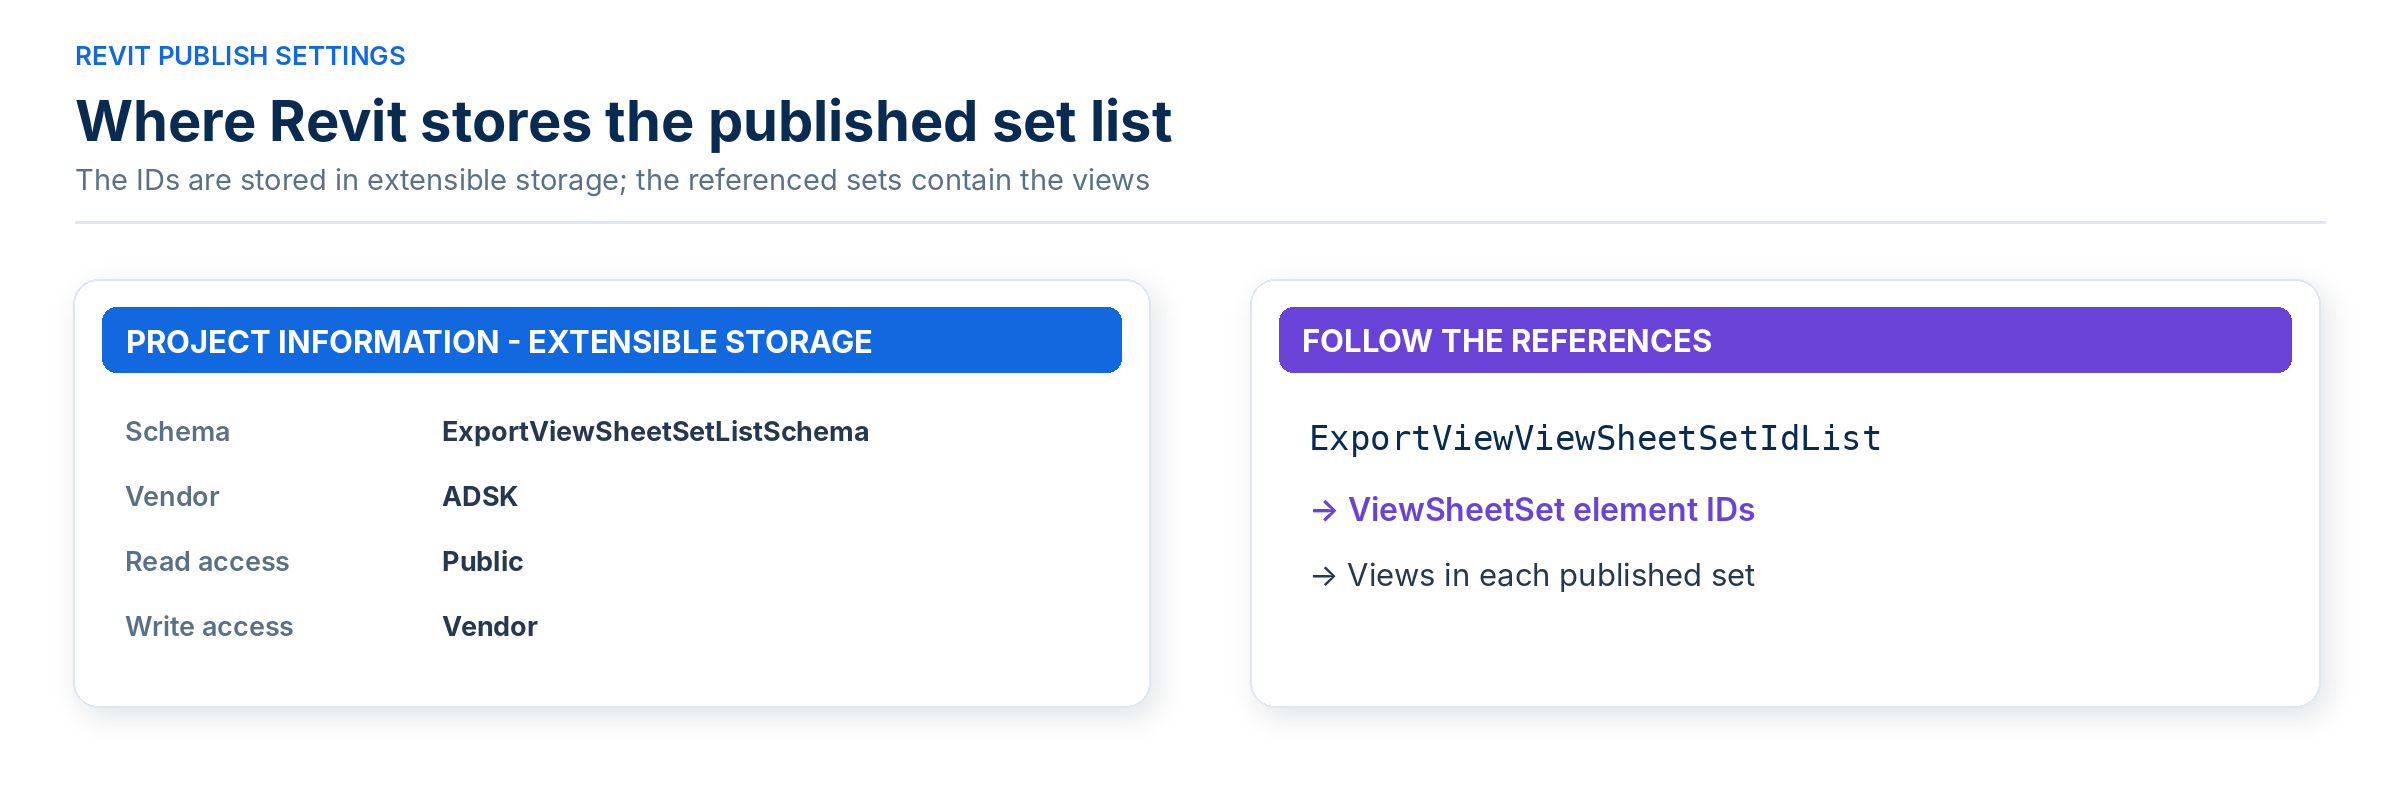
The entity doesn't contain views. It contains the IDs of view/sheet sets, and the sets contain the views. A file that publishes a single set, for example, has one ID in the list, and that set holds the views that Forma extracts.
Any add-in can read the schema, but only Autodesk can write it. So you can't add a set to the list. To register a view: you don't edit the list, you edit the sets it points to.
How to register a view
One important thing to know is that it seems that the Revit API has no member dedicated to publish settings. However, it has the print API, which manages view/sheet sets, and the publish settings are made of view/sheet sets. So there is no direct API for publish settings, but there is a supported way to change what they contain.
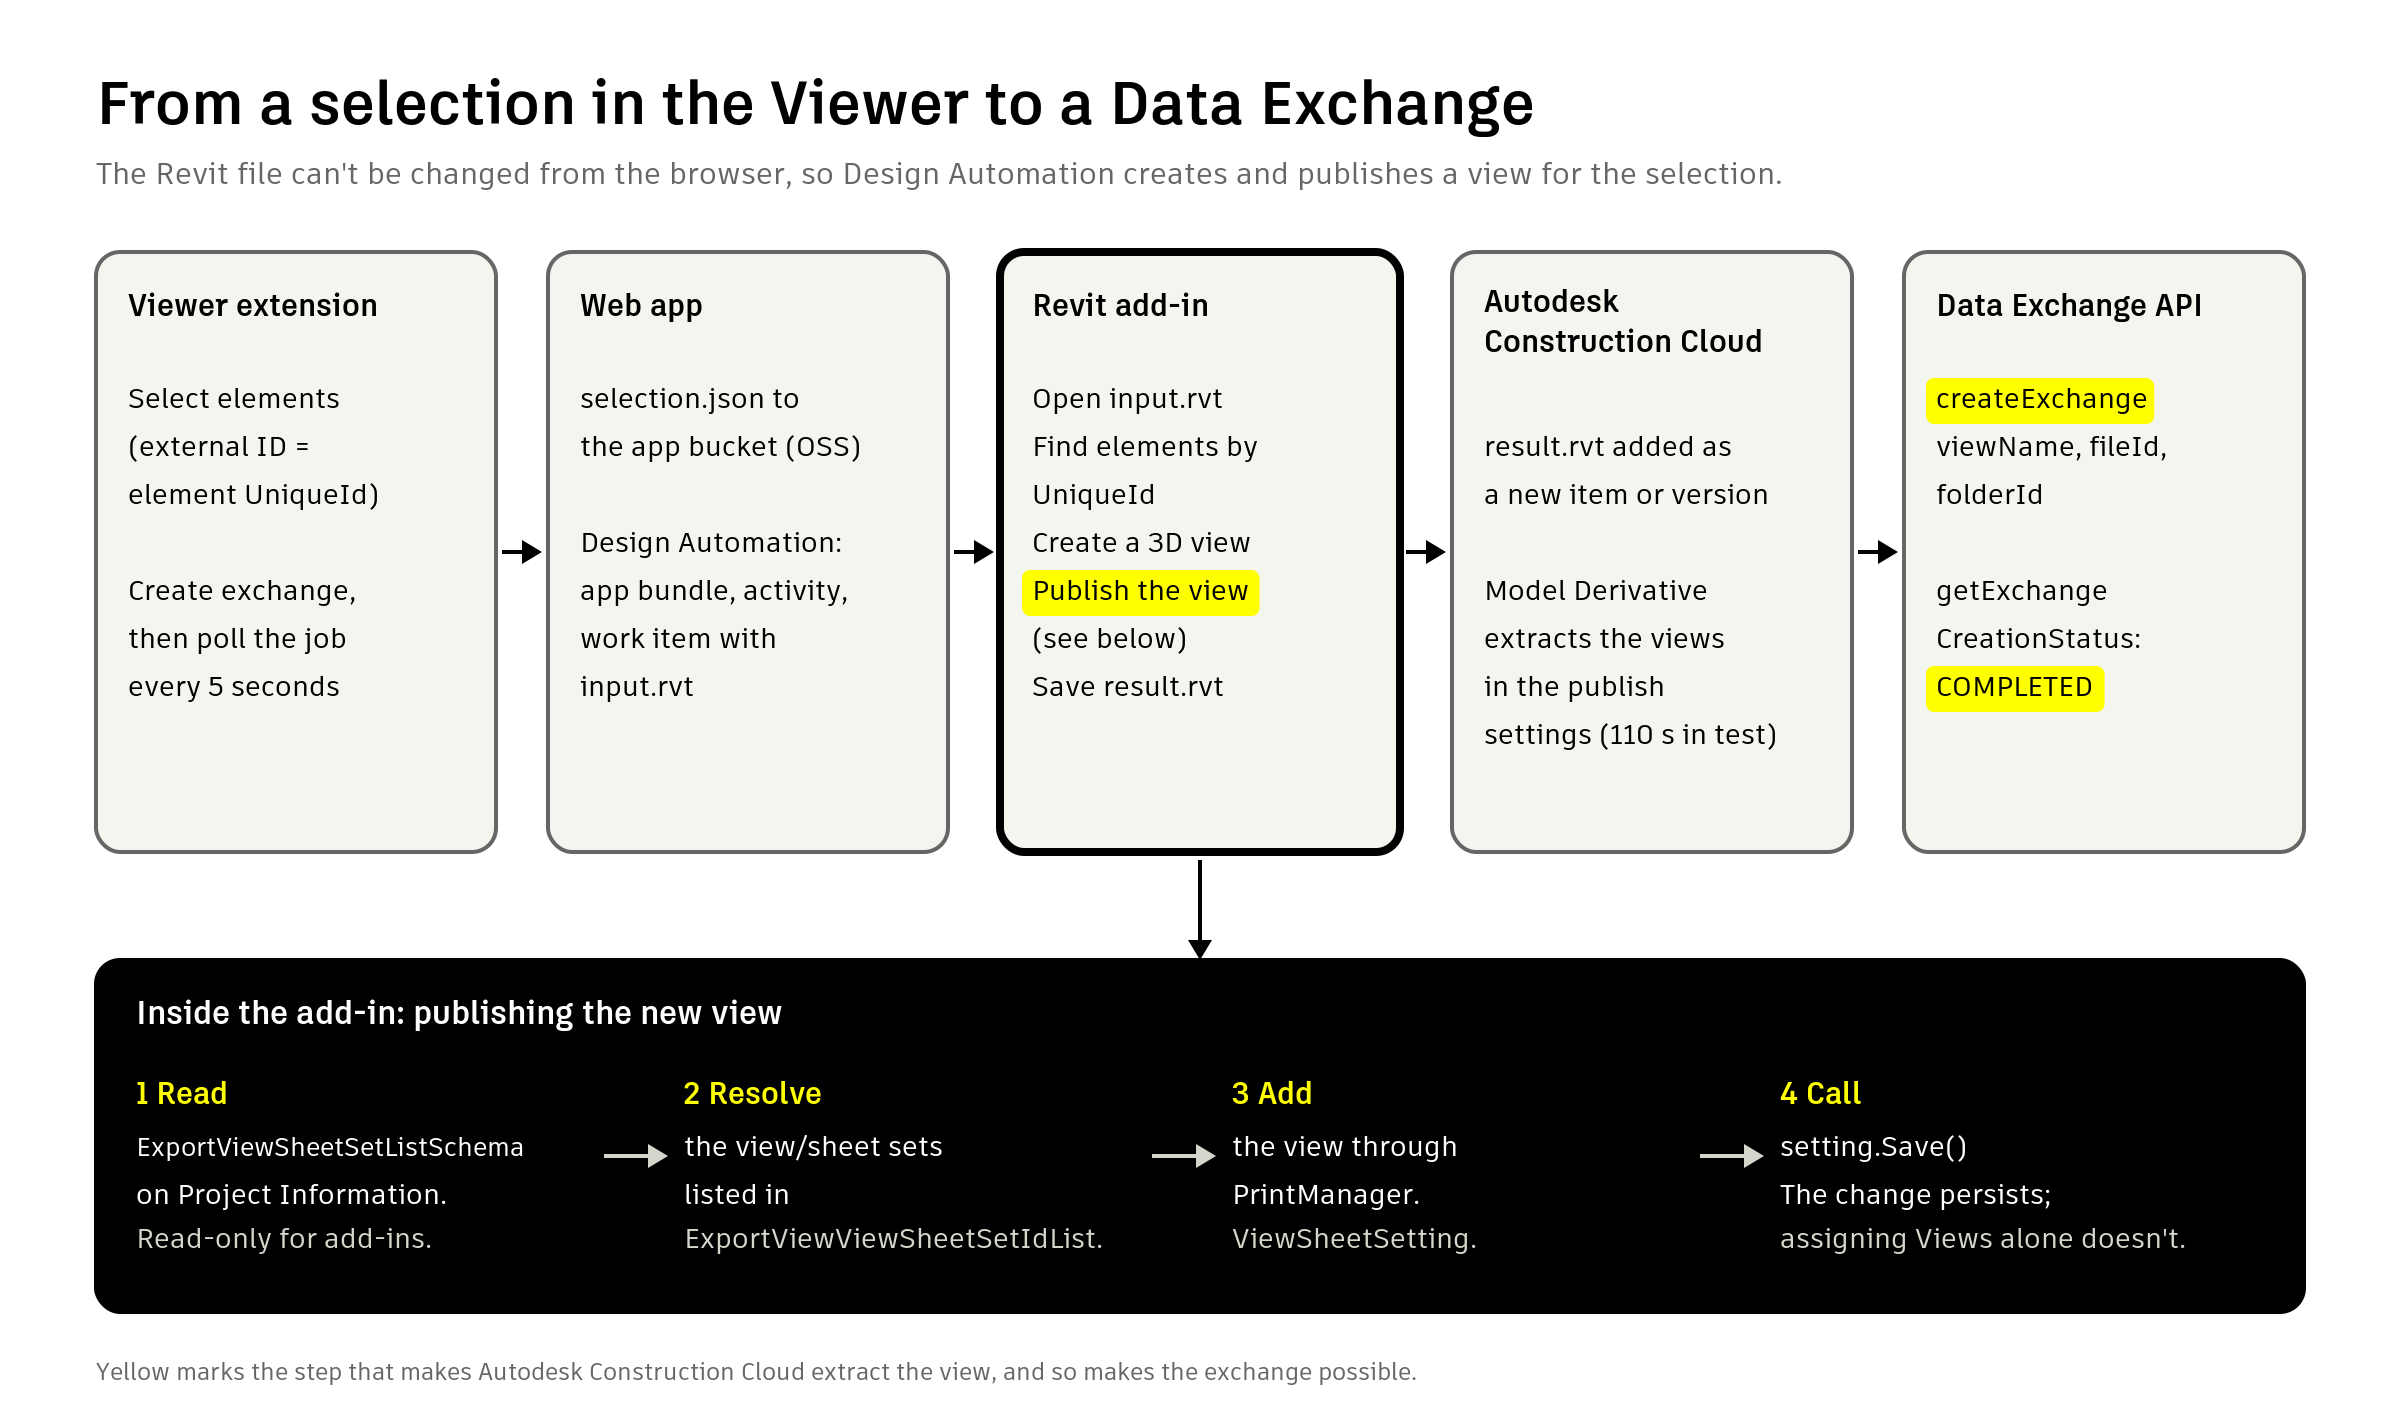
The procedure has four steps, all inside one transaction in a Revit add-in. If you run it in Design Automation, the file you save is the one you upload to Forma.
1. Read the published sets. Find the schema, read the ID list from Project Information, and resolve the IDs to ViewSheetSet elements: If the list comes back empty, the file has no publish settings, and Forma extracts its default views. In that case there is nothing to register.
2. Open the set through the print manager. Set PrintRange to Select and make each published set the current one on ViewSheetSetting.
3. Add your view to the set. Copy the existing views into a new ViewSet, insert yours, and assign it back.
4. Call Save(). This is the step that persists the change.
Below is just a schematic extract. For full code check the add-in from Exchange Creator sample.
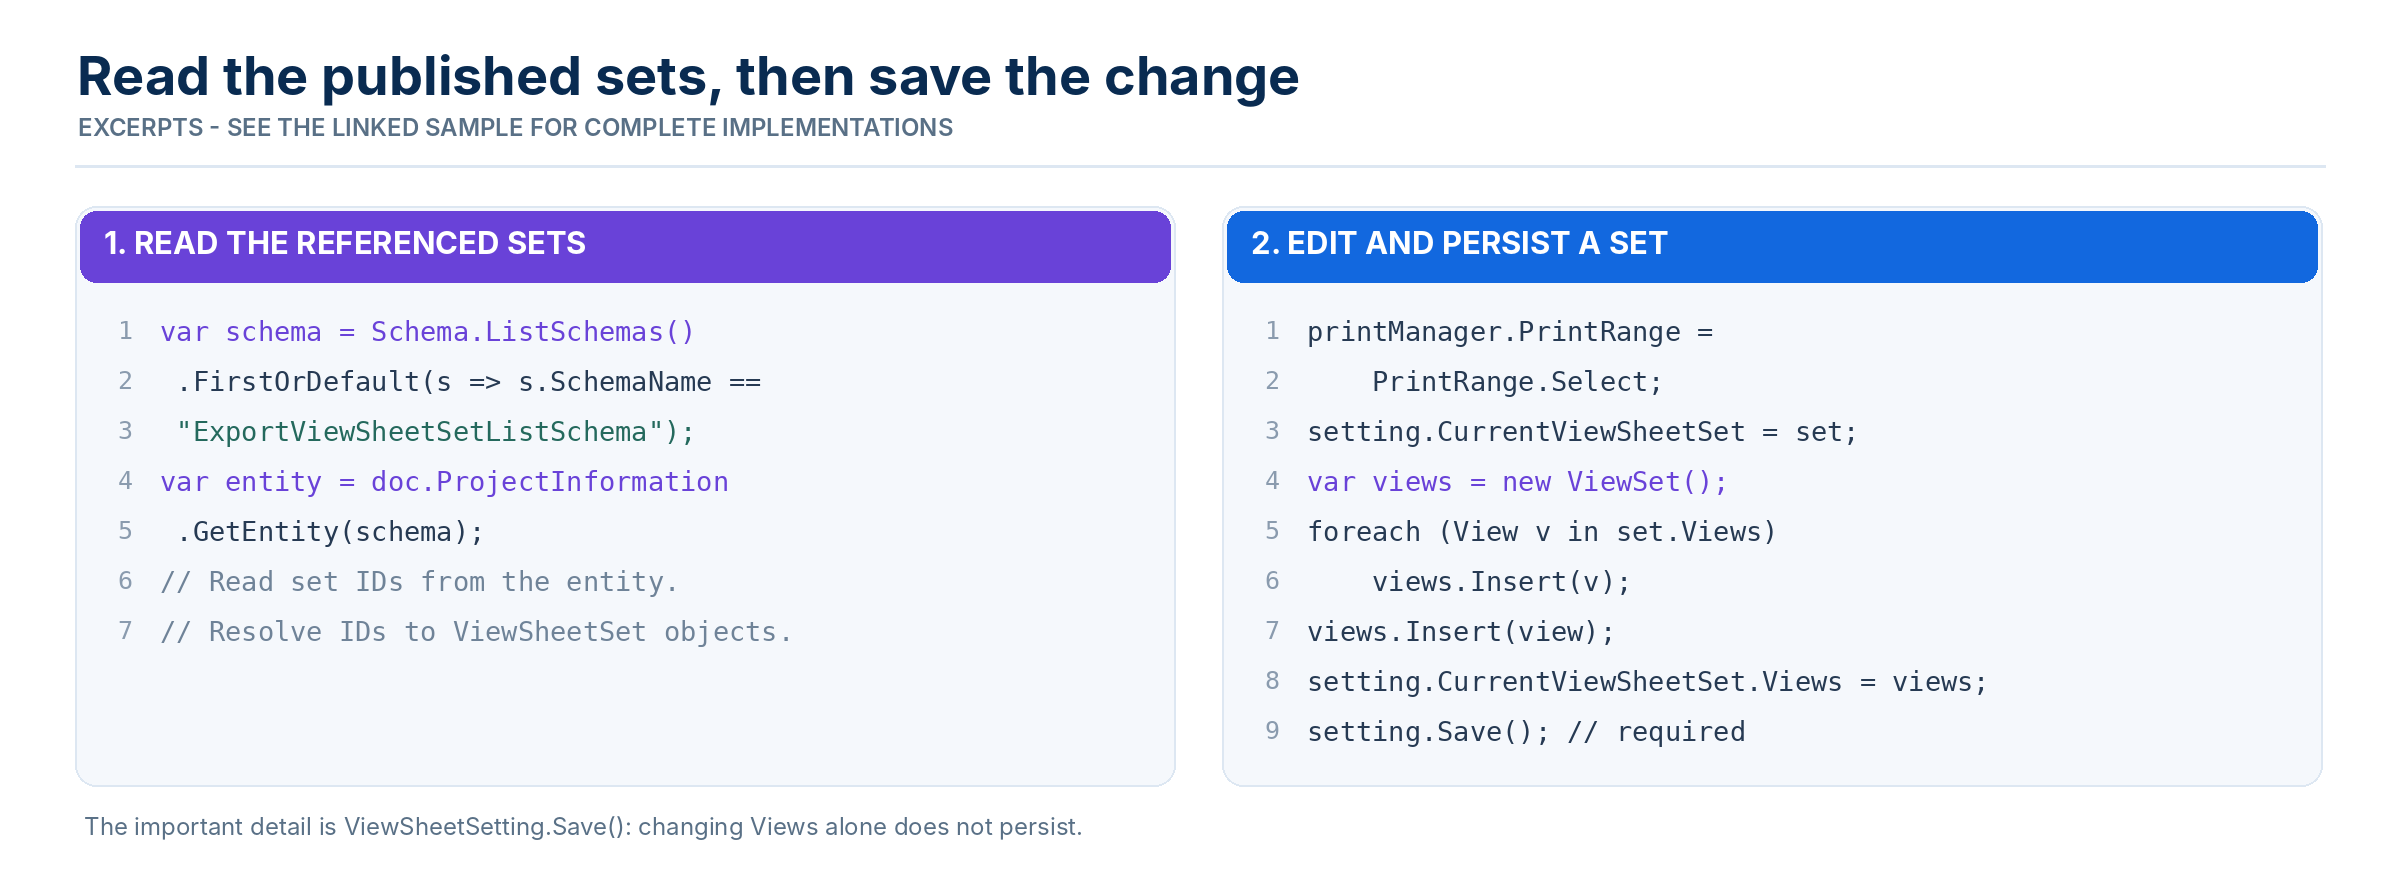
The detail to remember is that assigning ViewSheetSet.Views on its own changes the object in memory and nothing else, so the file still lists the old views when you save it. The assignment has to go through ViewSheetSetting, followed by Save().
Check that it works
There are several ways to check if it works, be it visually verify it in Forma or Autodesk Viewer, or Data Management API or even Data Exchange GraphQL API. No matter what is your method to verify if the needed view is available or not, keep in mind you should give some time to Forma to process the new file version.
Forma publishes the extracted views in the Model Derivative manifest, so you can wait for the manifest and look for your view by name.
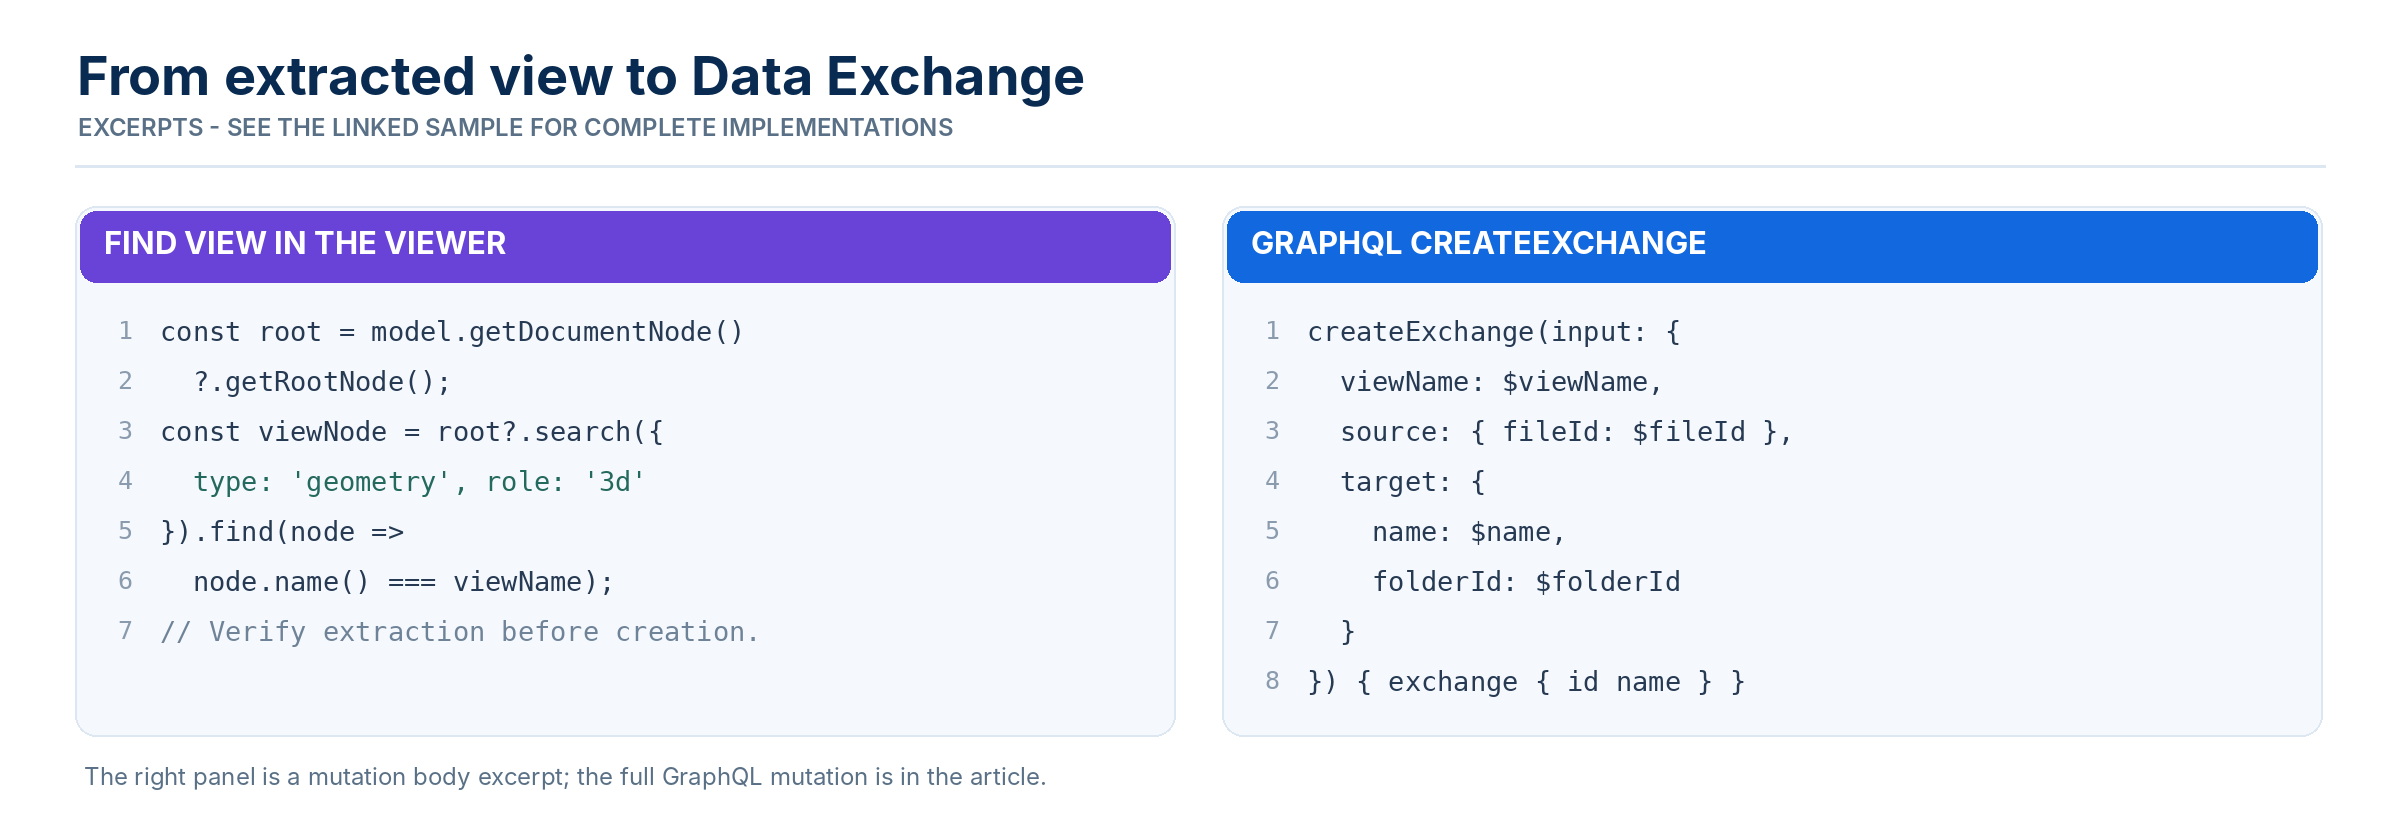
In the Viewer, the same information is on the loaded model. This is how Exchange Maker sample lists the published 3D views and finds one by name.
Once the view is in the manifest, the exchange comes from the documented mutation:
What to know before you rely on it
Registering a view changes the file. The set gains a view, and if you save the result as a new version of the source file, that version appears for everyone, upgrades older designs, and changes the file's publish settings. The change is additive.
The list references views by identity, not by name. If you repurpose an existing published view and rename it, the cloud extracts it under its new name.
Cloud workshared models don't work. Design Automation needs a file it can download, and a cloud workshared model has none in Autodesk Construction Cloud. Use .rvt files uploaded to Forma Data Management.
Exchanges follow their source file. An exchange doesn't keep a copy of its view. When the source file gets a new version, every exchange created from it updates from the view in that version.
The schema belongs to Autodesk. It is readable by any add-in and writable only by Autodesk, so a future Revit release could change how publish settings are stored. The workaround described here was tested on Revit 2024 to 2027.
Where to go next
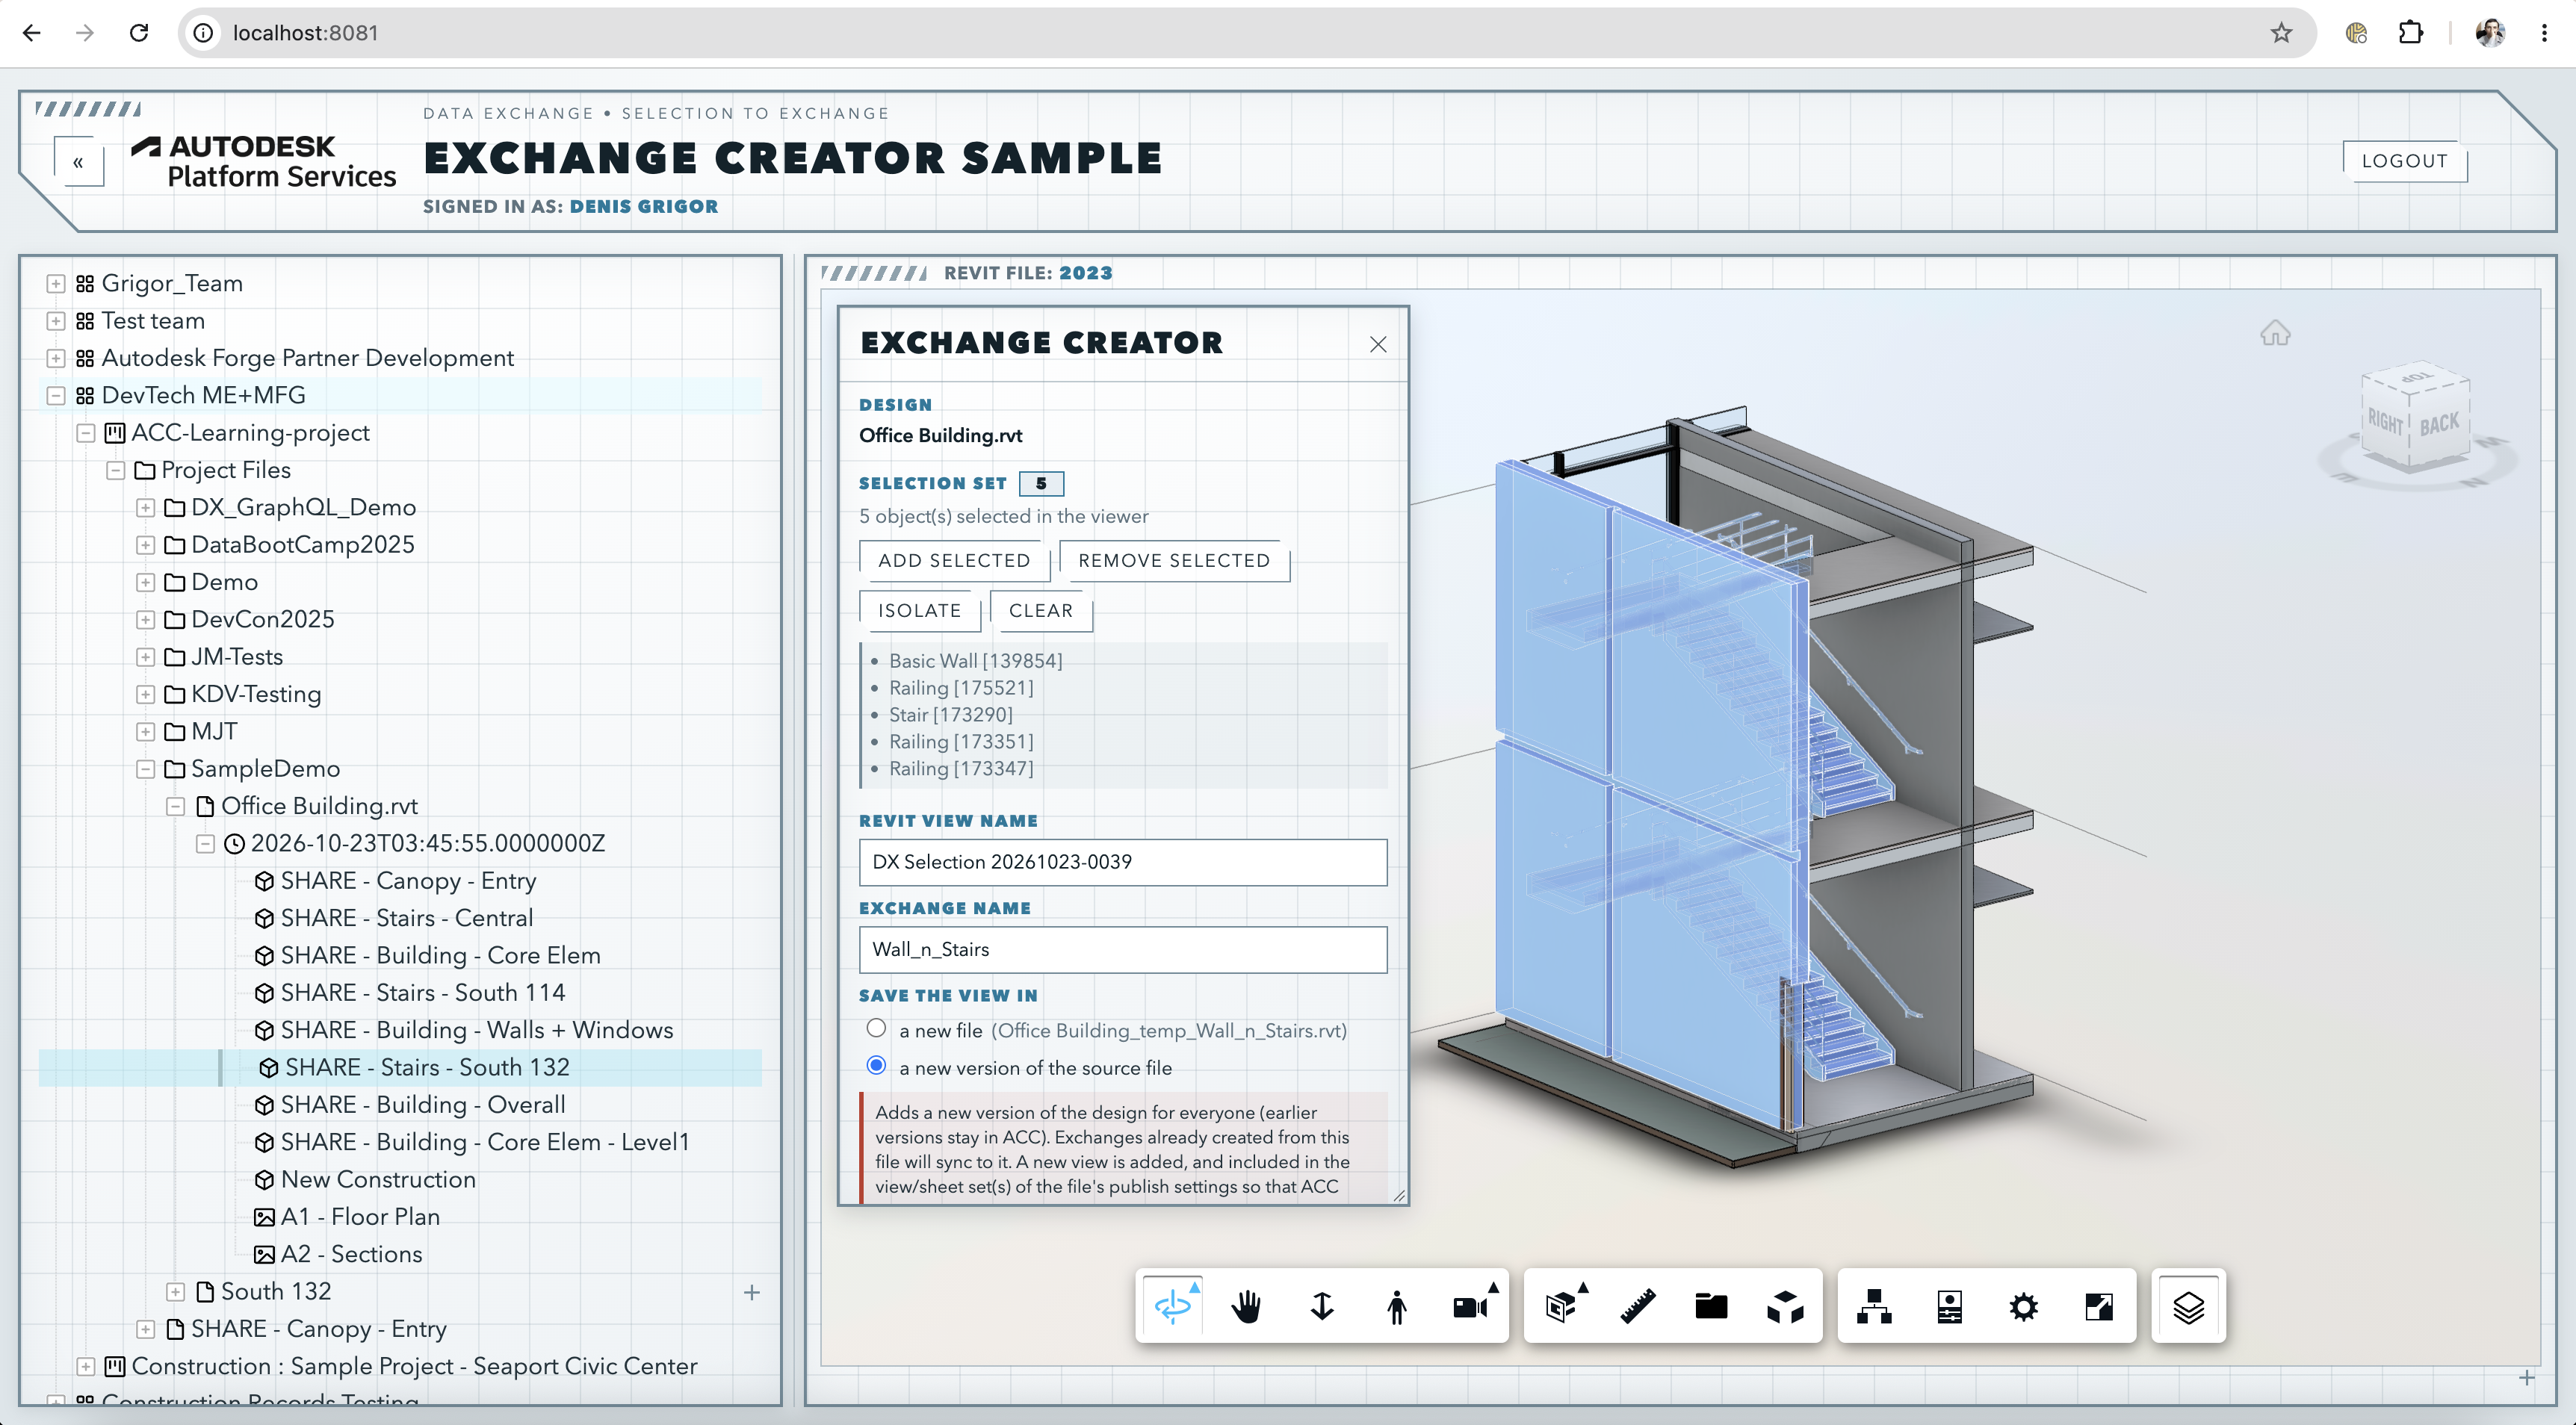
Exchange Creator sample puts this together with a Viewer extension that builds the selection, a Design Automation work item that runs the add-in, and the polling that waits for extraction. Its README lists the setup steps. If you only need the view-registration step, check this part of the add-in.