


Introduction
If you ever found yourself developing a DLL bundle for Revit / Autocad / Automation API, you probably came across this repo - It covers debugging locally with Visual Studio.
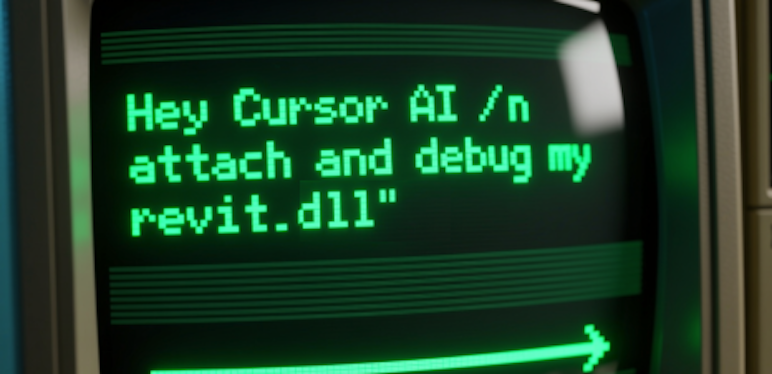
But the tooling landscape has changed. Today, AI assistants and modern IDEs like Cursor can do far more than autocomplete—they can help you 'debug" too.
In this post we’ll show you how to give AI access to your real-time debug feeds so it saves you time and mental-fatigue, during the toughest of C# debug sessions.
Let's dive in ...
Prerequisites
Before we begin, make sure you have:
- Revit installed on your machine (2025 or later)
- Cursor
- .NET SDK compatible with your Revit version
- Automation Handler for local testing (first 4 minutes of the video below)
Step-by-step video
How It Works
The key to this debugging workflow is understanding how Revit plugins load and execute. Unlike standalone applications, Revit plugins (add-ins) run inside the Revit process. This means we can't simply press F5 and debug like a normal application. Instead, we need to:
- Start Revit independently - Launch Revit as you normally would
- Attach the debugger - Connect Cursor's debugger to the running Revit process
- Set breakpoints - Mark the lines of code where you want execution to pause
- Trigger your plugin - Use your add-in within Revit to hit those breakpoints
- Inspect and iterate - Examine variables, step through code, and make informed fixes
This approach gives you the best of both worlds: Revit stays running between debugging sessions (saving startup time), and you get full debugging capabilities, including breakpoints, variable inspection, and step-through execution.
Setting Up Your Project
1. Clone the Repository
Start by cloning the sample repository that contains a pre-configured debugging setup:
git clone https://github.com/autodesk-platform-services/revit-cursor-plugin-debug.git
cd revit-cursor-plugin-debug
This repository includes a simple "Hello World" Revit plugin that demonstrates the debugging workflow.
2. Configure the Launch Settings
The magic happens in the .vscode/launch.json file. This configuration tells Cursor how to attach to Revit's process. Open the file and you'll see something like this:
{
  "version": "0.2.0",
  "configurations": [
    {
      "name": "Attach to Revit",
      "type": "coreclr",
      "request": "attach",
      "processName": "Revit.exe"
    }
  ]
}
This configuration:
- Uses the CoreCLR debugger (for .NET applications)
- Specifies "attach" mode rather than "launch"
- Targets the process named "Revit.exe" (you need to manually select this process)
3. Update the Revit paths to match your installation
In RevitPlugin.csproj (for assembly references):
<!-- Edit this path to match your Revit executable path -->
<RevitPath>C:\Program Files\Autodesk\Revit 2025</RevitPath>

<!-- Edit this path if you have Design Automation Bridge installed locally -->
<DesignAutomationBridgePath>C:\ProgramData\Autodesk\Revit\Addins\2025</DesignAutomationBridgePath>

<!-- Edit this path to match your Revit Addins path -->
<RevitAddinsPath>C:\ProgramData\Autodesk\Revit\Addins\2025</RevitAddinsPath>
Common Revit installation paths:
- Revit 2025:
C:\Program Files\Autodesk\Revit 2025 - Revit 2024:
C:\Program Files\Autodesk\Revit 2026
4. Build the Project
Open a terminal in the project directory and run:
dotnet build -c Debug -p:Platform=x64The DLL will be created in bin\Debug\RevitPlugin.dll
Note: The build process automatically updates the .addin file with the correct assembly path using
UpdateAddinPath.ps1.
Debugging in Action
Now comes the satisfying part - actually debugging your code!
Step 1: Launch Revit
Start Revit normally. Open any project or create a new one.
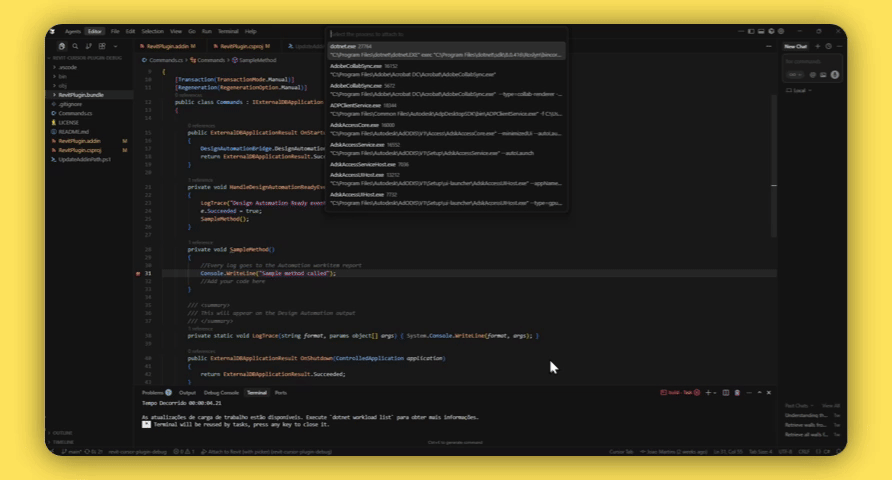
Step 2: Attach the Debugger
- Open your project in VS Code/Cursor
- Open the file containing your plugin code (e.g.,
Command.cs) - Set a breakpoint by clicking in the gutter next to a line number (a red dot will appear)
- Press F5 or go to the Debug panel and click "Start Debugging"
- Manually select revit.exe to attach the Revit process
You should see the debug toolbar appear, indicating the debugger is connected.
Step 3: Trigger Your Plugin
In Revit, trigger your plugin command. For the sample project, this might be a button in the Add-ins ribbon or a command you run from the Revit interface.
When your code executes, Revit will pause at your breakpoint, and VS Code will come to focus. Now you can:
- Inspect variables by hovering over them or checking the Variables panel
- Step through code using F10 (step over) or F11 (step into)
- Evaluate expressions in the Debug Console
- View the call stack to understand how you got to this point
Step 4: Make Changes and Reload
Here's where this workflow really shines. After debugging:
- Stop the debugger and close Revit
- Make your code changes
- Rebuild the project
- Open Revit again
- Attach the debugger again and test
Tips and Best Practices
Keep Revit Responsive
When paused at a breakpoint, Revit's UI is frozen. Don't leave it paused for extended periods, as this can cause Windows to mark Revit as "Not Responding."
Version Your .addin Files
If you're working with multiple Revit versions, maintain separate .addin files for each version and update the paths accordingly.
Troubleshooting
Debugger won't attach?
- Ensure Revit is actually running
- Check that you have the correct permissions (run Cursor as administrator if needed)
- Verify the process name is exactly "Revit.exe"
Breakpoints appear hollow/disabled?
- Ensure you've built the project with debug symbols
- Check that the DLL loaded by Revit matches your build output
- Verify you're attaching after Revit has loaded (not during startup)
Changes not taking effect?
- Make sure you've rebuilt the project
- Check that Revit is loading the DLL from the correct location
- Some changes require a full Revit restart (like changing the plugin's interface structure)
Conclusion
Setting up a proper debugging workflow for Revit plugins might seem like extra work initially, but it pays dividends in productivity. The ability to set breakpoints, inspect the Revit API's behavior in real-time, and iterate quickly transforms plugin development from a frustrating guessing game into a systematic, efficient process.
This setup also opens the door to leveraging modern development tools like Cursor's AI assistance. With a debugger attached, you can understand API behavior, verify assumptions, and catch bugs before they make it into production.
The next time you're building a Revit plugin, take the time to configure this debugging workflow. Your future self will thank you.
Happy debugging!