
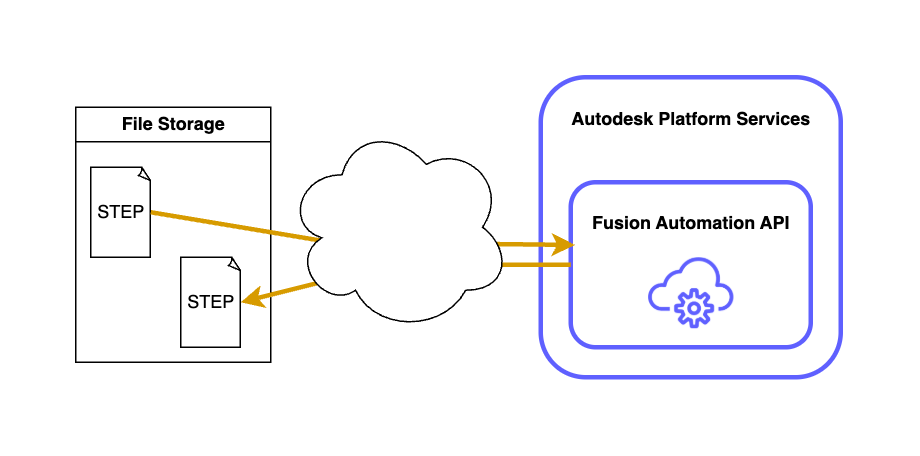
The main samples of Fusion Automation API focus on working with files stored in Fusion Team, but of course they can have input and output files anywhere, just like in the case of the other engines.
Just to keep things simple we're going to use input and output files stored in an OSS bucket, but they could be anywhere and we could simply provide pre-signed URLs for them.
For the test the easiest is to use this CLI tool with the following configuration file:
{
  "credentials": {
    "clientId": "your-client-id",
    "clientSecret": "your-client-secret",
    "scope": "code:all data:read data:write bucket:create bucket:read bucket:update bucket:delete"
  },
  "nickname": "your-client-id",
  "bucketName": "your-bucket",
  "appbundle": {
    "id": "InputOutputAppBundle",
    "description": "My first Fusion AppBundle based on Fusion 2025",
    "engine": "Autodesk.Fusion+Latest",
    "alias": "my_working_version",
    "path": "InputOutput"
  },
  "activity": {
    "id": "InputOutputActivity",
    "description": "",
    "engine": "Autodesk.Fusion+Latest",
    "alias": "my_working_version",
    "commandLine": [],
    "parameters": {
      "InputFile": {
        "verb": "get",
        "description": "the input design file",
        "required": true,
        "localName": "inputFile.step"
      },
      "PersonalAccessToken": {
        "verb": "read",
        "description": "the personal access token to use",
        "required": true
      },
      "OutputFile": {
        "verb": "put",
        "description": "the output design file",
        "required": true,
        "localName": "outputFile.step"
      }
    },
    "appbundles": [
      "{{nickname}}.InputOutputAppBundle+my_working_version"
    ],
    "settings": {}
  },
  "workitem": {
    "arguments": {
      "InputFile": {
        "url": "urn:adsk.objects:os.object:{{bucketName}}/Input.step"
      },
      "OutputFile": {
        "url": "urn:adsk.objects:os.object:{{bucketName}}/Output.step"
      },
      "PersonalAccessToken": "your-pat"
    }
  }
}
You just have to modify the "clientId", "clientSecret", "nickName" (same as "clientId" unless you used the Automation API to change it), "bucketName" (where you store your files), and "PersonalAccessToken" values.
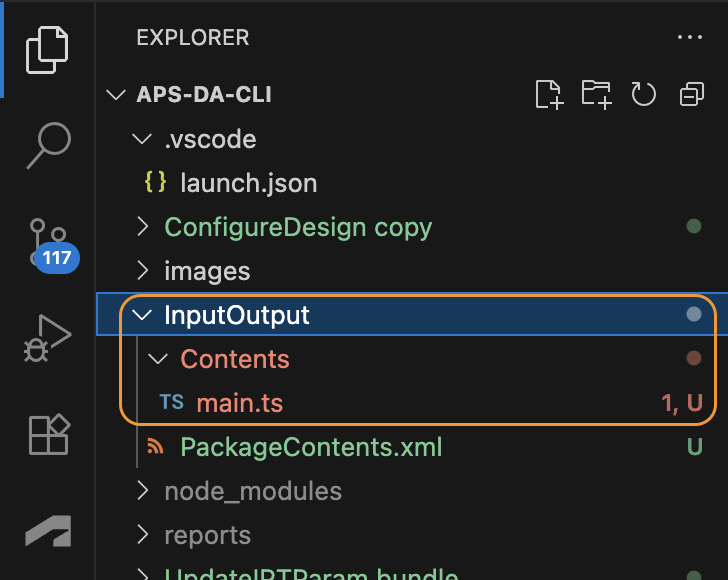
You also need to unzip this app bundle into the root folder of the CLI utility project: InputOutputAppBundle.zip
The content of the script is really simple: it just imports the input STEP file and exports the model to another STEP file that will be stored as the output:
import { adsk } from "@adsk/fas";

function run() {
  const app = adsk.core.Application.get();
  if (!app) throw Error("No asdk.core.Application.");

  let importManager = app.importManager
  let importOptions = importManager.createSTEPImportOptions("inputFile.step")
  let doc = importManager.importToNewDocument(importOptions)

  const design = doc.products.itemByProductType(
    "DesignProductType",
  ) as adsk.fusion.Design;

  let exportManager = design.exportManager
  let exportOptions = exportManager.createSTEPExportOptions("outputFile.step")
  exportManager.execute(exportOptions)

  adsk.result = JSON.stringify({message: "Created outputFile.stp"});

  while (app.hasActiveJobs) {
    wait(2000);
  }
}

function wait(ms: number) {
  const start = new Date().getTime();
  while (new Date().getTime() - start < ms) adsk.doEvents();
}

run();
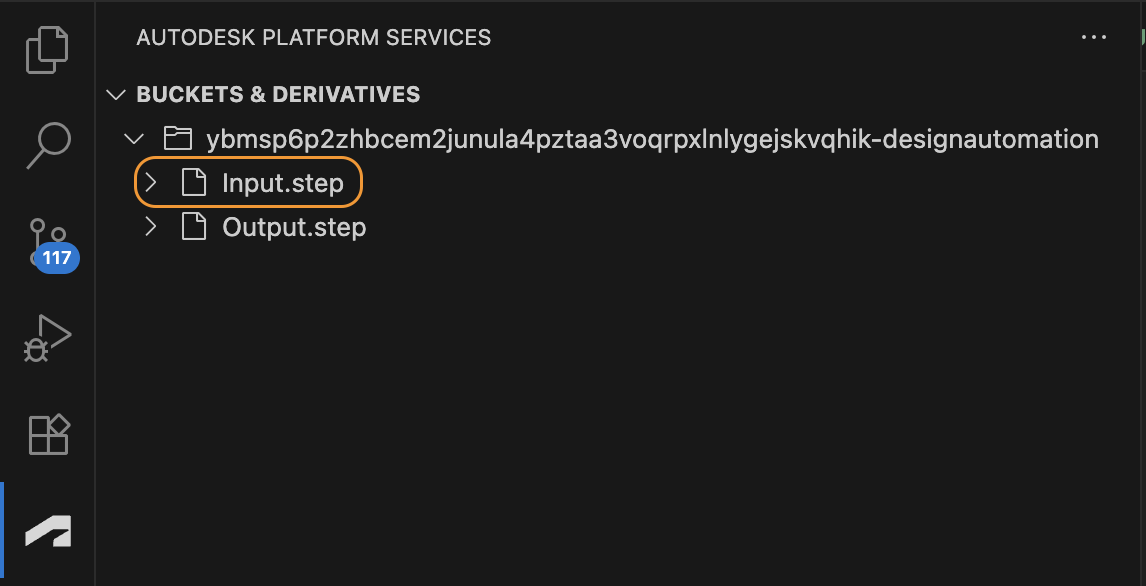
Just make sure you have an "Input.step" file in your bucket or modify the value of InputFile.url in the configuration file
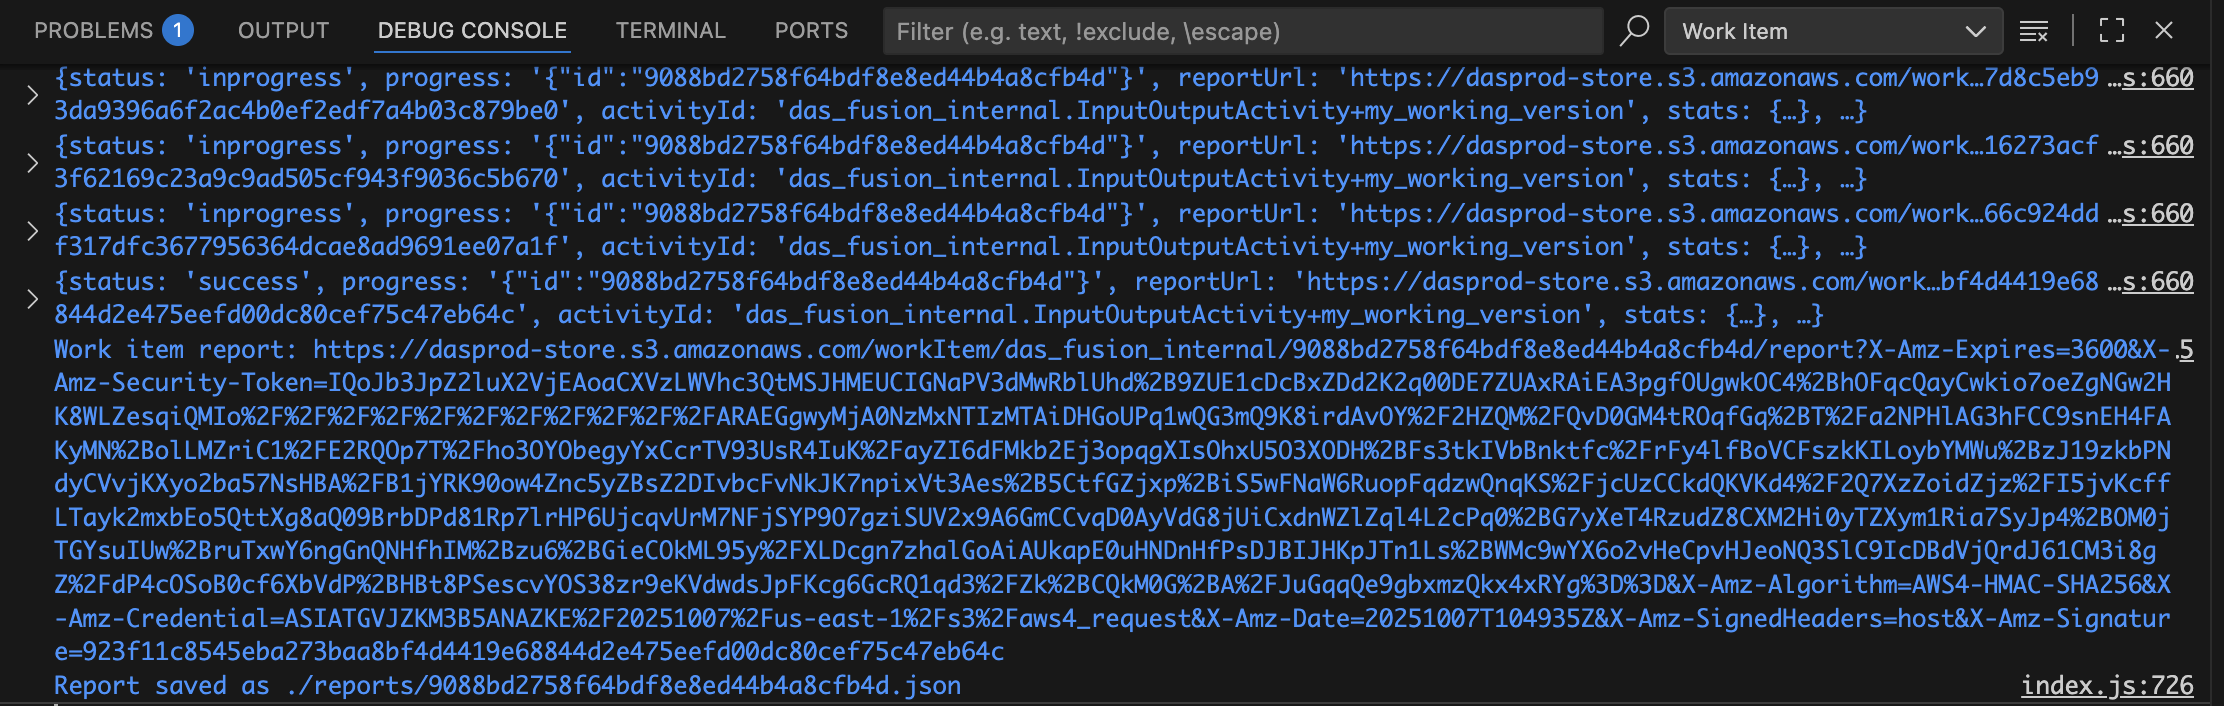
First you have to run the "App Bundle", the "Activity" and finally the "Work Item" command, and you should get something like this in the Debug Console of VS Code:
If you want to work with other file types, have a look at Import Manager API Sample and ExportManager API Sample