Creating an extension is the recommended approach to add custom code to Viewer. And in most cases we want some UI for it: buttons & panels. This skeleton code shows how to create an extension with that.

We are going to use a method that is part of Viewer3D library called setThemingColor

We need a THREE JS Vector4 with the RGB and the Transparency values to be in a range from 0-1
A good point of reference in order to add an extension to your project will be this post done by my colleague Augusto Goncalves a few weeks back, I based the structure of my extension in the same way he does. Here is his post for reference extension-skeleton-toolbar-docking-panel
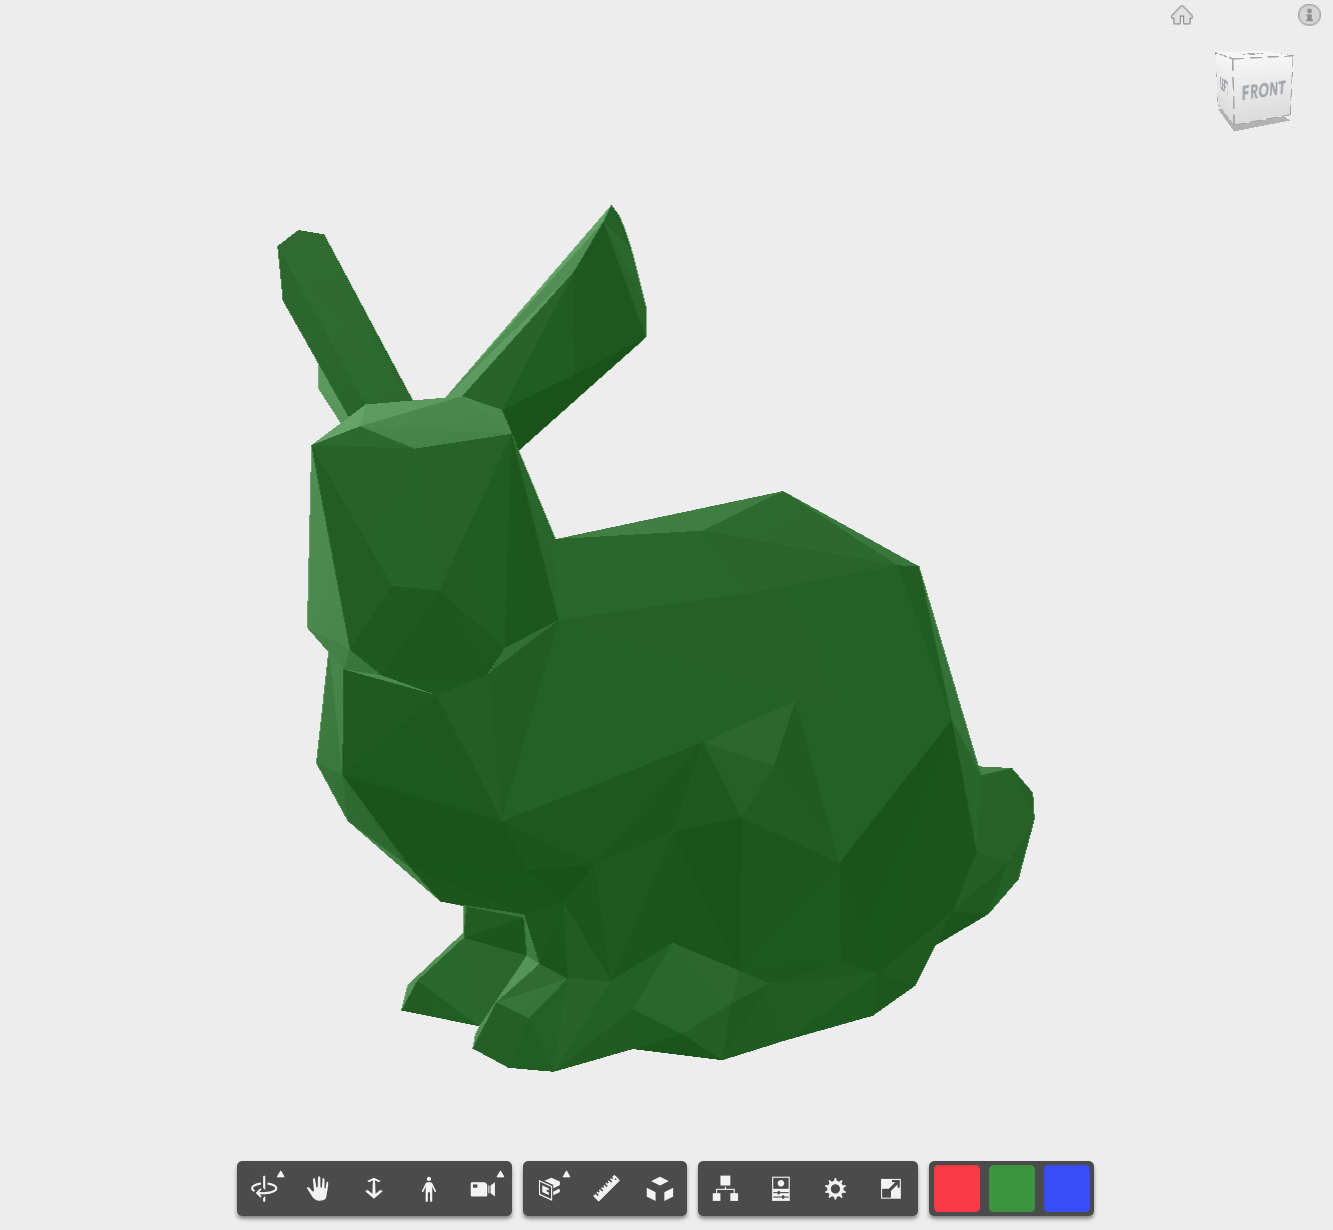
Here is how my Color Extension looks.
// *******************************************
// My Color Extension
// *******************************************

function MyColorExtension(viewer, options) {
    Autodesk.Viewing.Extension.call(this, viewer, options);
  }

  MyColorExtension.prototype = Object.create(Autodesk.Viewing.Extension.prototype);
  MyColorExtension.prototype.constructor = MyColorExtension;

  MyColorExtension.prototype.load = function() {

    if (this.viewer.toolbar) {
      // Toolbar is already available, create the UI
      this.createUI();
    } else {
      // Toolbar hasn't been created yet, wait until we get notification of its creation
      this.onToolbarCreatedBinded = this.onToolbarCreated.bind(this);
      this.viewer.addEventListener(av.TOOLBAR_CREATED_EVENT, this.onToolbarCreatedBinded);
    }

    return true;
  };

  MyColorExtension.prototype.onToolbarCreated = function() {
    this.viewer.removeEventListener(av.TOOLBAR_CREATED_EVENT, this.onToolbarCreatedBinded);
    this.onToolbarCreatedBinded = null;
    this.createUI();
  };

  MyColorExtension.prototype.createUI = function() {
    // alert('TODO: Create Toolbar!');

    var viewer = this.viewer;

    // Button 1
    var button1 = new Autodesk.Viewing.UI.Button('red-bunny');
    button1.onClick = function(e) {
        var red = new THREE.Vector4(1, 0, 0, 0.5);
        viewer.setThemingColor(3,red);
    };
    button1.addClass('red-bunny');
    button1.setToolTip('Red Bunny');

    // Button 2
    var button2 = new Autodesk.Viewing.UI.Button('green-bunny');
    button2.onClick = function(e) {
        var green = new THREE.Vector4(0, 0.5, 0, 0.5);
        viewer.setThemingColor(3,green);
    };
    button2.addClass('green-bunny');
    button2.setToolTip('Green Bunny');

     // Button 3
     var button3 = new Autodesk.Viewing.UI.Button('blue-bunny');
     button3.onClick = function(e) {
        var blue = new THREE.Vector4(0, 0, 0.5, 0.5);
        viewer.setThemingColor(3,blue);
     };
     button3.addClass('blue-bunny');
     button3.setToolTip('Blue Bunny');

    // SubToolbar
    this.subToolbar = new Autodesk.Viewing.UI.ControlGroup('my-custom-view-toolbar');
    this.subToolbar.addControl(button1);
    this.subToolbar.addControl(button2);
    this.subToolbar.addControl(button3);

    viewer.toolbar.addControl(this.subToolbar);
  };

  MyColorExtension.prototype.unload = function() {
    this.viewer.toolbar.removeControl(this.subToolbar);
    return true;
  };


  Autodesk.Viewing.theExtensionManager.registerExtension('MyColorExtension', MyColorExtension);
Now let's add style in the HTML for the toolbar buttons to look good.
<style>
  .red-bunny {
    background: red;
  }
  .green-bunny {
    background: green;
  }
  .blue-bunny {
    background: blue;
  }
</style>
and also let's reference the extension file in both our HTML and JS.
Reference in HTML
<script src="js/MyColorExtension.js"></script>Reference in JS file
viewerApp.registerViewer(viewerApp.k3D, Autodesk.Viewing.Private.GuiViewer3D, { extensions: ['MyColorExtension'] });And here are the final looks of our colored bunny. Happy Easter!


