There are multiple resources already on this topic, but it can be useful to explain the same thing in multiple ways.
First of all, the existing resources:
- Introduction to custom properties: https://aps.autodesk.com/en/docs/mfgdataapi/v3/developers_guide/customintro/
- Step-by-step tutorial: https://aps.autodesk.com/en/docs/mfgdataapi/v3/tutorials/get_custom_properties/
- Sample: https://github.com/autodesk-platform-services/aps-mfgdm-samples/tree/v3/4.Use%20Custom%20Properties
There are three distinct personas for the full workflow, though they can overlap:
- Property Admin: the properties you create are tied to a specific APS app and only the owner or an editor of that app can create and modify them
- Fusion Hub Admin: the admin of the Fusion hub who can link a property definition collection to the hub using an app that the property definition collection belongs to. Once linking is done all properties inside the given property definition collection that are not set to be hidden will show up in Fusion: both on the website and also inside the desktop product.
- Fusion User: any user that wants to set the values of available custom properties using the app that the property definition collection belongs to.
As we are moving toward 3-legged authentication in multiple places, that's what's now required for all the above operations too.
3-legged tokens have two main components:
- the client id of the APS app that is in charge of the operations
- the user id of the user on whose behalf the operations are done
Though the client id should be the same for all three personas, the user id (i.e. the user that logs in) might need to be different - see below.
Let's create some properties and set their values using https://mfgdatamodel-explorer.autodesk.io/
Property Admin
When creating the properties you have to make sure that you use the credentials (client id and client secret) of the app that you want to own the properties.
Set credentials
You can go on https://mfgdatamodel-explorer.autodesk.io/credentials to do that:
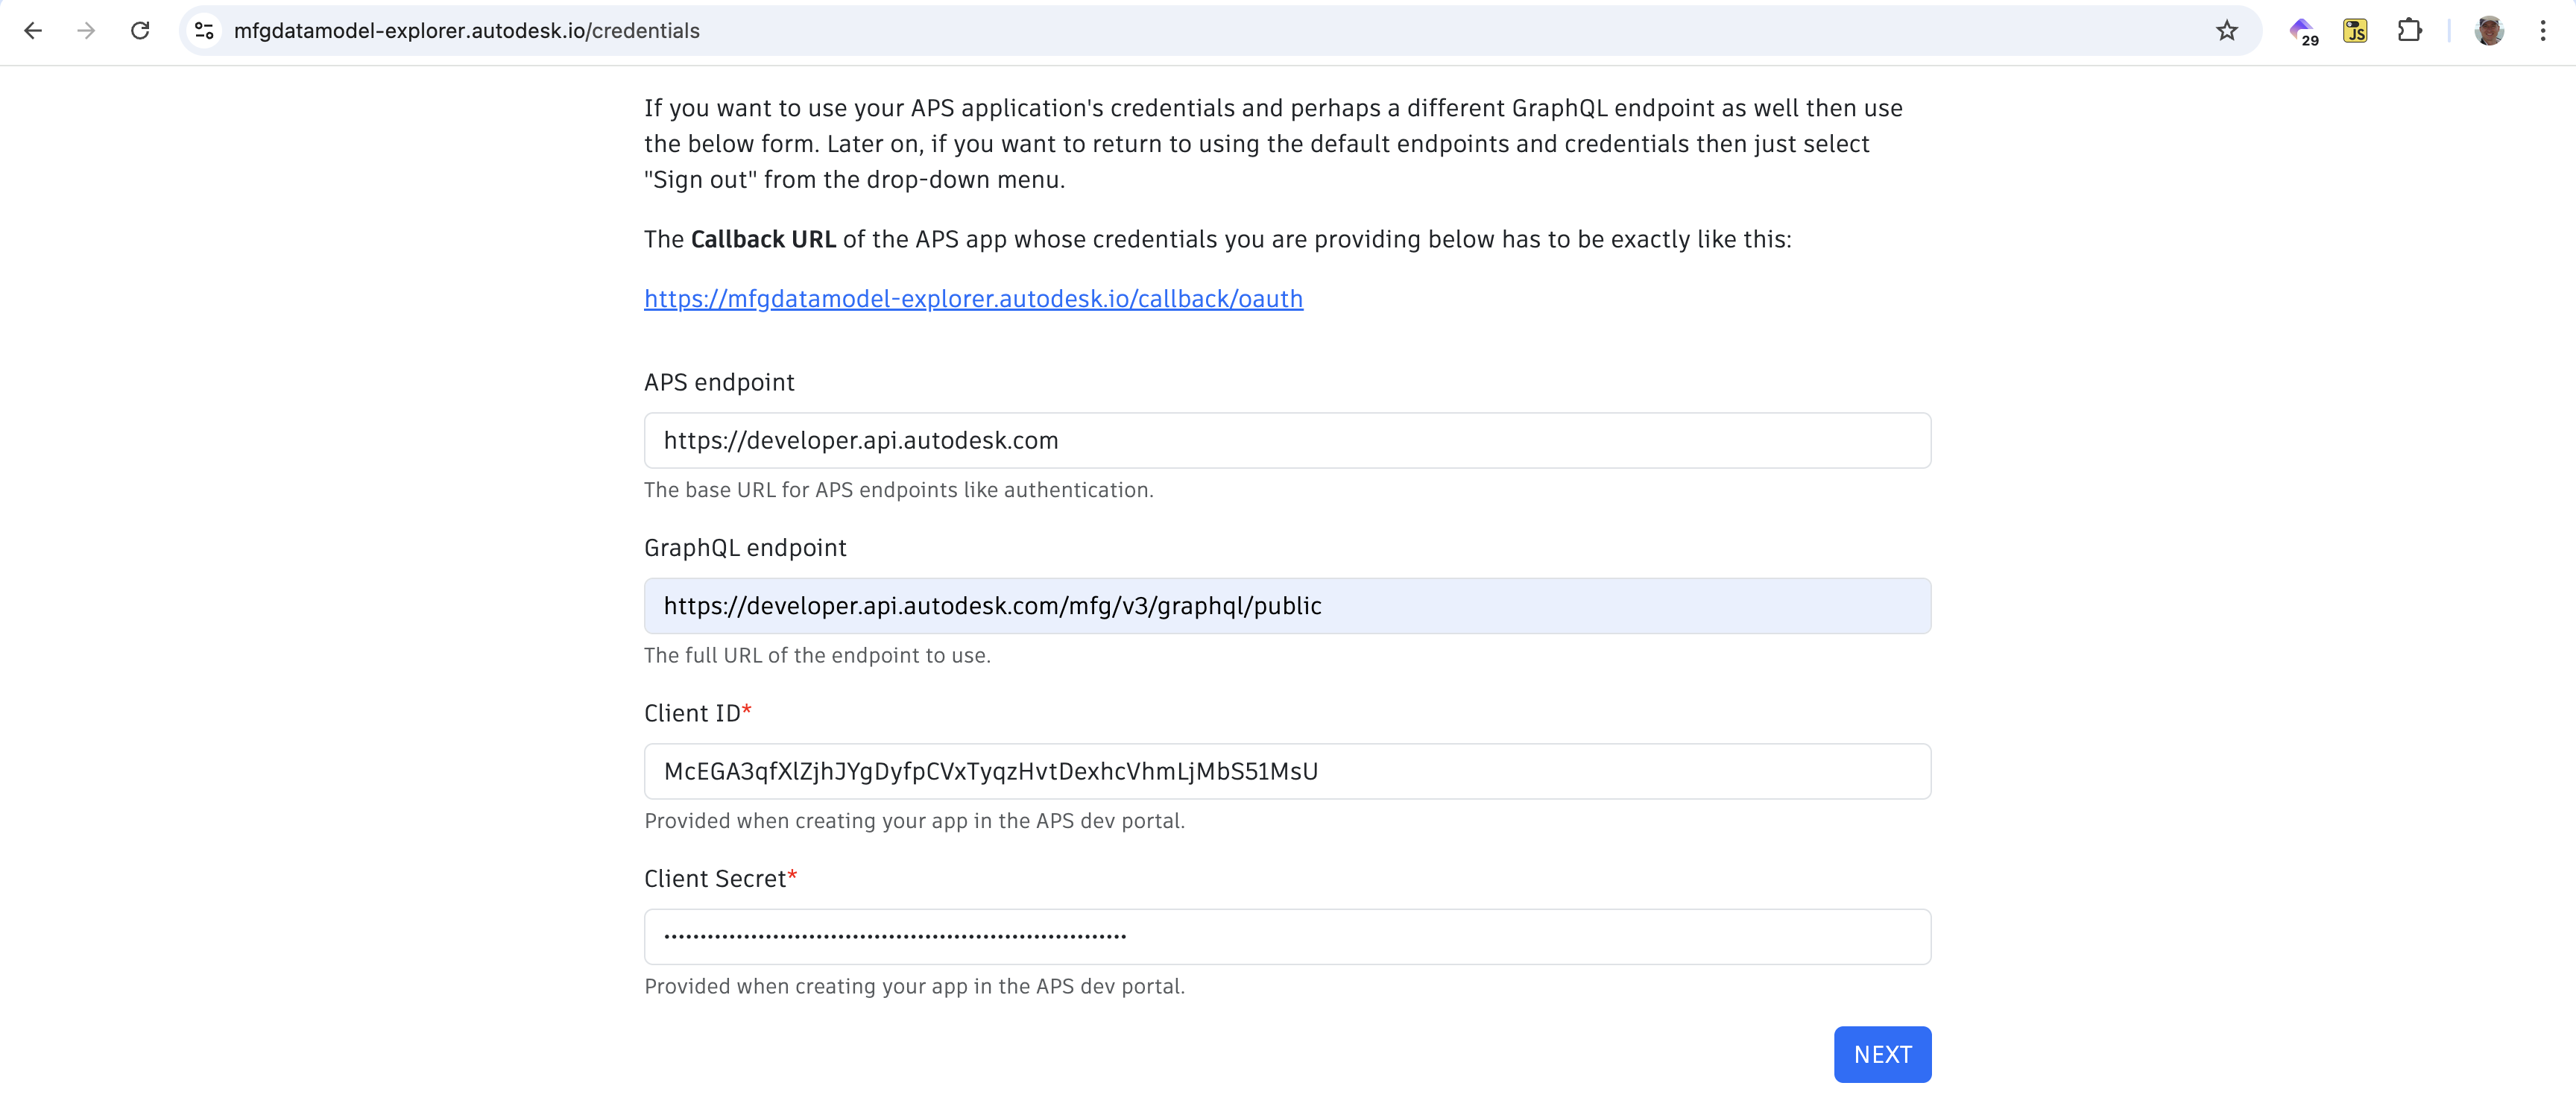
Here are the URLs you can use for APS endpoint and GraphQL endpoint:
- https://developer.api.autodesk.com
- https://developer.api.autodesk.com/mfg/v3/graphql/public
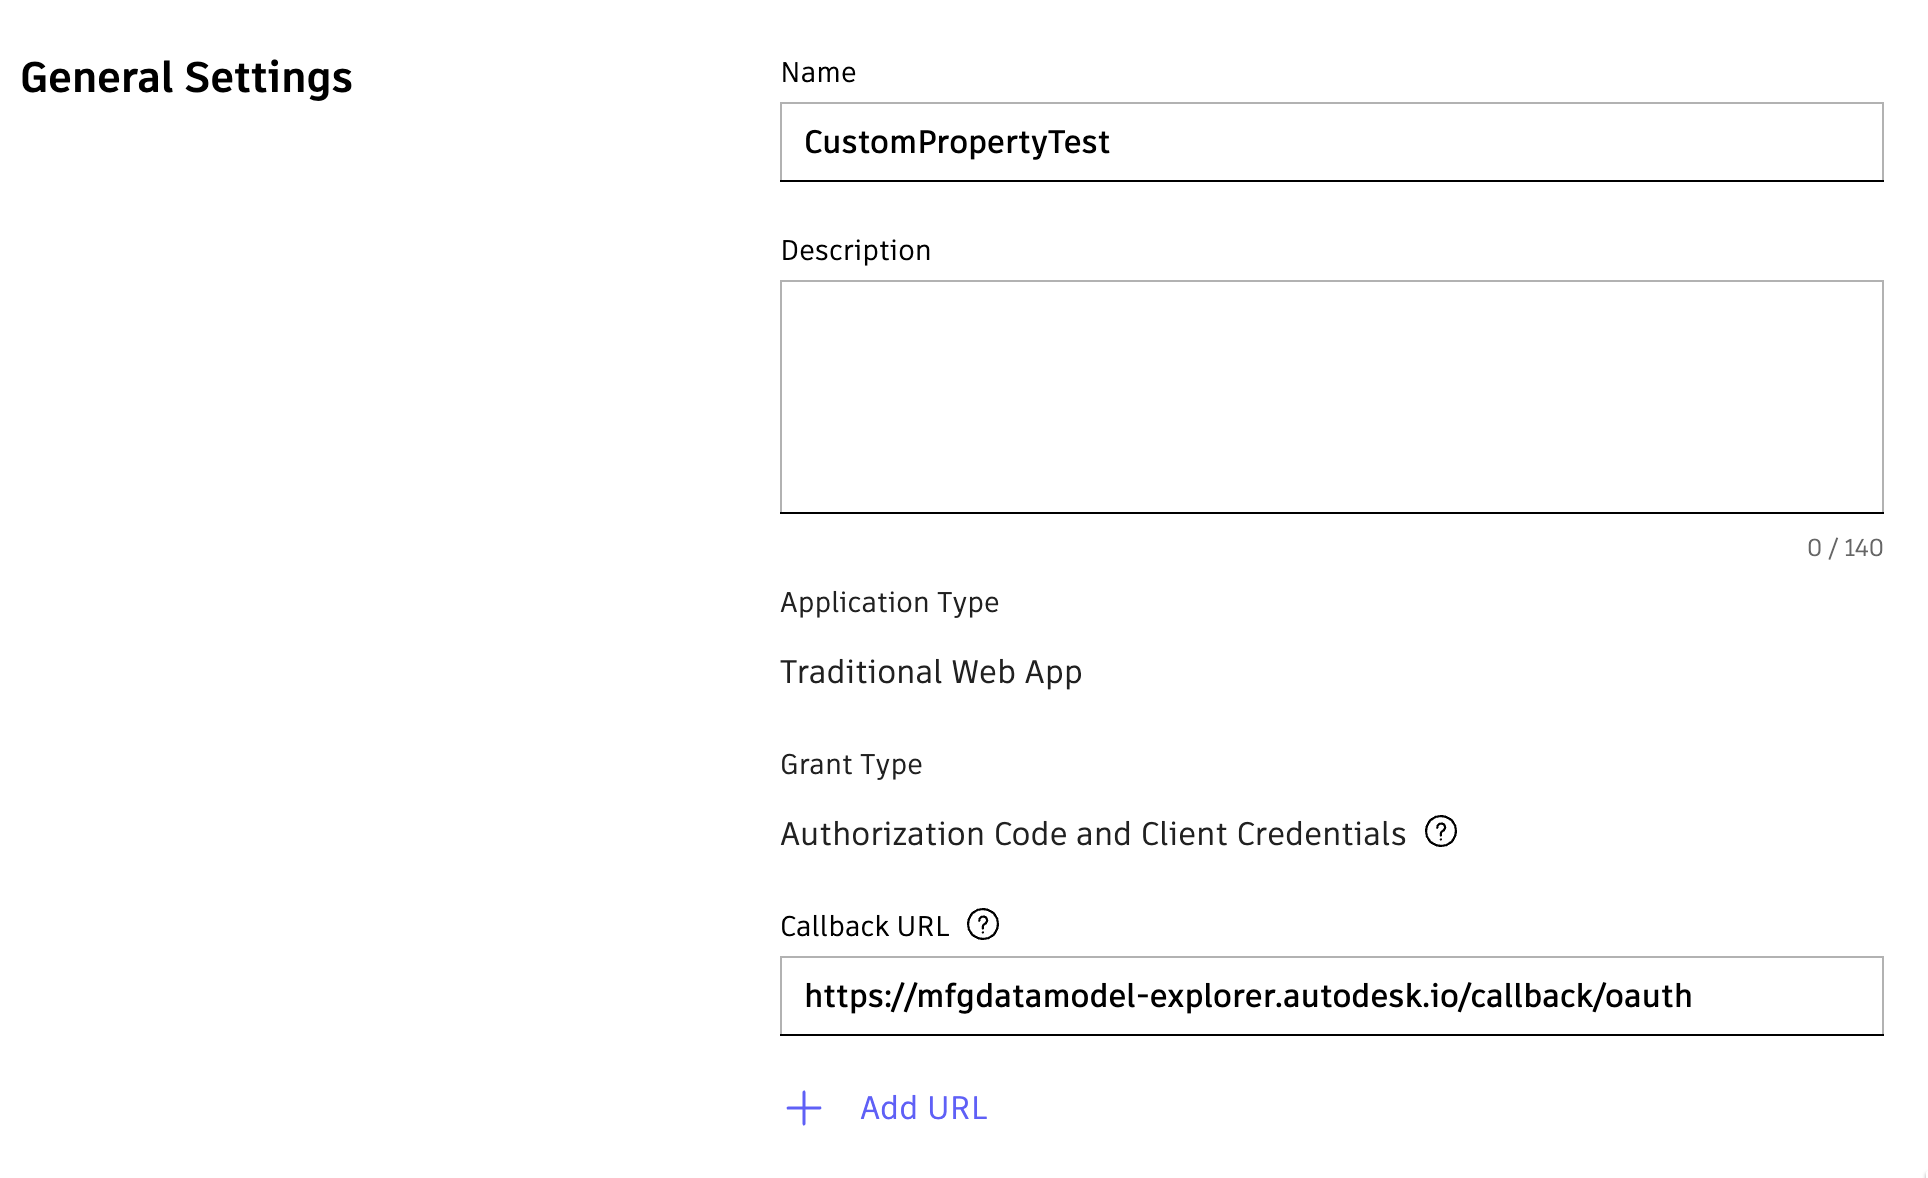
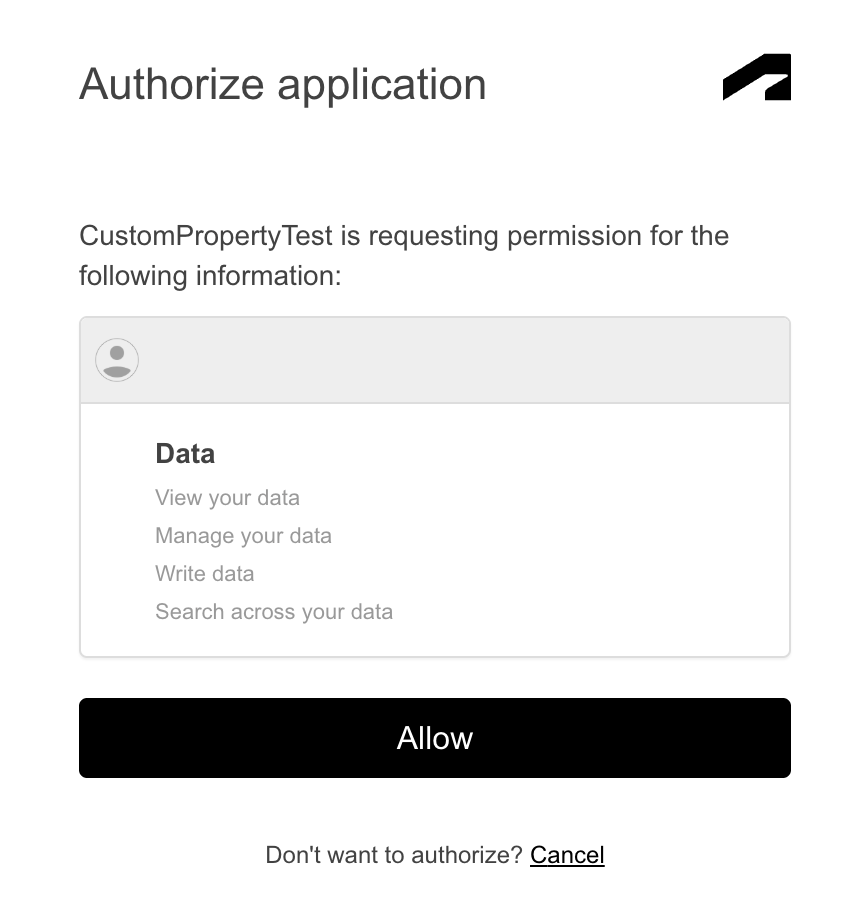
Make sure that you add the Callback URL pointed out on this page (i.e. https://mfgdatamodel-explorer.autodesk.io/callback/oauth) to your APS app and click "Save changes".
Log in
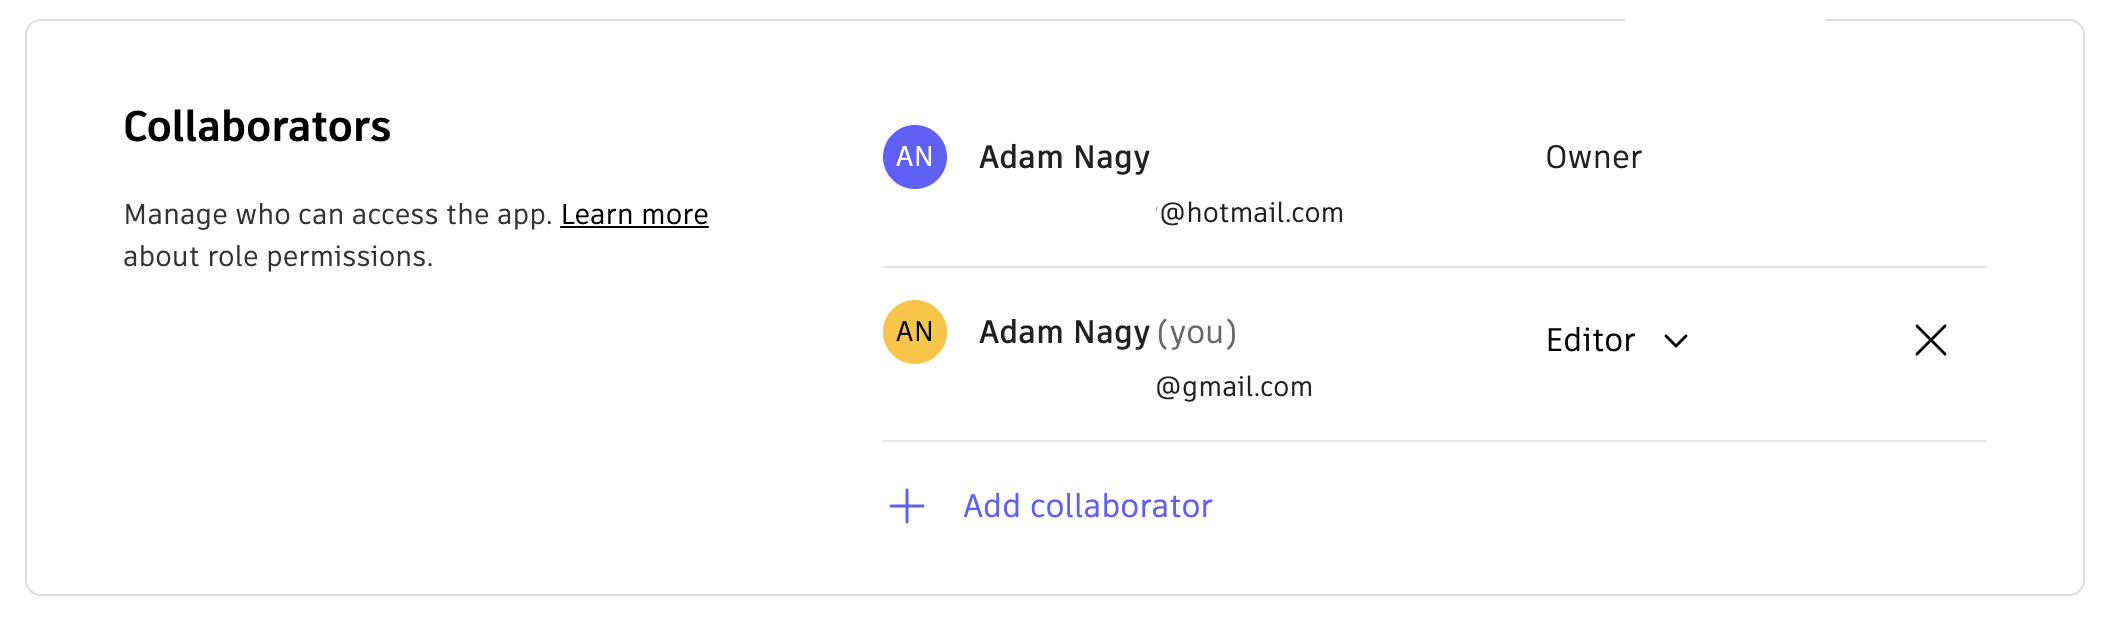
Make sure you log in with the Autodesk account that is the owner or an editor of the APS app whose credentials you are using. In my case I could log in with either the hotmail or the gmail account because one is the owner and the other is an editor:
I'm using now the gmail account:
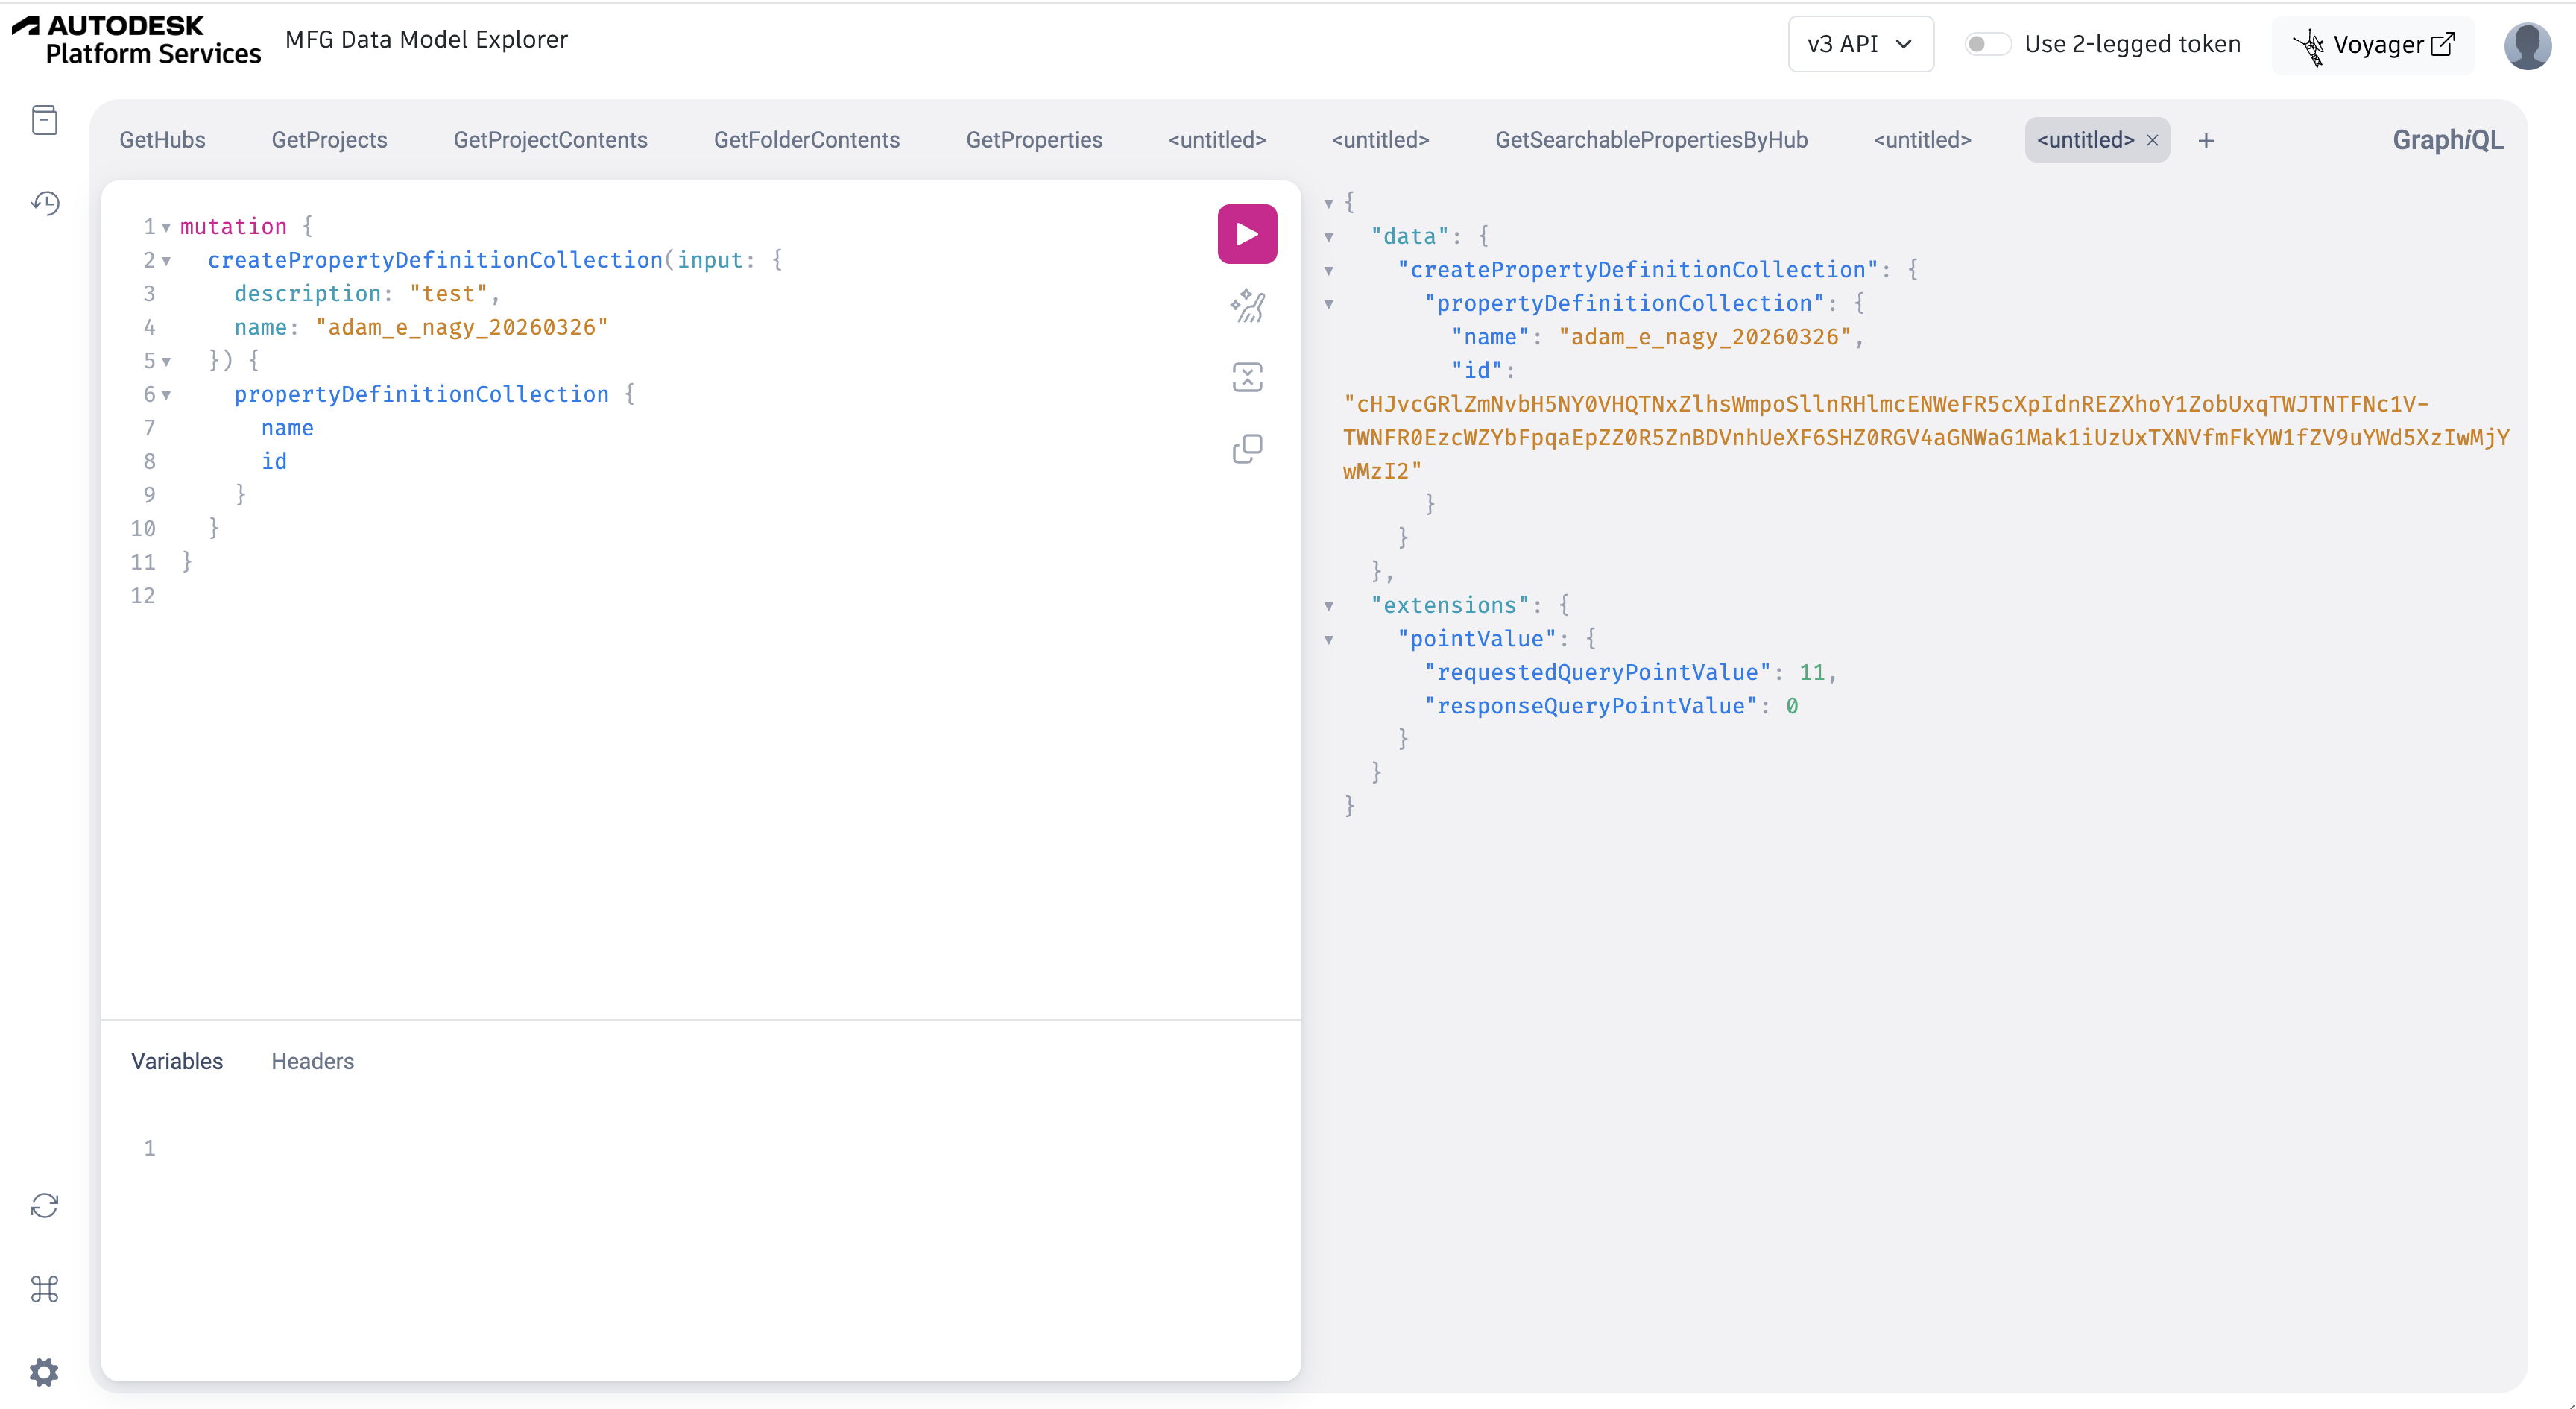
Create property definition collection
We can just run the below query:
mutation {
createPropertyDefinitionCollection(input: {
description: "test",
name: "adam_e_nagy_20260326"
}) {
propertyDefinitionCollection{
name
id
}
}
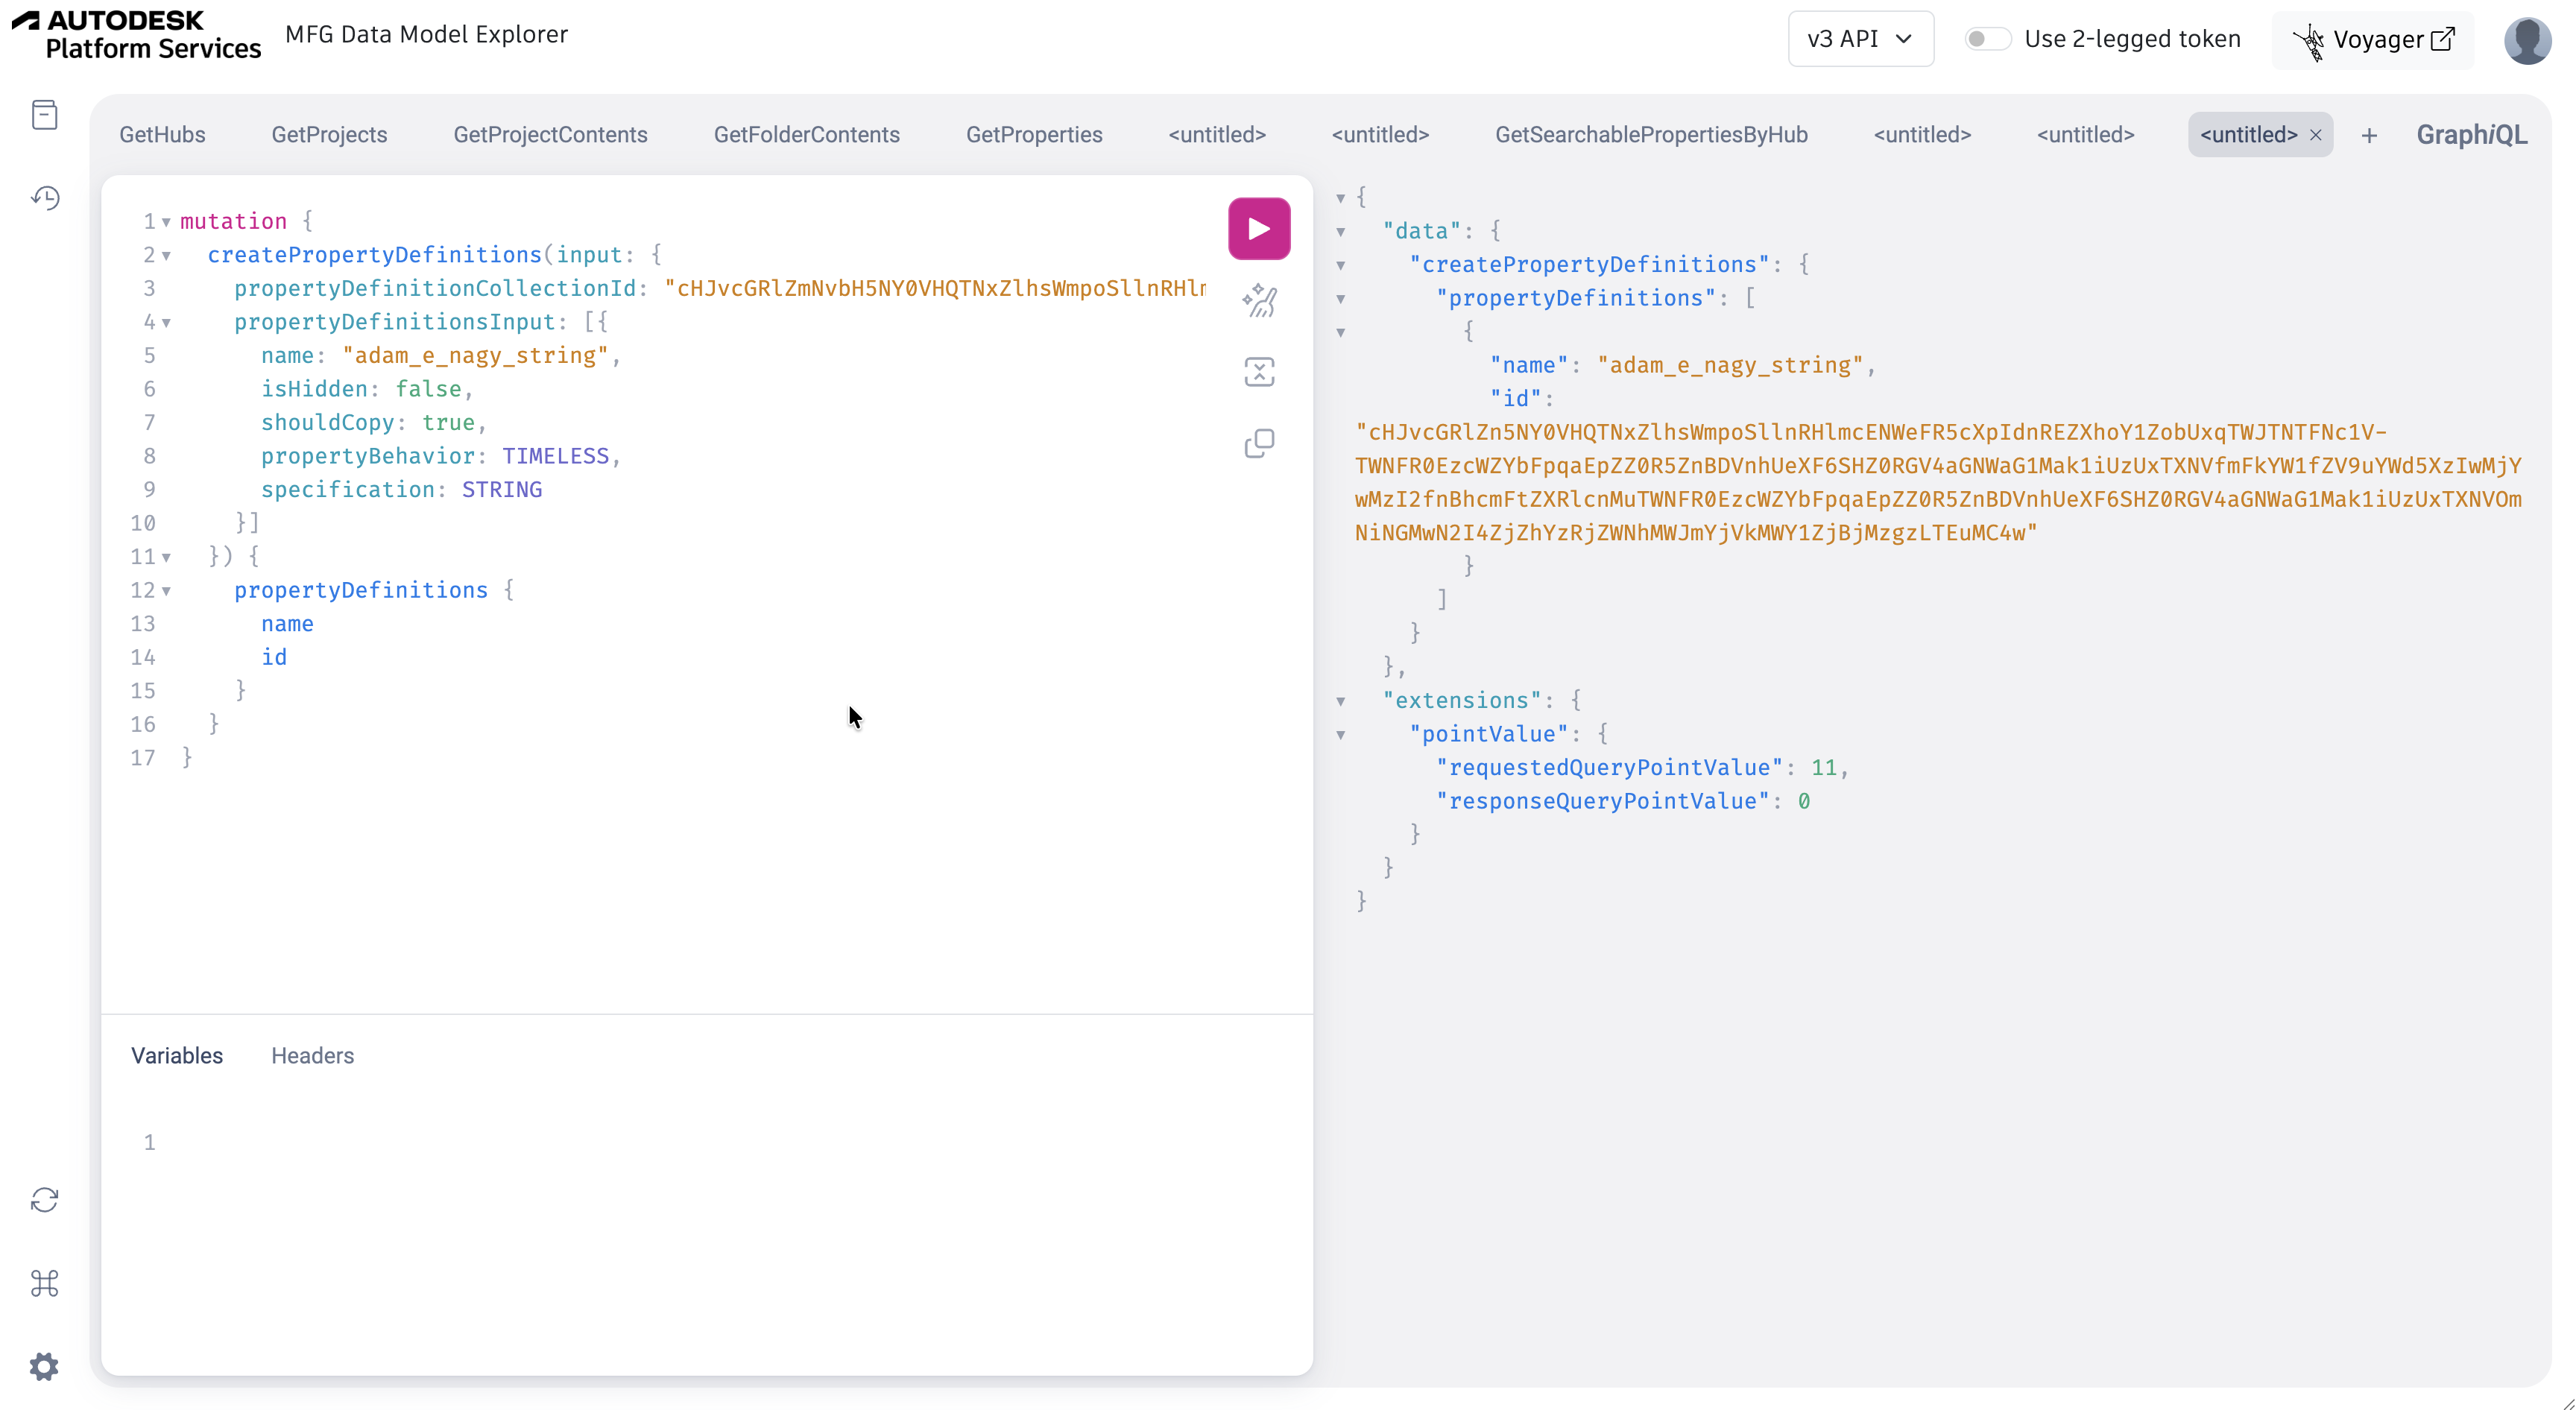
} Create property definitions
Now we can add property definitions to our collection whose id was returned to us when we created it. We'll need to use that id in the next requests.
mutation {
  createPropertyDefinitions(input: {
    propertyDefinitionCollectionId: "cHJvcGRlZmNvbH5NY0VHQTNxZlhsWmpoSllnRHlmcENWeFR5cXpIdnREZXhoY1ZobUxqTWJTNTFNc1V-TWNFR0EzcWZYbFpqaEpZZ0R5ZnBDVnhUeXF6SHZ0RGV4aGNWaG1Mak1iUzUxTXNVfmFkYW1fZV9uYWd5XzIwMjYwMzI2",
    propertyDefinitionsInput: [{
      name: "adam_e_nagy_string",
      isHidden: false,
      shouldCopy: true,
      propertyBehavior: TIMELESS,
      specification: STRING
    }]
  }) {
    propertyDefinitions {
      name
      id
    }
  }
}
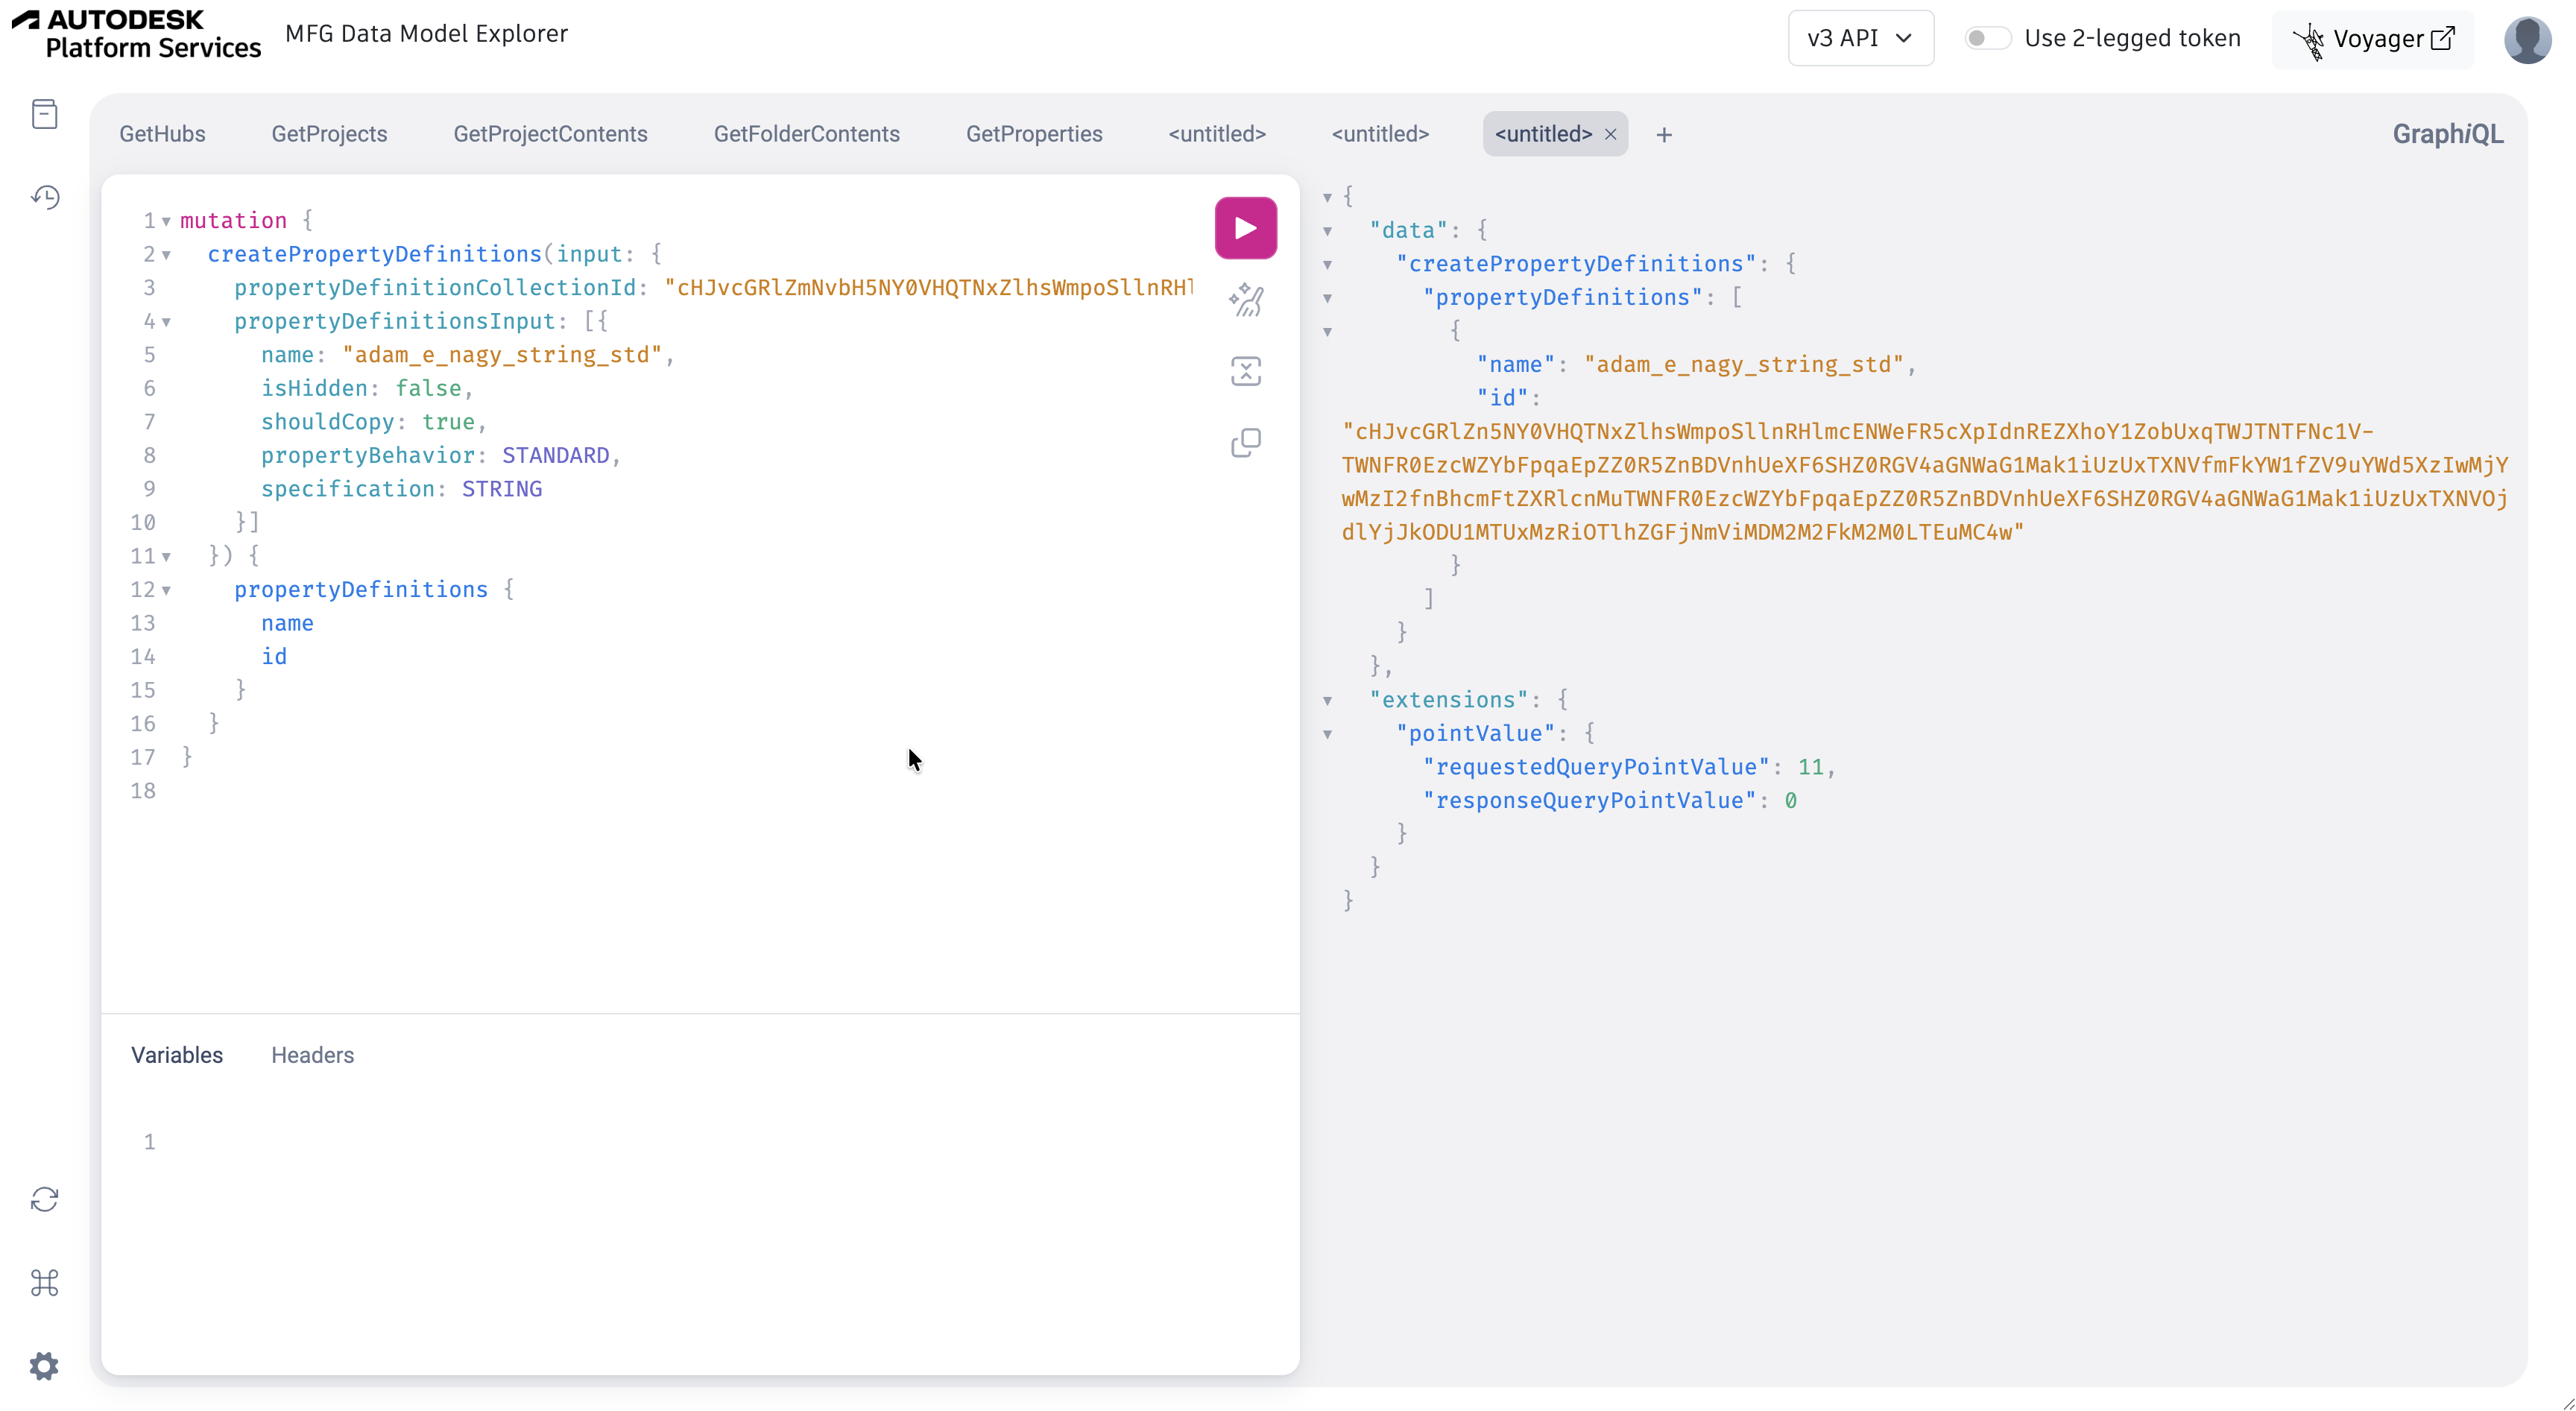
mutation {
  createPropertyDefinitions(input: {
    propertyDefinitionCollectionId: "cHJvcGRlZmNvbH5NY0VHQTNxZlhsWmpoSllnRHlmcENWeFR5cXpIdnREZXhoY1ZobUxqTWJTNTFNc1V-TWNFR0EzcWZYbFpqaEpZZ0R5ZnBDVnhUeXF6SHZ0RGV4aGNWaG1Mak1iUzUxTXNVfmFkYW1fZV9uYWd5XzIwMjYwMzI2",
    propertyDefinitionsInput: [{
      name: "adam_e_nagy_string_std",
      isHidden: false,
      shouldCopy: true,
      propertyBehavior: STANDARD,
      specification: STRING
    }]
  }) {
    propertyDefinitions {
      name
      id
    }
  }
}
Both the STANDARD and TIMELESS properties will show up for my Fusion models as soon as we link the collection to my hub later on.
Fusion Hub Admin
Now that we have a property definition collection with some property definitions in it, we can link the collection to our hub.
Log in
Make sure that the Fusion hub admin is logged in when trying to link the collection to the Fusion hub. If it's a different person from the previous one, then log out and log in with the correct user account, then go to https://mfgdatamodel-explorer.autodesk.io/credentials to set the correct APS app credentials again.
Link collection to the hub
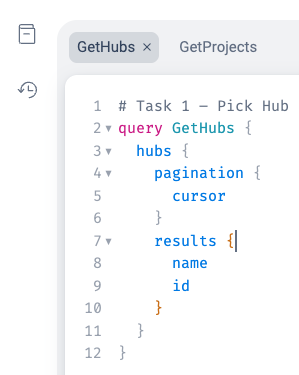
You can easily find the id of the Fusion hub that you want to link your property definition collection to by using the "GetHubs" request sample of the MFG Data Model Explorer.
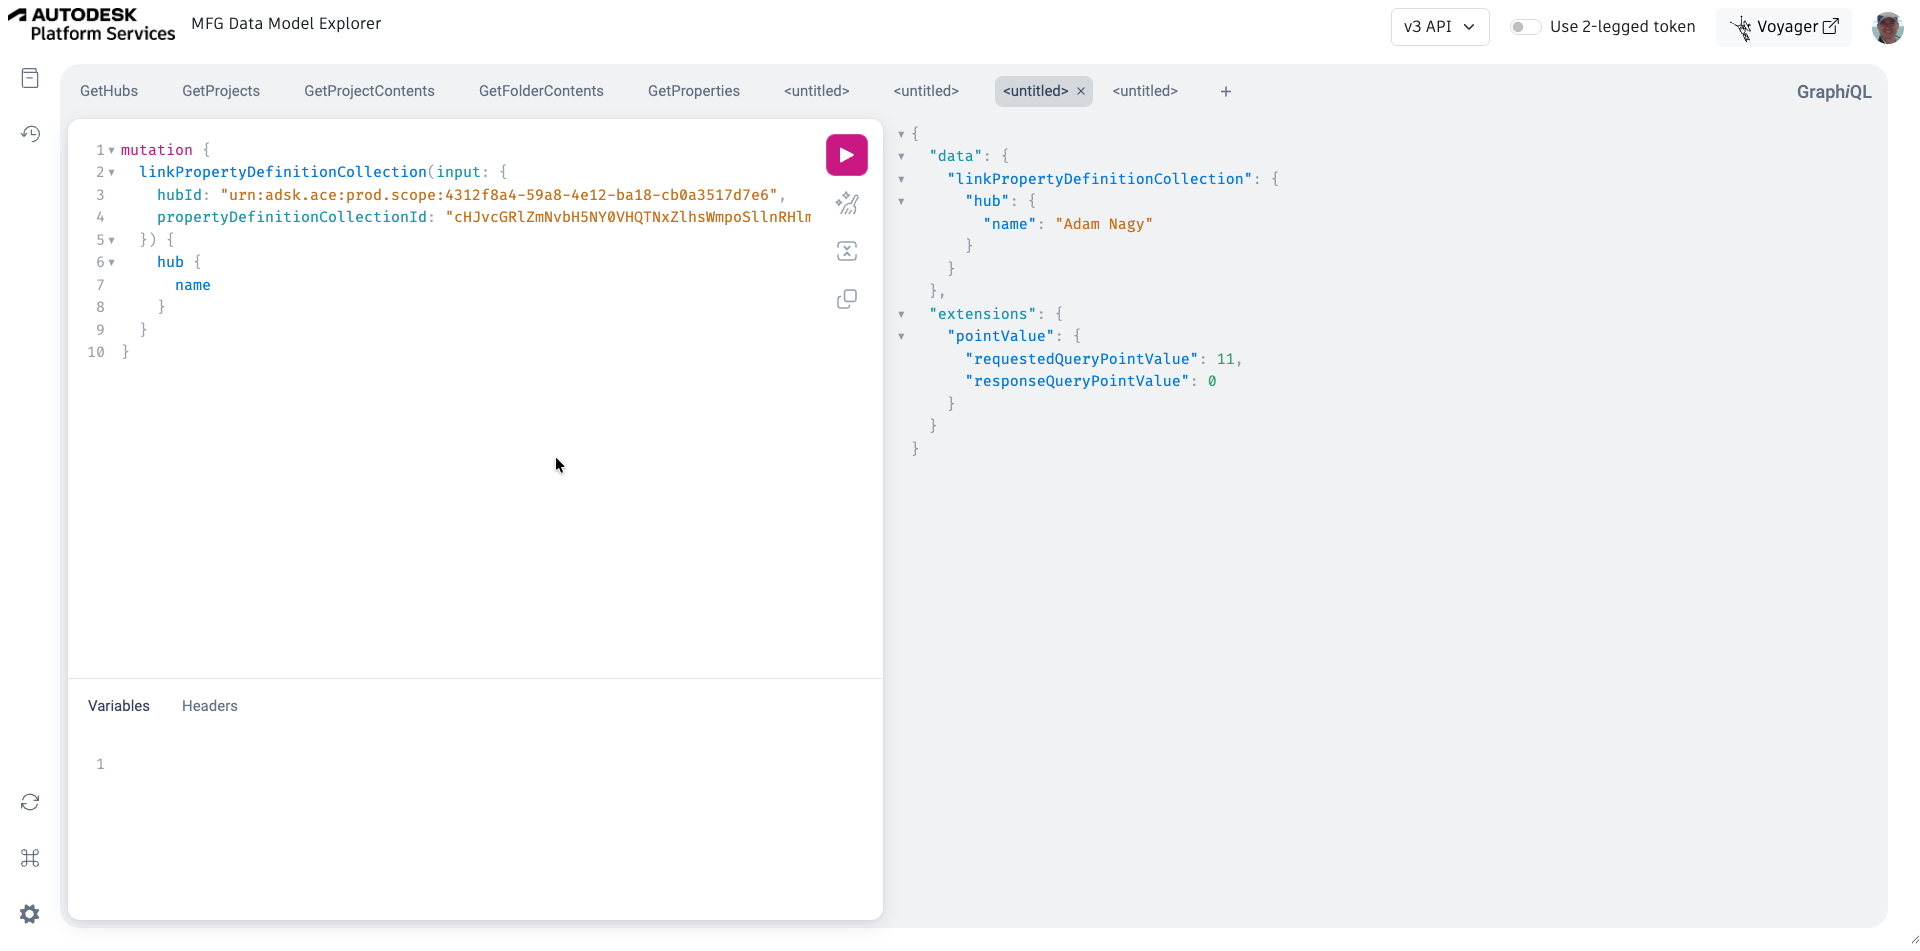
Now that we have the inputs we need, we can run this request:
mutation {
  linkPropertyDefinitionCollection(input: {
    hubId: "urn:adsk.ace:prod.scope:4312f8a4-59a8-4e12-ba18-cb0a3517d7e6",
    propertyDefinitionCollectionId: "cHJvcGRlZmNvbH5NY0VHQTNxZlhsWmpoSllnRHlmcENWeFR5cXpIdnREZXhoY1ZobUxqTWJTNTFNc1V-TWNFR0EzcWZYbFpqaEpZZ0R5ZnBDVnhUeXF6SHZ0RGV4aGNWaG1Mak1iUzUxTXNVfmFkYW1fZV9uYWd5XzIwMjYwMzI2"
  }) {
    hub {
      name
    }
  }
}
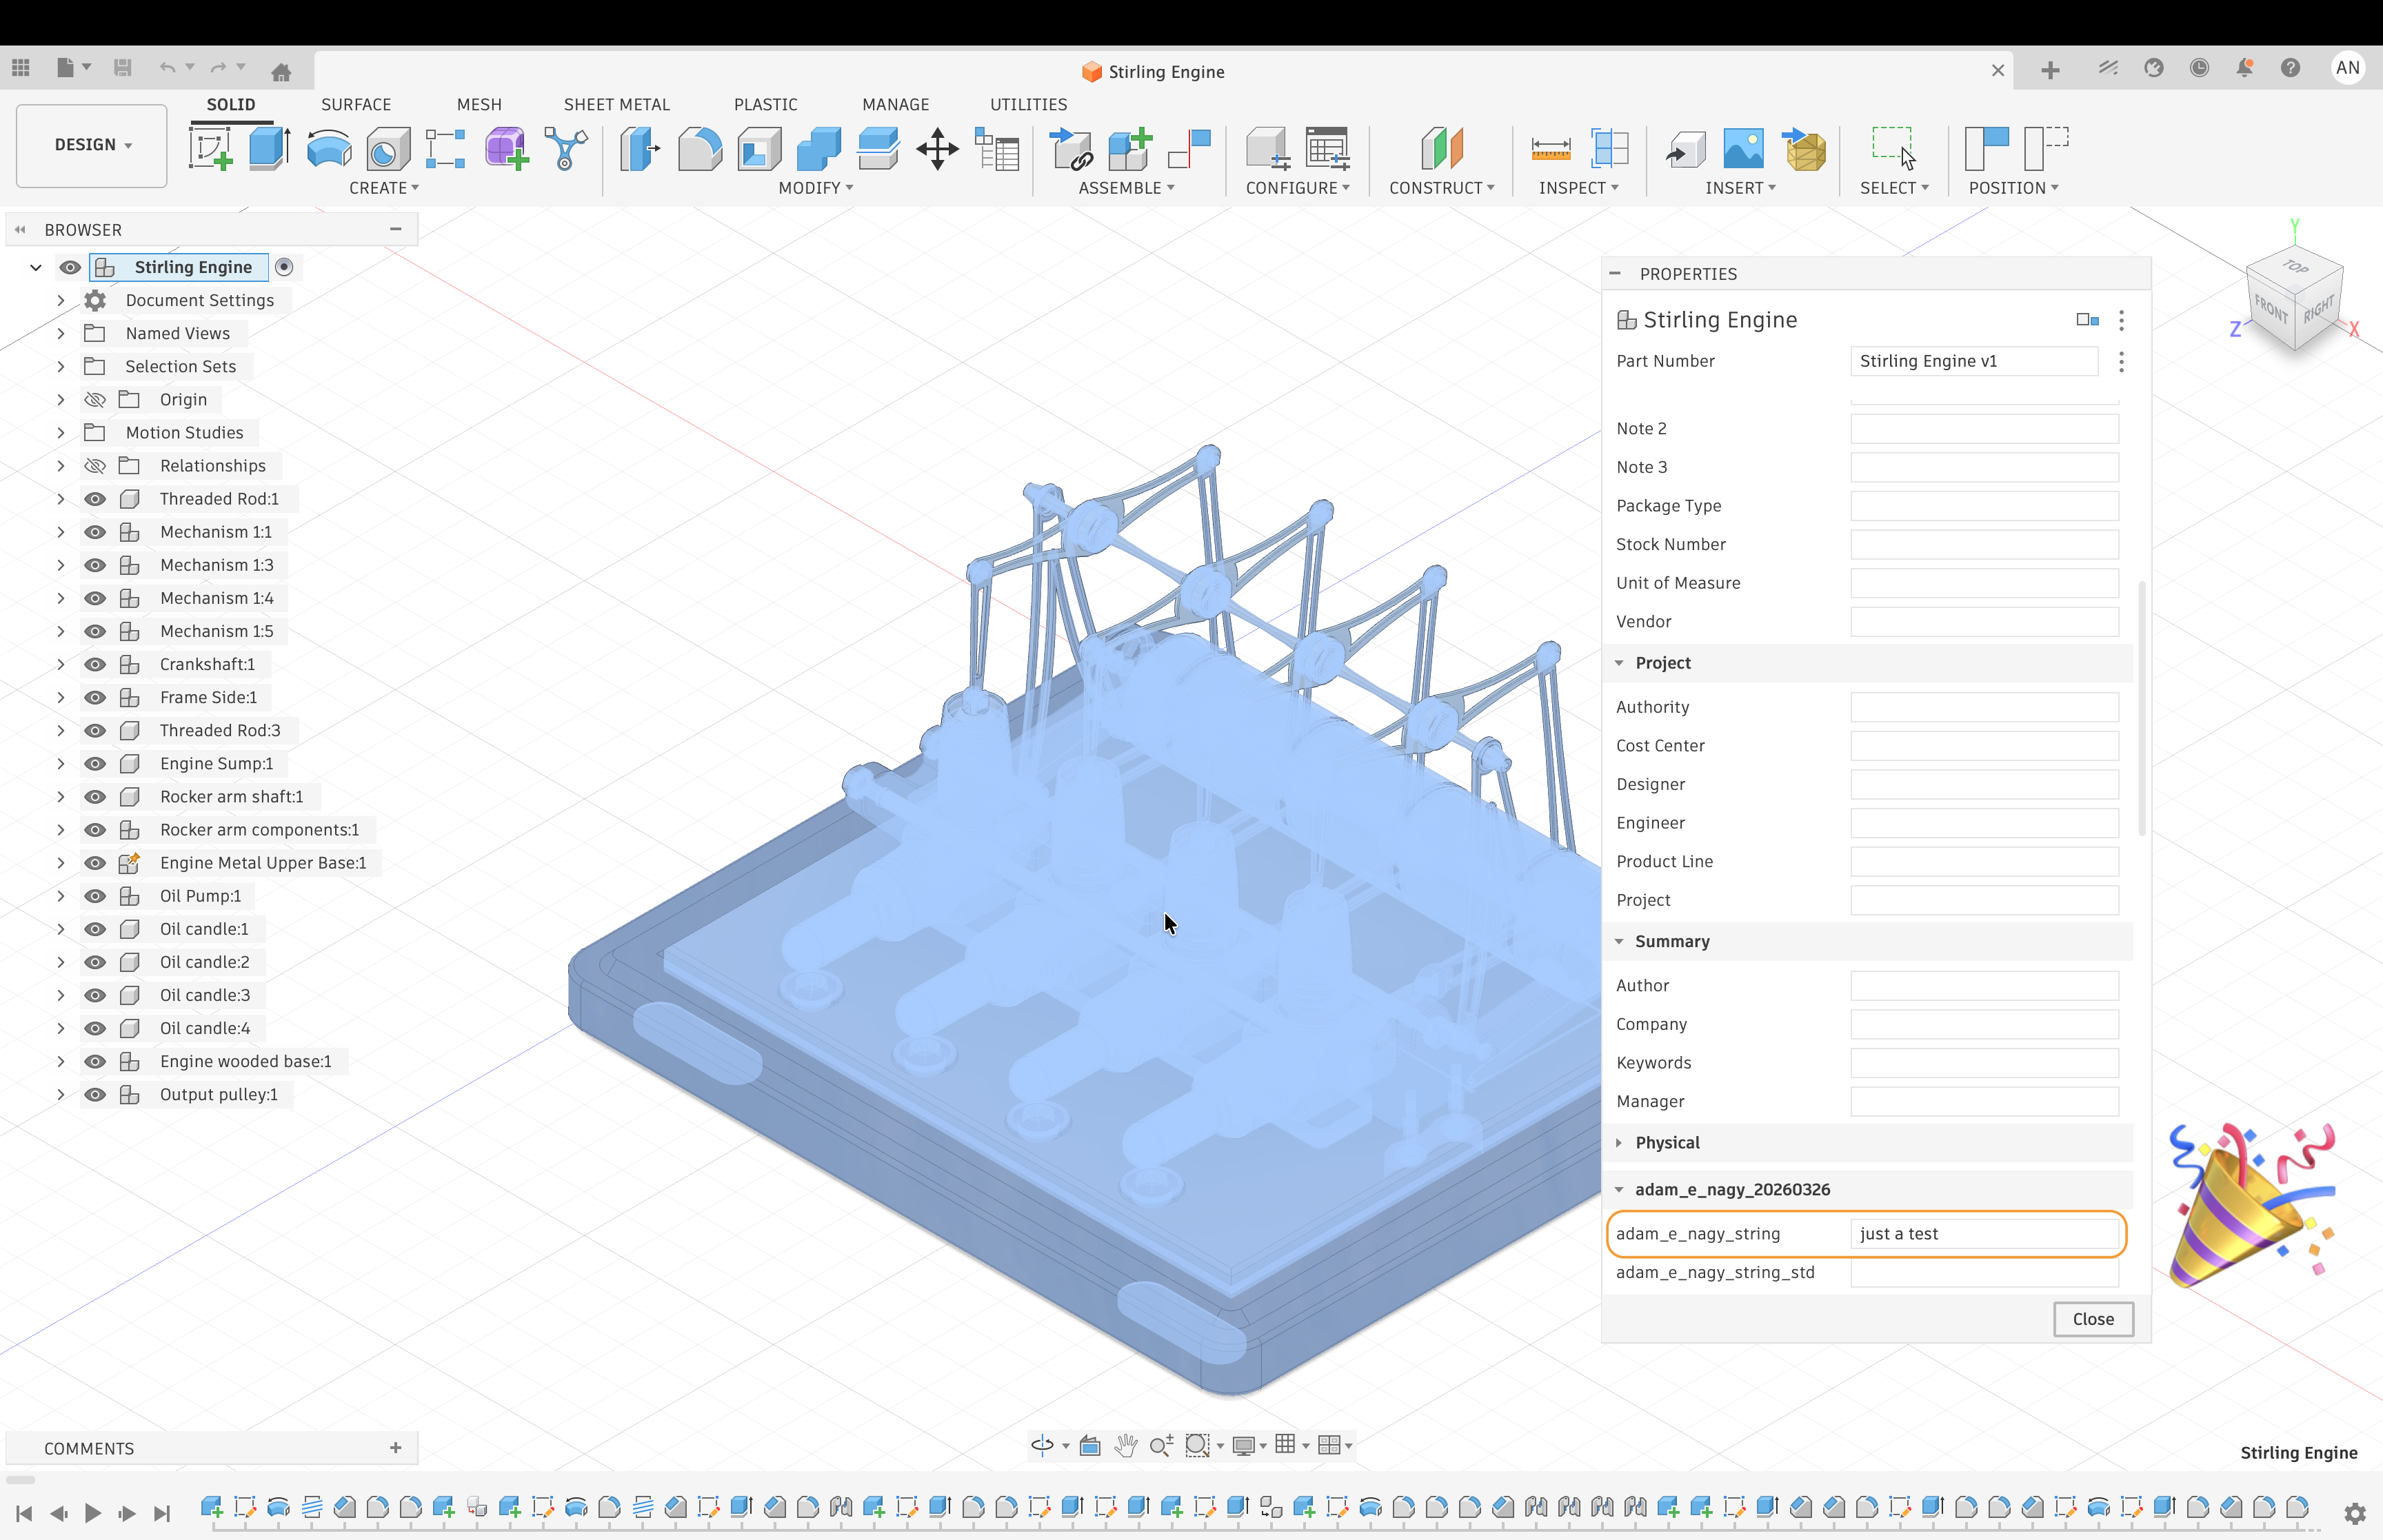
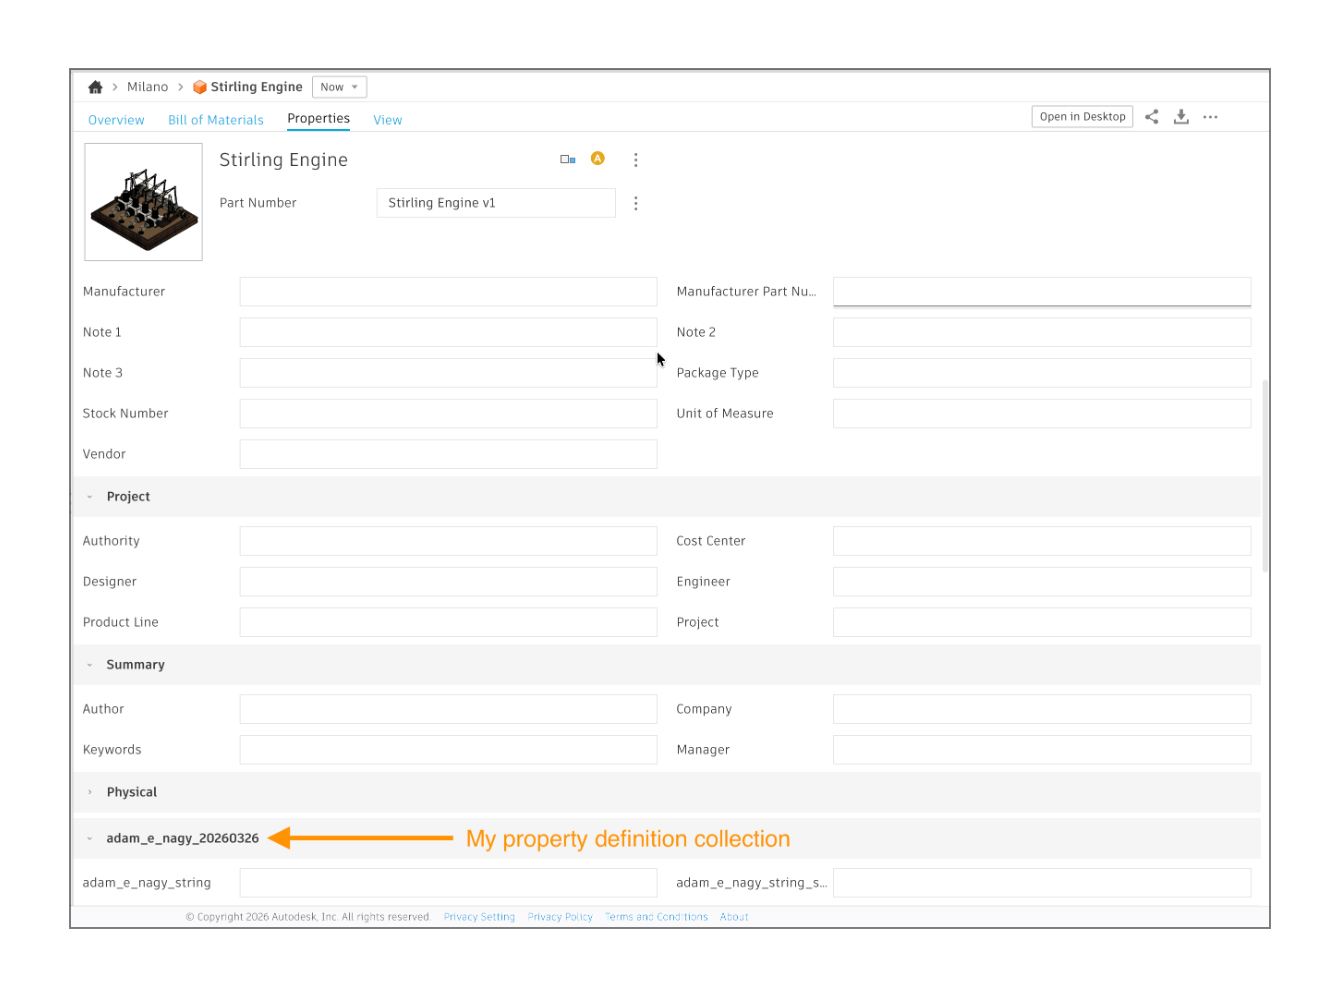
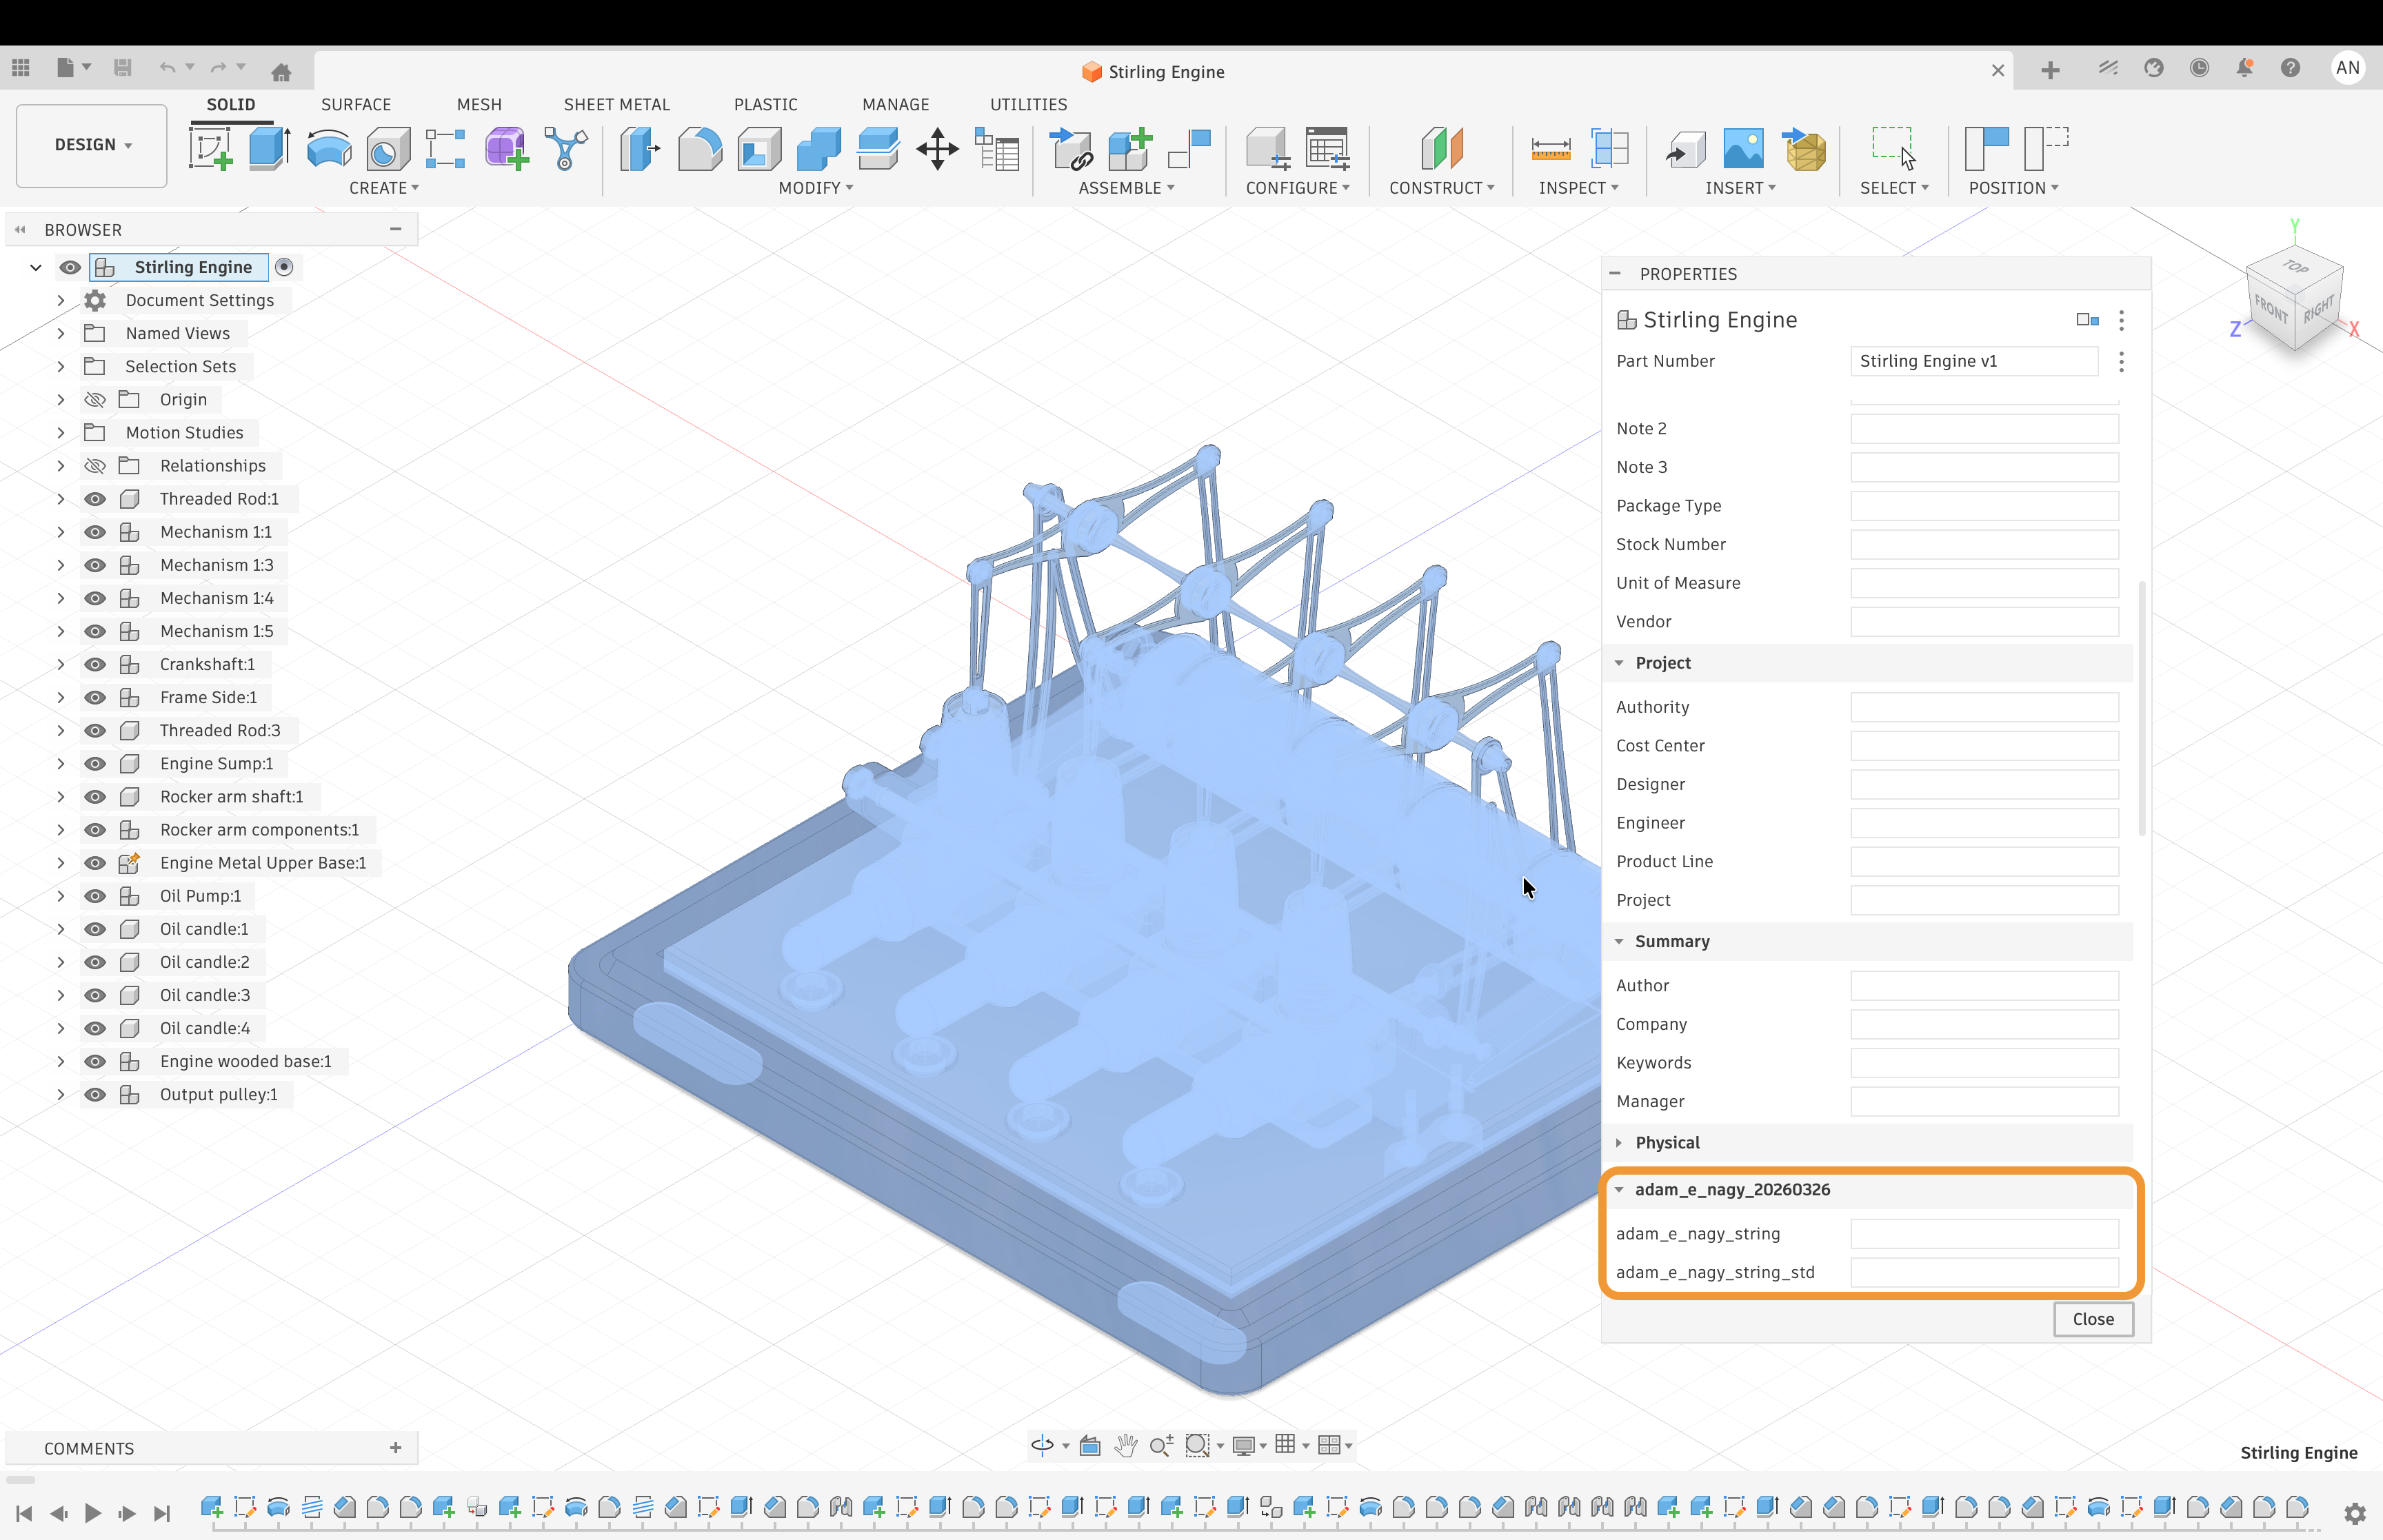
As soon as the collection is linked to the hub, the properties will show up for the components, both on the web (see picture on top) and also in the desktop product:
Fusion User
Now that we have the custom properties available for our components, we can also set their values using an app or service that is using the APS app credentials that generated the definitions for those properties.
Log in
You can stay logged in as the Fusion hub admin or try a non-admin user account that also has access to the component for which you want to set the values of the custom properties. If the latter, then log out and log in with the correct user account, then go to https://mfgdatamodel-explorer.autodesk.io/credentials to set the correct APS app credentials again.
Set a property value
First we need the id of the component you want to set the custom property value for. Probably the easiest is to find it based on the name of the component using the new query field searchByHub:
{
  searchByHub(
    hubId:"urn:adsk.ace:prod.scope:4312f8a4-59a8-4e12-ba18-cb0a3517d7e6",
    searchCriteria: { query: "Stirling Engine" }) {
    results {
      name
      searchResultObject {
        __typename
        ... on Component {
          id
        }
      }
    }
  }
}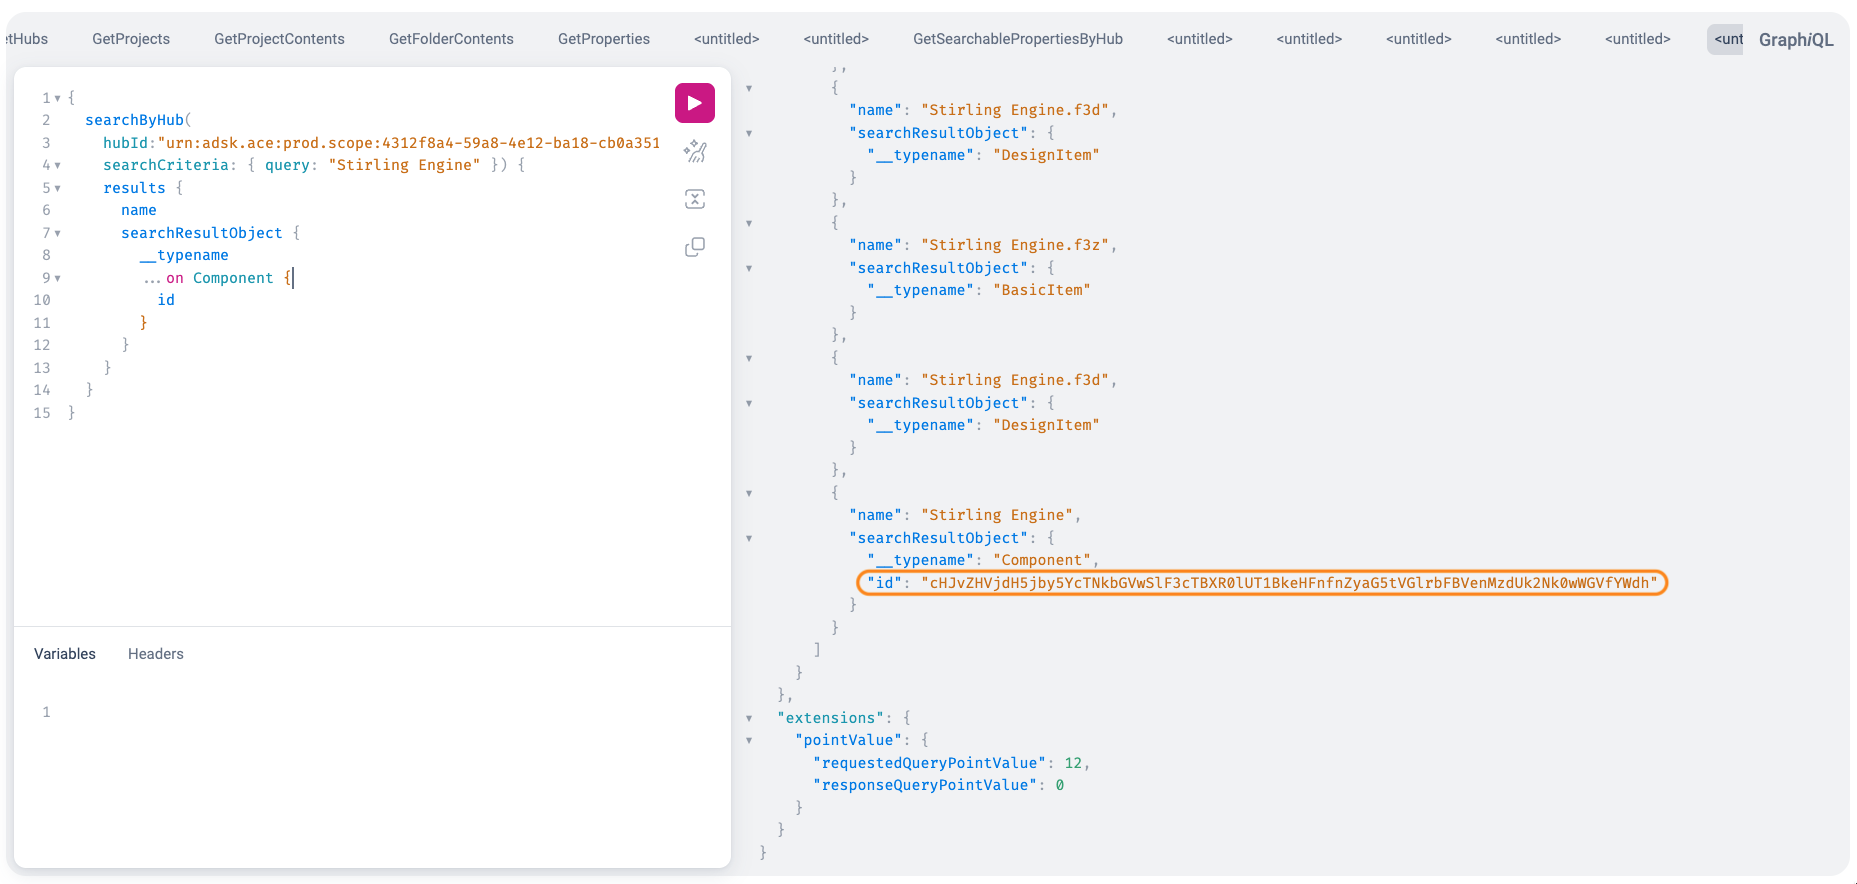
We'll have to pass the component's id as the targetId and the id of the property definition that we want to set the value for - the id was returned when we created the property definition, but you can also look them up later.
mutation {
  setProperties(input: {
    targetId: "cHJvZHVjdH5jby5YcTNkbGVwSlF3cTBXR0lUT1BkeHFnfnZyaG5tVGlrbFBVenMzdUk2Nk0wWGVfYWdh",
    propertyInputs: [{
      propertyDefinitionId: "cHJvcGRlZn5NY0VHQTNxZlhsWmpoSllnRHlmcENWeFR5cXpIdnREZXhoY1ZobUxqTWJTNTFNc1V-TWNFR0EzcWZYbFpqaEpZZ0R5ZnBDVnhUeXF6SHZ0RGV4aGNWaG1Mak1iUzUxTXNVfmFkYW1fZV9uYWd5XzIwMjYwMzI2fnBhcmFtZXRlcnMuTWNFR0EzcWZYbFpqaEpZZ0R5ZnBDVnhUeXF6SHZ0RGV4aGNWaG1Mak1iUzUxTXNVOmNiNGMwN2I4ZjZhYzRjZWNhMWJmYjVkMWY1ZjBjMzgzLTEuMC4w",
      value: "just a test"
    }]
  }) {
    properties {
      displayValue
    }
  }
}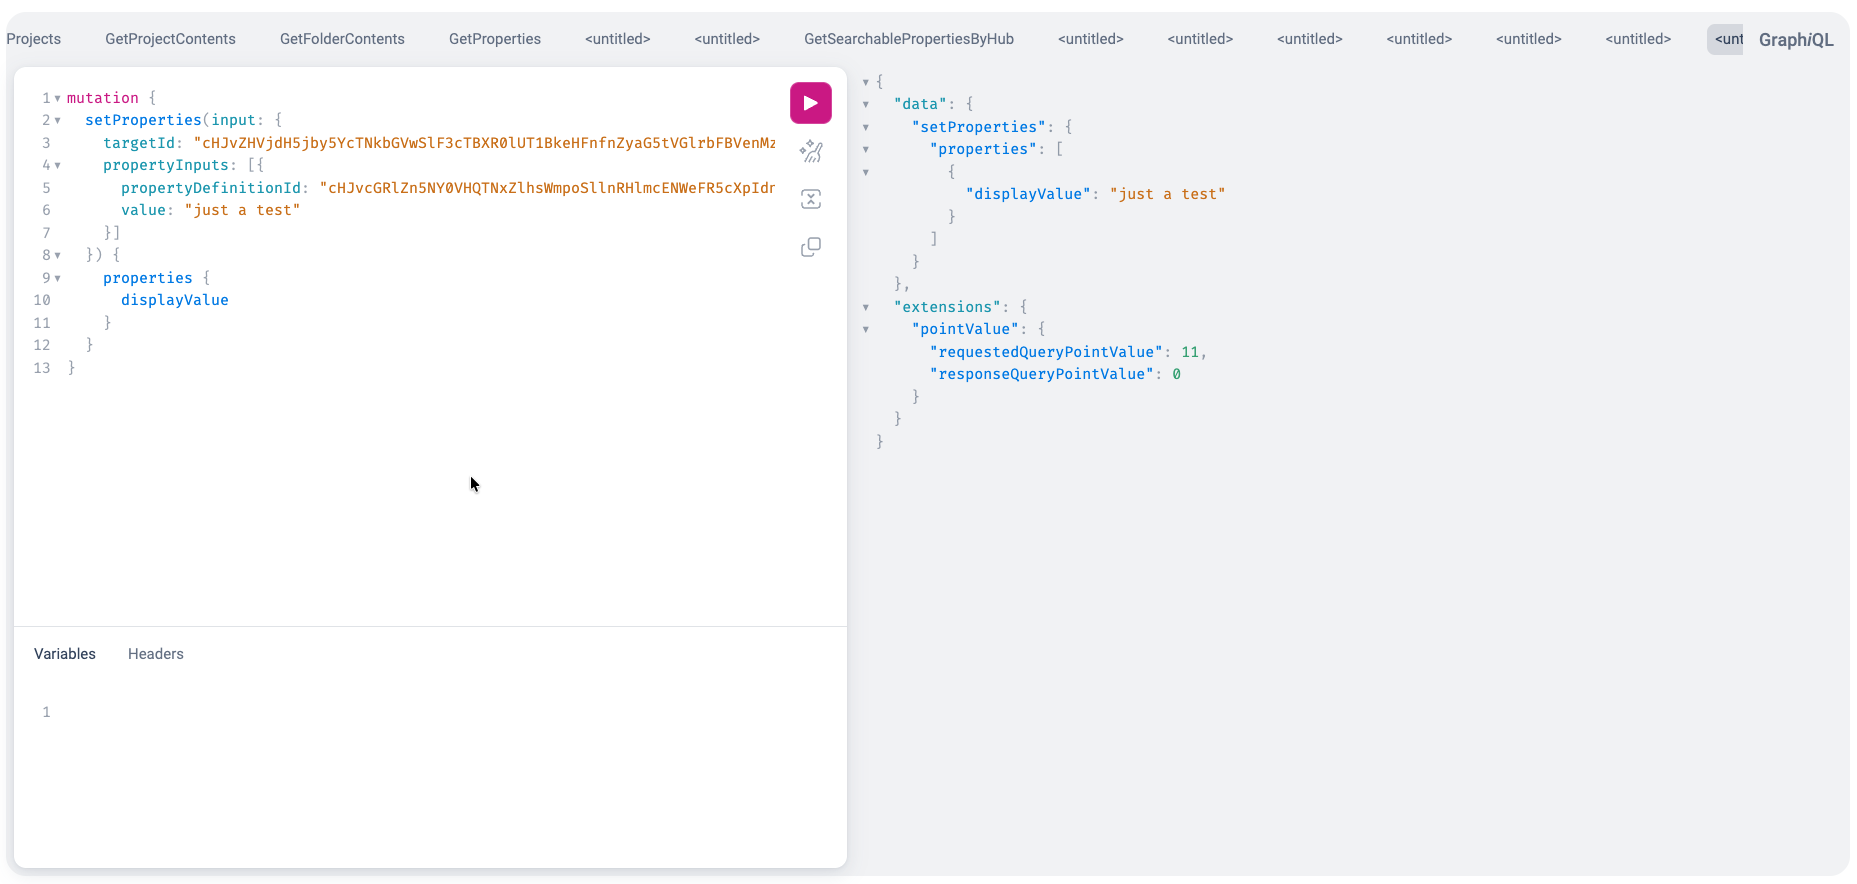
As soon as we do this, the property value will show up in Fusion: